|
-
ITR '96 Steering Wheel into EG/DC2
Disclaimer: The following is provided as a GUIDE ONLY, and neither myself nor Ozhonda take any responsibility for the outcomes of someone else doing the following. You follow these steps at your own risk!
Wanting to add that sleeper but appealing steering wheel. You dont have too look far, its straight Honda. This steering wheel only came out in the JDM Integra Type R '96 spec. I was lucky to find one, thanks to CIV97.
Aim:
To make you car look bling pretty much. And still make your ride legal with this mod (only applies to cars without SRS).
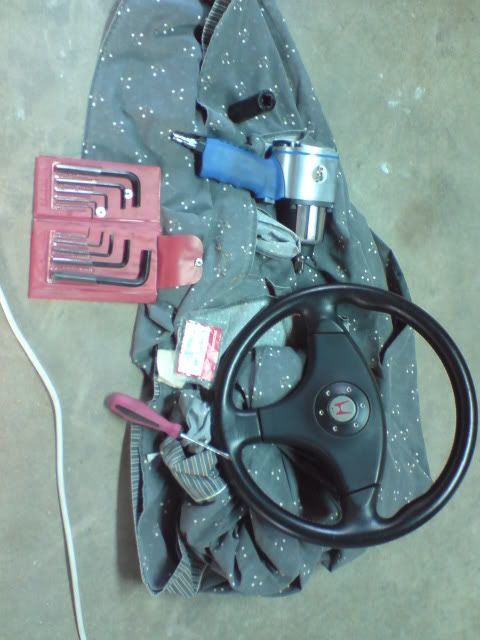
Required:
1) Flat head screw driver
2) Rattle Gun
3) Allen Keys (3mm used)
4) Deep impact socket (19mm)
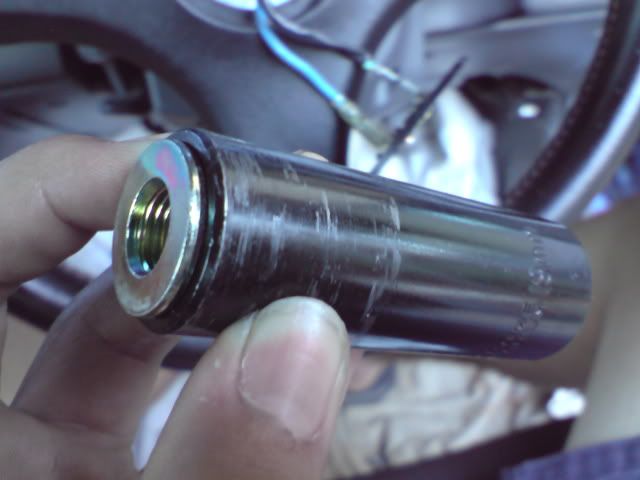
5) OEM Steering wheel nut (part#: 90380-SB2-003)
6) DC2R '96 steering wheel
Steps:
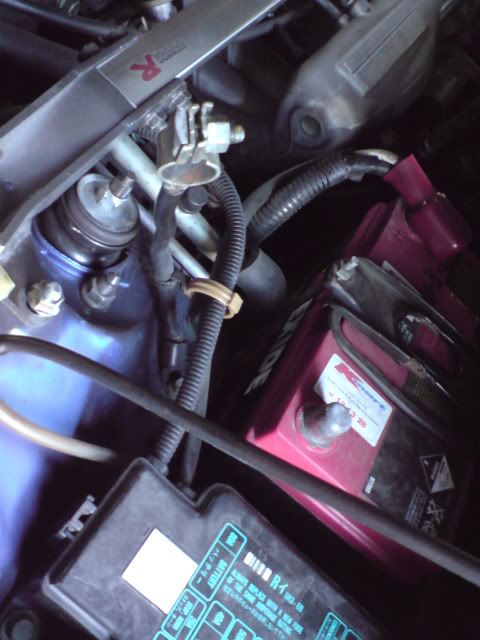
First we gotta remove the Negative (-) terminal from the battery to save your self from a possible shock. And make sure that your steering wheel is straight as possible.
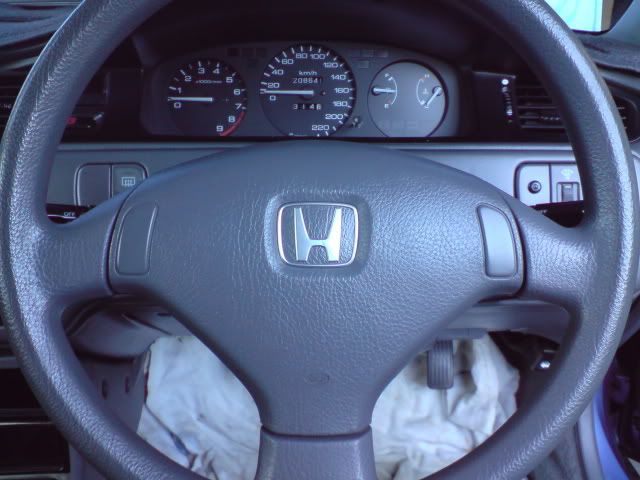
Jump in the driver seat and look at what you got. Boring old EGG wheel.
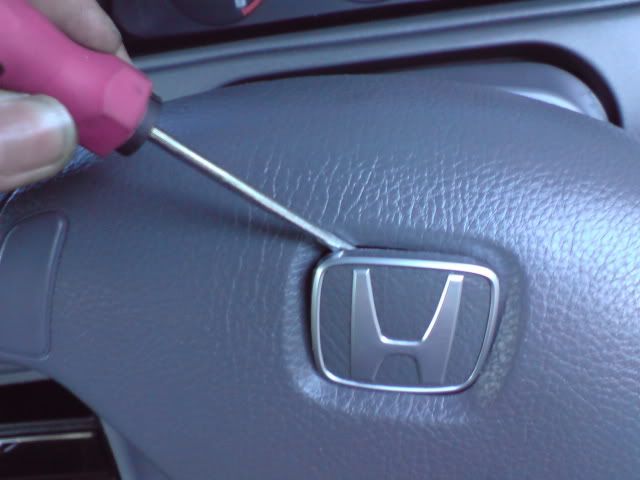
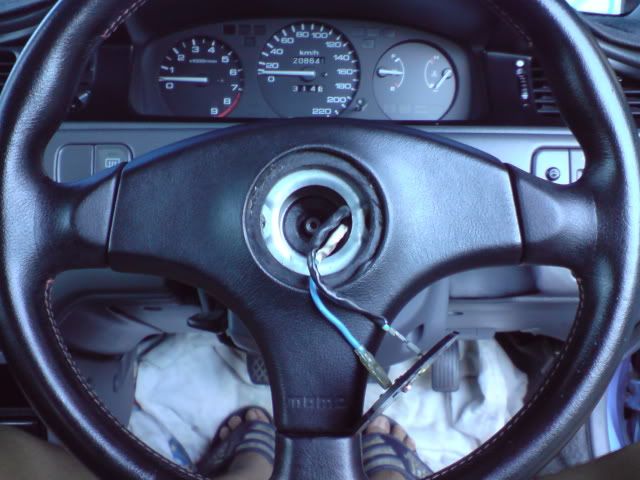
Now this step is only for EG's without SRS. Get the flat head screw driver and carefully pry into the plastic cover as shown here. Being careful not to damage the wheel or plastic cover.
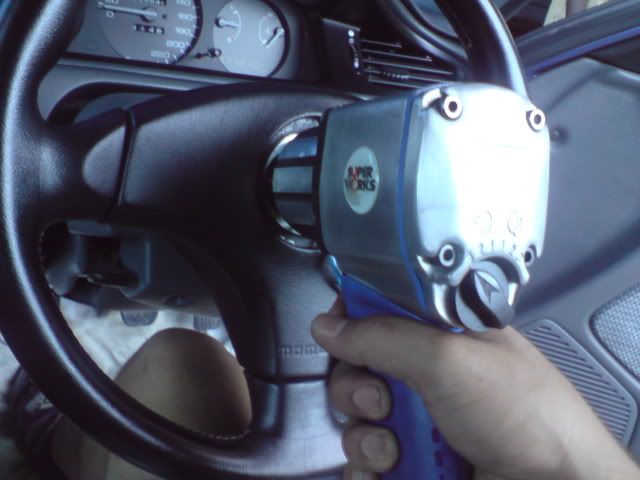
Now you get el impacto (rattle gun) along with your deep impact socket (19mm) and get that sucka of a nut out. Without el impacto you will have trouble keeping the wheel static while trying to turn with a ratchet. Although it is possible.
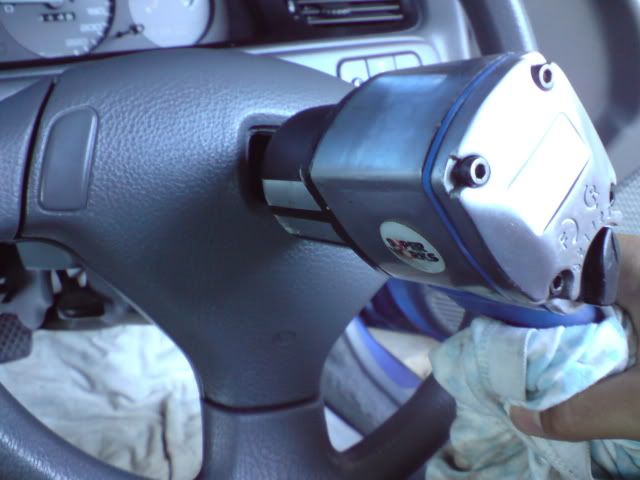
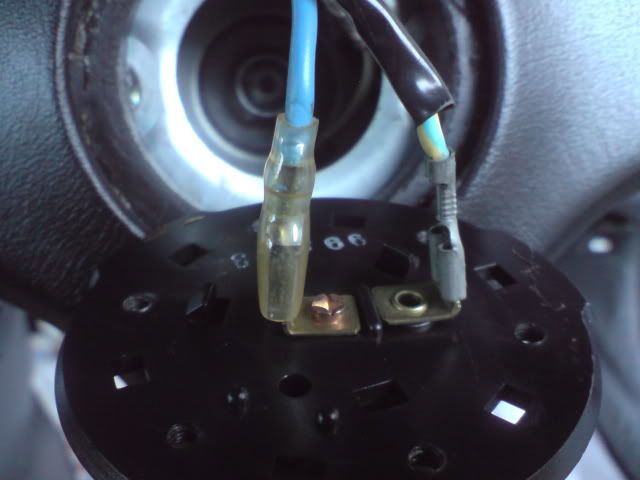
Once loose, leave the nut still on. I have heard many stories including on OH, people remove the nut and pull the wheel off only to smack them selves in yo face. Here is what it looks like with the wheel off, i just put the nut back on for no reason . .

Now get your sweet ITR wheel and begin removing hex nuts from it like shown below. I used a 3mm Allen key. Remember: lefty loosey, righty tighty.
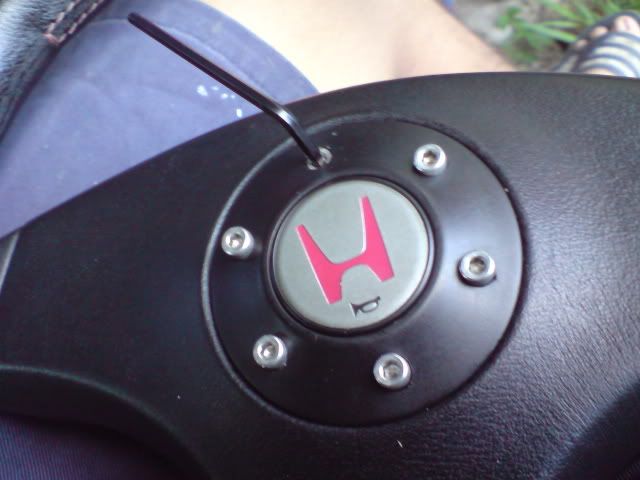
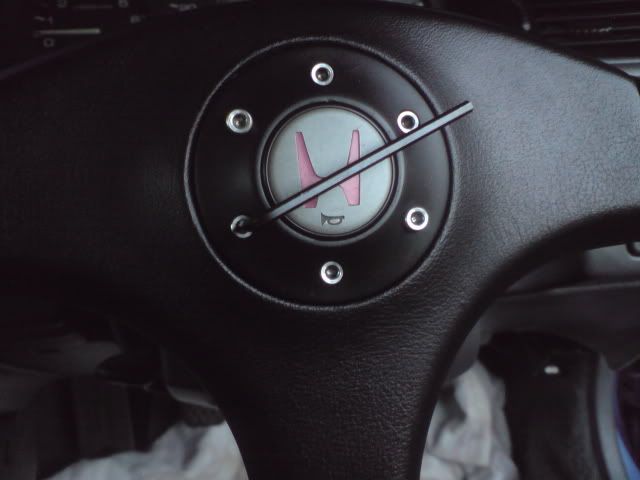
Here is what it looks like with cover plate off. Remove plate first, then to remove horn button you must compress the little tabs holding onto the base. There are 3 tabs, one of mine were broken so be careful. Look before you remove so you know where they are. Also do not lose the spring and contact plate under horn button.
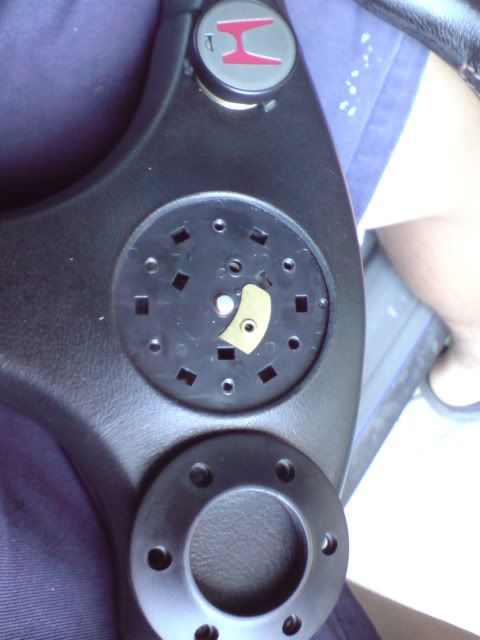
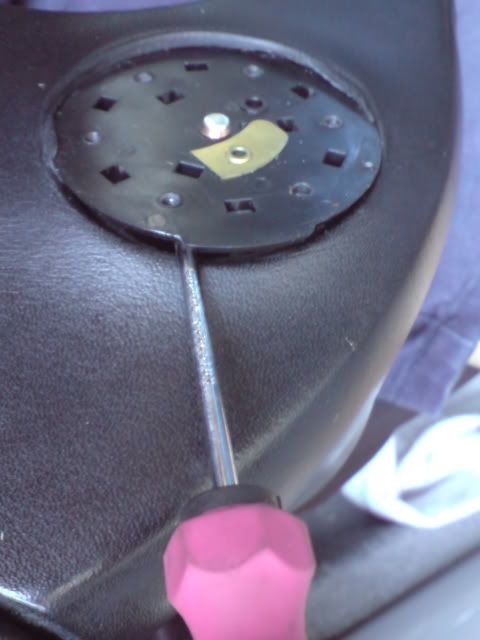
To remove base you will need the flat head screw driver again. Carefully pry it in and bring it up slowly. Going around if you can so you dont damage the leather.
If you must clean the inside of the wheel now, because you will not want to remove it a later date. I know i sure as hell dont. Here it is on, remember why you need the wheel straight before?
Now get the replacement nut and put it in a extension ratchet socket. Other wise you will have trouble gettin the nut in without falling inside the wheel. Thats what happened to me.
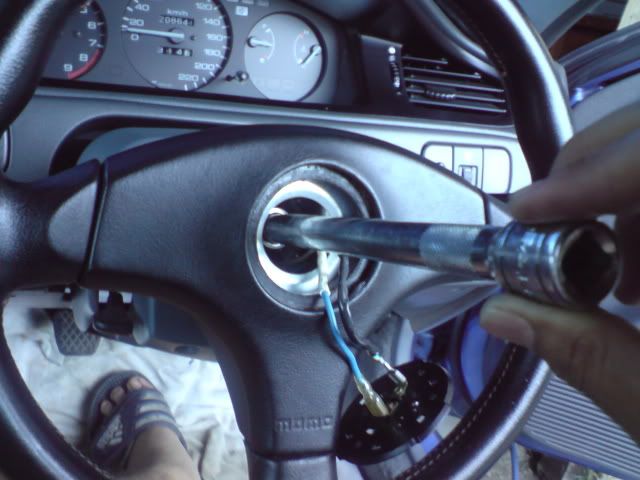
Now get el impacto set it to RIGHT. and go for gold, get that nut on TIGHT. Cause you dont want your wheel comming off when your driving.
Get the plastic base back in, slowly and carefully again. Do that, and clip in the horn button along with the spring and contact plate. Get it to align straight as you can.

Put the plastic plate back on and begin tightening the hex nuts back in. Not too tight because its only plastic.
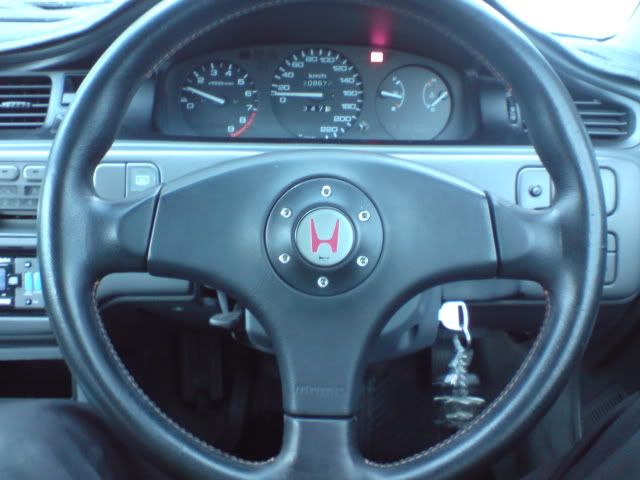
Now go ahead and admire what you just did in less than 30 minutes. But before you get excited, get yourself in the bay and connect back the Negative (-) terminal to the battery. Make sure the horn is working properly/normal.
Other comments:
Now go for a test drive, try and do difficult turns for e.g: 3 point turn, U-Turn, tight corners. If it feels perfect for you then all is good and go show your mates to see their jelous faces . .
After i had finished this i could feel the steering become more responsive. Could be for the smaller wheel or just too damn excited i had to make an excuse. Hope this is easy to understand, and enjoy ... Chico ... Chico
Last edited by riruiz_88; 31-12-2012 at 11:37 AM.
-
haha u dont need to open the horn up just connect it and put back on
as to using a rattle gun your ratchet is good enough
nice write up thou
-
-
i never thought of that ey Lan. oh well, same results haha. cheers for the words non the less guys
-
Good write up, good detail in photos! +rep for you.
JDM D15B - you wouldn't understand
No K-SWAP ? No worries - Unfriend
-
Would really like to do this, could you please fix the pictures?
-
here you go dude, sorry for the lateness.
-
 Originally Posted by riruiz_88

here you go dude, sorry for the lateness.
Thanks that's fine, but I'm having a problem with the alarm, want to see if anyone's experiencing/ed it.
When I take out the negative terminal my alarm sound goes and and won't stop til I plug the battery back in, even if I take both positive and negative out it still sounds?
Anyone experienced this before?
-
where is your siren located? well when you find it it should have a key hole so you can "silent" it when/if your doing maintenance to the system.
were you provided with a key with your alarm system? do this and it will stop.
-
Originally Posted by riruiz_88
where is your siren located? well when you find it it should have a key hole so you can "silent" it when/if your doing maintenance to the system.
were you provided with a key with your alarm system? do this and it will stop.
Na that's the problem, I bought the car but he didn't give me a key for it and I never asked...
-
middle part comes apart from the wheel, it is only stuck on with velco at the back
if you dont want to pull the horn out
-
Originally Posted by 90LAN
middle part comes apart from the wheel, it is only stuck on with velco at the back
if you dont want to pull the horn out
But I need to remove the battery don't I? If I don't want the airbag deploying?
 Posting Permissions
- You may not post new threads
- You may not post replies
- You may not post attachments
- You may not edit your posts
-
Forum Rules
|


 Reply With Quote
Bookmarks