|
-
How-To: AP2 Tail Light Conversion
AP2 Tail light Conversion
I finally found time to install my AP2 tail lights I bought from the States.
The whole install took me around 2 hours each side, including setting up and cleaning up.
Tools used:
- AP2 lights and gaskets
- Permanent marker
- 100mm Angle grinder & Safety goggles
- Dremel
- Drill
- 8mm Socket wrench
- Sandpaper
- Spray paint
- Gasket Silicone
- Newspaper
- Vacuum cleaner
BODYWORK
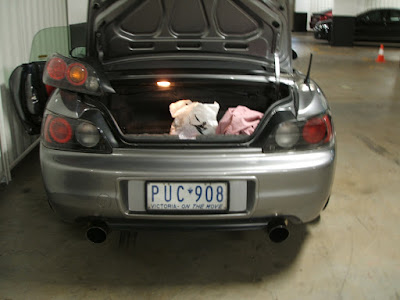
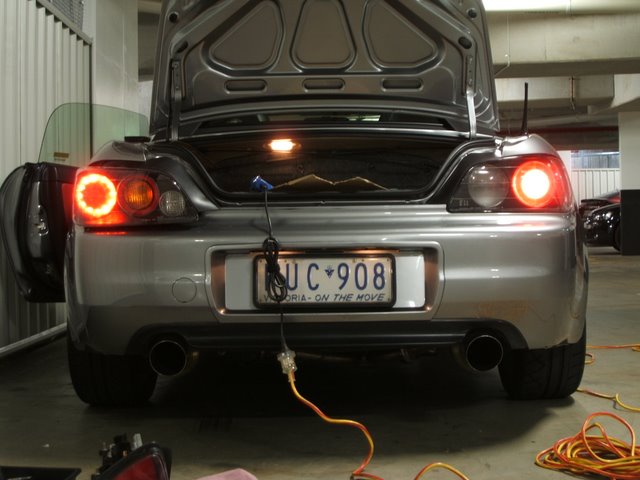
Heres my lights before the install:
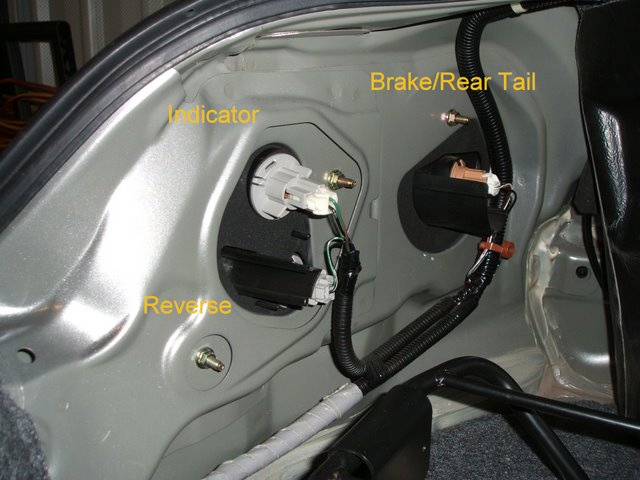
Heres the exposed light wiring after removing the boot panels:
Unplug the wires and using an 8mm socket, remove the four (4) nuts holding the light to the car. Hes a view after from the outside:
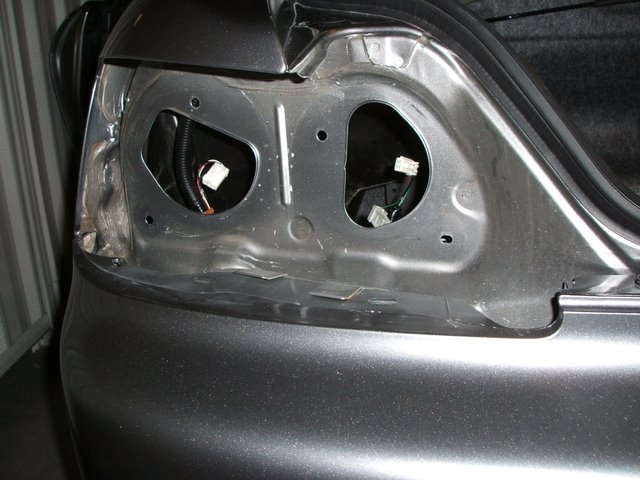
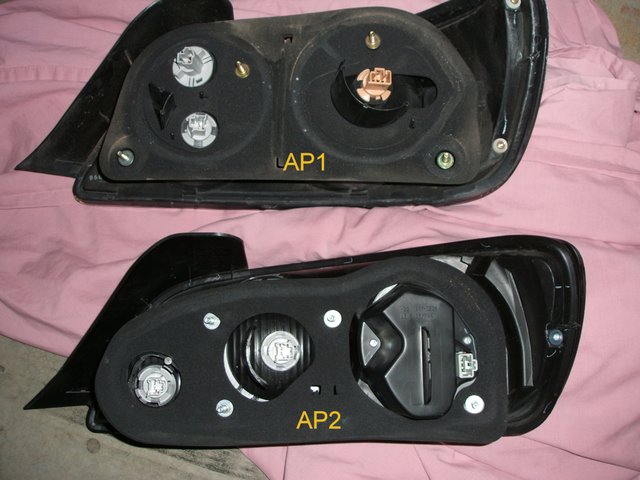
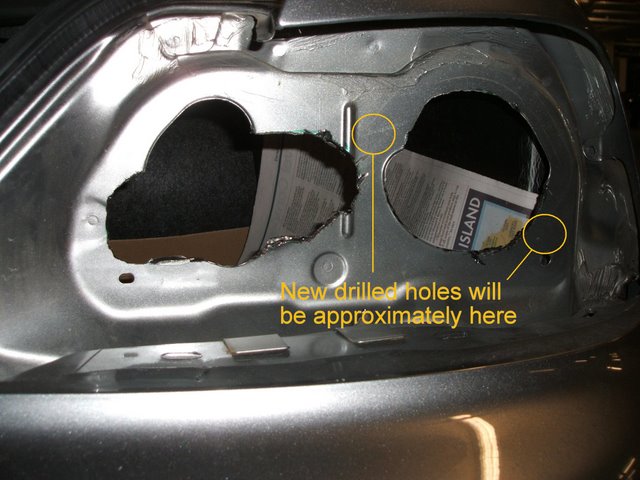
As you can see, the AP2 light houses three individual lights compared to AP1 which has only two. So cutting of the car is a must.
Carefully remove the foam gasket seal from the AP2 light and use this as a template to cut your holes. I lined up the most outer 45 degree line of the foam and car together:

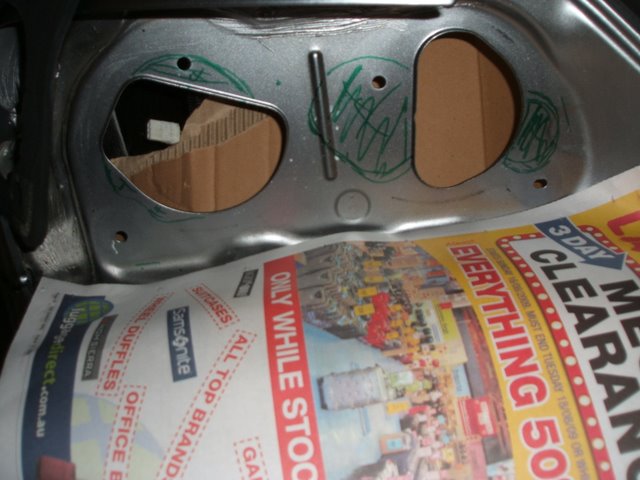
Paper up or cloth up the surrounding areas to protect the car before cutting.
I used a 100mm angle grinder to hack away at the car. (Make sure you protect your eyes. I had shrapnel flying at me once.)
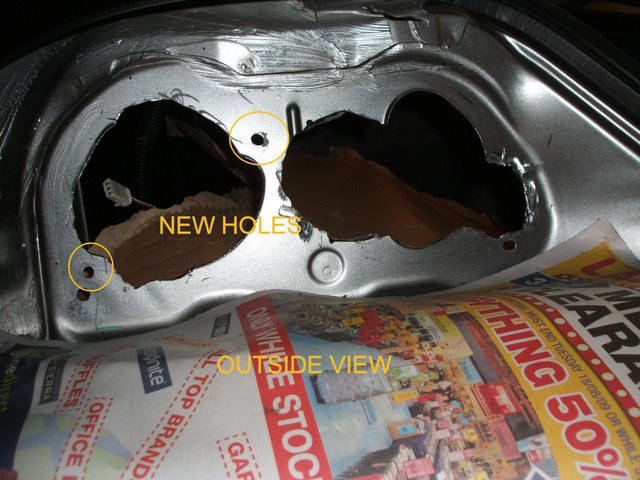
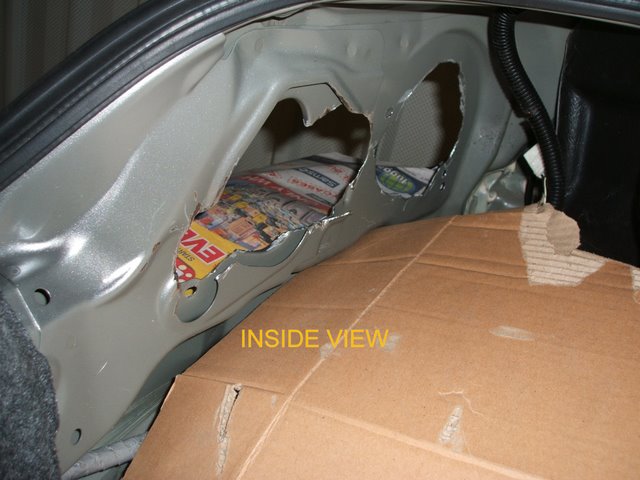
Here are some pictures after cutting:
Outside view:
Inside view:
The four (4) bolts that fix the AP2 lights are different from the AP1. You need to drill two (2) new holes into the body panel. Mark these holes using the light itself. Press the light into the body work and the tips of the bolt will scratch and mark the paint. Then drill two (2) holes. Test fit the light to make sure everything fits well.
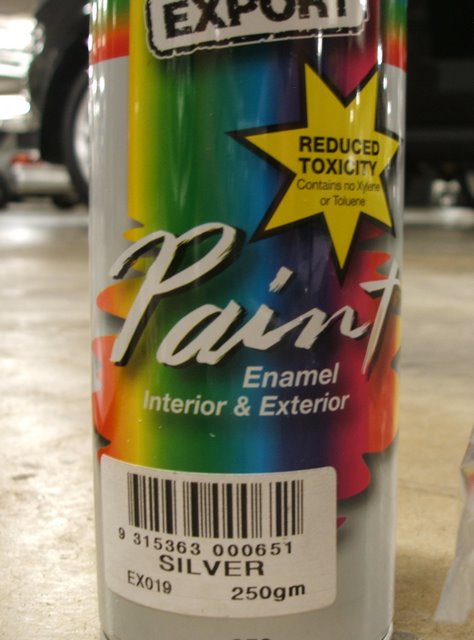
Now use a Dremel die to clean up the rough edges and sand it back before giving it a quick spray of paint to prevent rust. I just did a quick coat using Silver Australian Export paint from Supercheap Auto for $2.
LIGHT WORK
There have been some reports of water leaking into the light because of how the AP2 lights and gasket sits against the modified AP1 body. Some other forum members have suggested silicone sealing the gasket to the lights. I thought it wouldnt hurt doing so, and invested $7 into a tube of gasket silicone.
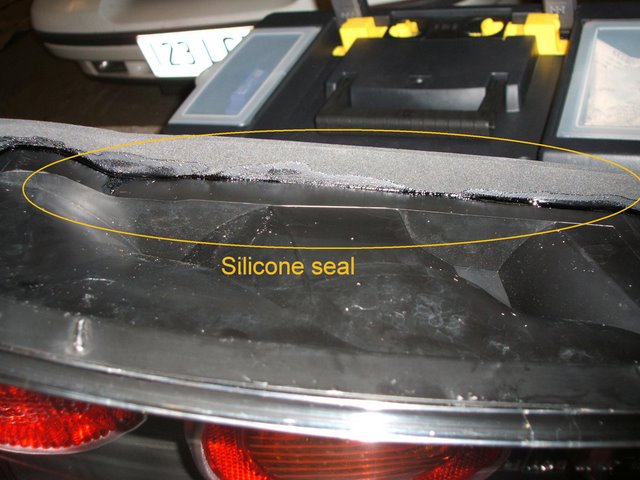
I also took the time to use black electrical tape to seal up any openings in the back of the light just in case water leaks in theres one or two openings.
**Note Ive gone through 3 high pressure washes now, and it hasnt shown any signs or leakage or condensation build up.**
WIRING
Whilst the paint and silicone is drying, its a perfect time to get the plugs on the light to fit.
Now, you can either get wiring kit which is plug and play from Hardtopguy.com in the States for $50 USD OR elect to cut apart your factory wires. I ended up doing the latter.
Brake Light
Brake light plug for AP1 and AP2 are similar, 3 pin connector. Its just a matter of trimming the male plug to make it fit for the slightly different AP2 female plug. I chopped the top clip off, and trimmed two (2) grooves on the top side.
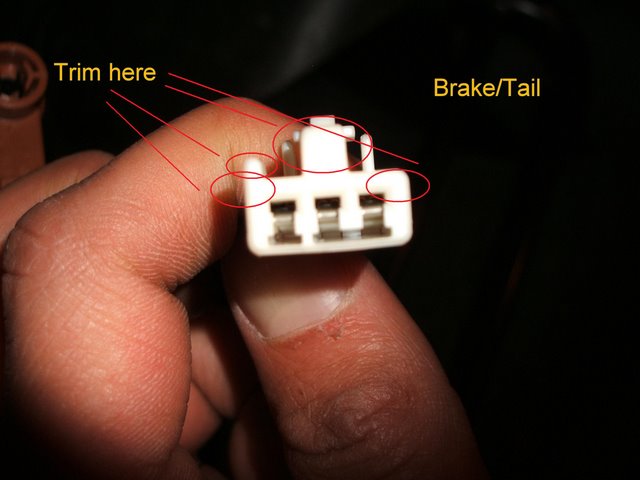
**Note Ive seen some people trim two (2) grooves on the bottom as well, but this isnt necessary if you simply cut the top off and pry the connector pins up slightly. Its easier this way.**
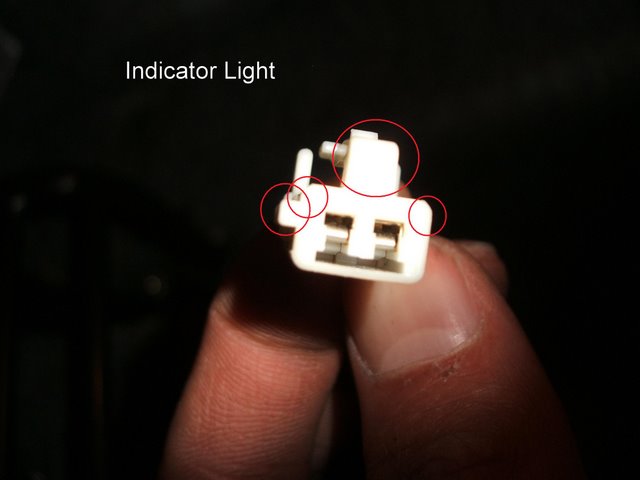
Indicator Light
My AP2 lights came with the light globes and sockets, so plugging in the connector simply required trimming the male plug as well.
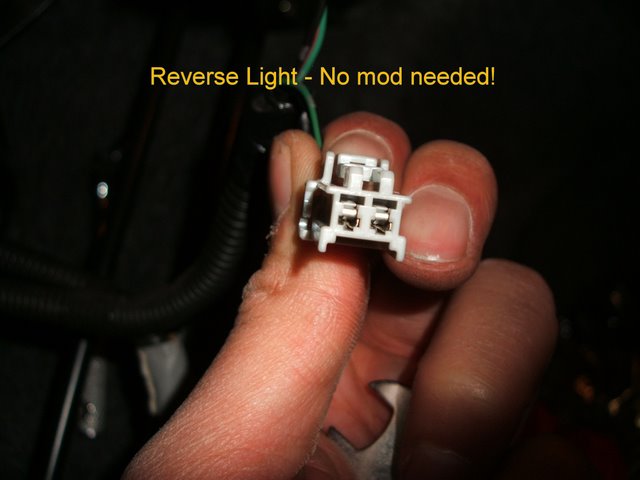
Reverse Light
Simple plug and play. No modification required.
Picture of all three plugs after trimming:
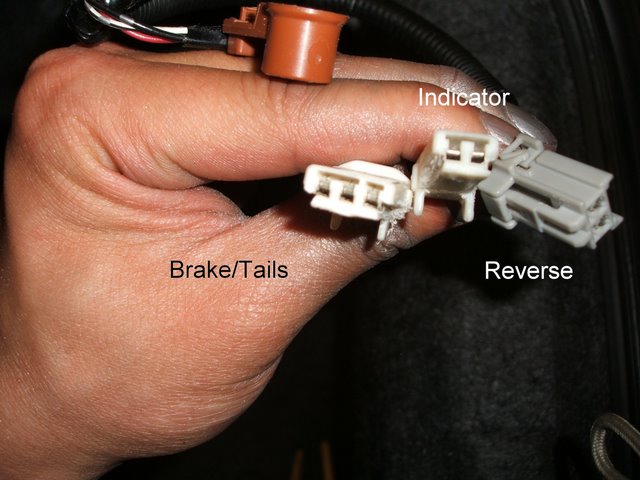
Test fit your plugs and turn on your lights to see everything is working!
FITTING
Simply bolt your lights in with the two (2) holes against the body.
Use a metal bracket to affix the other two (2) holes to the car. I bought the brackets from Bunnings around $1.50 ea, and folded them fit the predrilled holes.
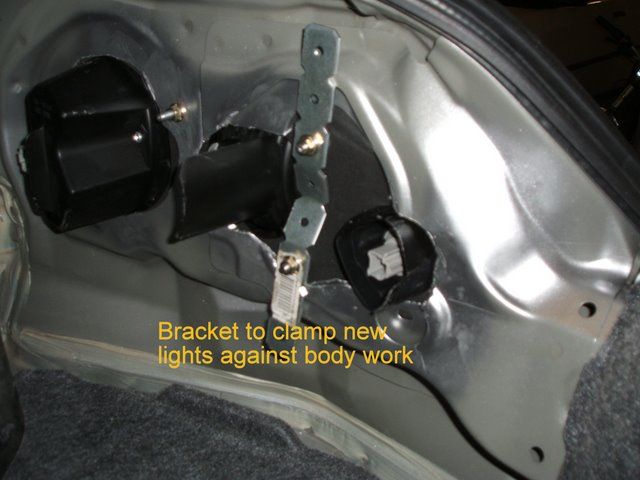
Hand tighten then tighten with an 8mm socket.
Plug in your connectors, and reattach your boot lining clips.
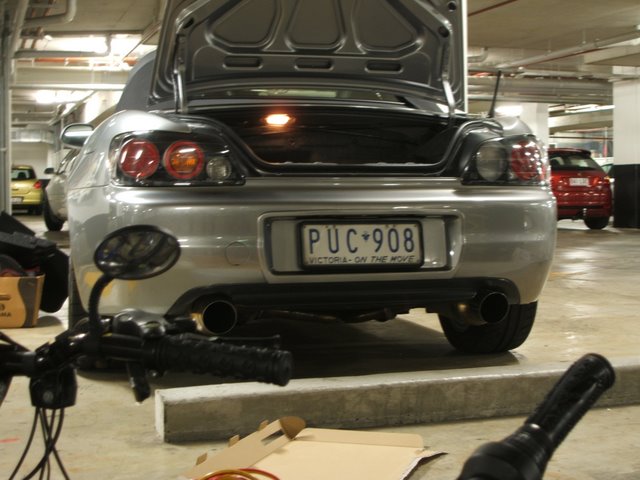
Some more pictures
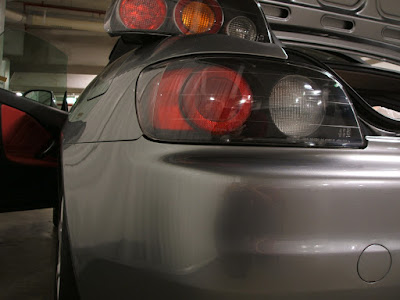
AP2 vs AP1
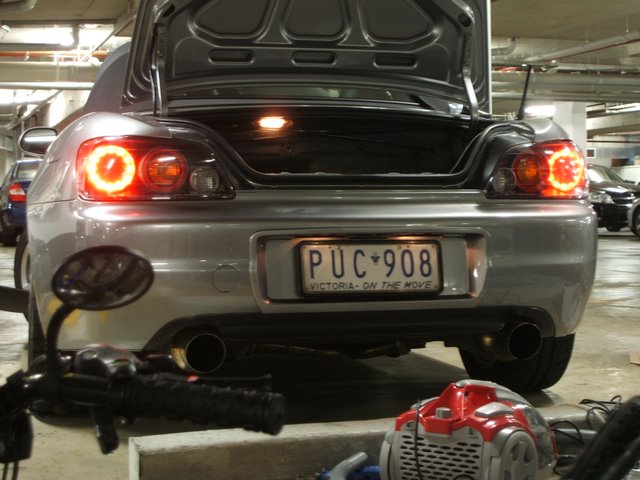
Result:
-
good stuff. love the step by step with pictures..
btw already had some info here http://www.ozhonda.com/forum/showpos...7&postcount=11 
僕の名前はTony です。 
I need a new car....lol
Speed has never killed anyone, suddenly becoming stationary... That's what gets you.
-
nice work!
lol at doing it in the carpark though!
-
bump.....bump....by the way, how long does took u to complete it??
Honda---The Power Of Dream! 
-
I did mine in about 4 hours  but I used a fkn dremel. Best thing to use is a air saw or a drill with that circle piece. but I used a fkn dremel. Best thing to use is a air saw or a drill with that circle piece.
You should also cover the backing, moisture gets in from the back as well I just used duct tape.
-
yeah, that link didn't really give me much help actually installing it...
so that's why i thought i'd do a proper one.
it took me about 4-5 hours all up including a beer break... it's a bitch to do, but well worth it.
use an airsaw like what vyets said. either that or jigsaw. i think it would be easier than angle grinder, and you don't get bits flying at you. haha
-
Nice write up ncmx5. I was about to say, an angle grinder would have been hard work. I used an air saw. Here's a guide that I found useful from s2ki:
http://www.s2ki.com/forums/index.php...ic=183447&st=0
-
Nice tut! And did you do that in a parking lot :| lol
-
awesome post~and great job
thx for sharing
What a Three Seventy Z!
-
haha, yeah did it all in the parking lot. moved interstate, so had like bare essential tools with me, hence no aircompressor for airsaw.. LOL everyone was staring at me cut apart my car like im a freak. LOL
-
LOL are you in melbourne now or the gold coast?
-
Sorry to bring this up again guys, but has anyone done a conversion from the old AP1 tail lights to the newer AP1 tail lights... as in the 2002 year ones ? I think the newer ones look heaps better. Is it an easier install than trying to install the AP2 tail lights ? and any ideas on pricing ?
 Posting Permissions
- You may not post new threads
- You may not post replies
- You may not post attachments
- You may not edit your posts
-
Forum Rules
|


 Reply With Quote
Bookmarks