|
-
No worries always glad to help, thought id chuck some videos up as im not to good at describing things lol, sorry for the dodgy recording on some of them, but i was using my camera phone with one hand and removing the dash with the other so can be a bit shaky and point at random things at times lol.
If you have anymore questions feel free to ask as if helps me edit the guide better for future DIY'ers.
-
Almost there but struggling to get the green connector off that plugs into the heater part.
Are there any lugs to depress or is it a straight pull?
Once that's off the facia will come off and I can get the clock changed then look at why there's no light on the demister switch.
One more question as I dont know Honda cars at all, but does the cig lighter usually light up with the dash lights?
-
Bit of an update and still got problems but they're different.
Couldn't unplug the green connector but did manage to get my big hand inside with a screwdriver and unscrew the clock and connected the replacement and found out there was nothing wrong with the original as the replacement behaves the same.
It only lights up when the lights are on and only displays when the ignition is on, if you turn the ignition off and back on again the time defaults to 1:00, so you have to reset the clock every time you start it up, my limited knowledge tells me it's wired to the ignition hence no power when it's turned off.
Took a chance and phoned the previous owner who said she remembers it working fine till she went to kmart and got an after market radio fitted.
They told her the clock wouldn't work due to compatibilty problems and she didnt question or demand they do the job properly.
Anyone any idea what they might have done (if it's a shonky install) or what can be done to fix this?
Having doubts now that the demister bulbs are blown , seems coincidental it has 2 blown bulbs when I have this appartent wiring problem, and those little bulbs aren't cheap
-
I'm at work on my mobile so ill be quick.
There is a lug to depress on the bottem of the connector, it might be a bit hard the first time as it has probably been there for 14 years or so.
My EK1 doesn't have a cig lighter light so id assume they dont.
Your clock problem is a bit off topic from my DIY so ill pm you after work so we dont fill up the DIY with unrelated posts, also recommend making a new thread outlining your problem too see if anyone can help in the meantime.
-
My apologies for going off topic, maybe one of the mods could delete the posts and tidy the DIY up?
-
Pm sent. No need to delete the posts i think, most have been relevant questions on how to take the dash apart and have helped me update the guide but your clock issue is not really relavant and may take a few messages to work out so were probably better off taking that to a new thread or Pm so we dont clutter up this one.
-
-
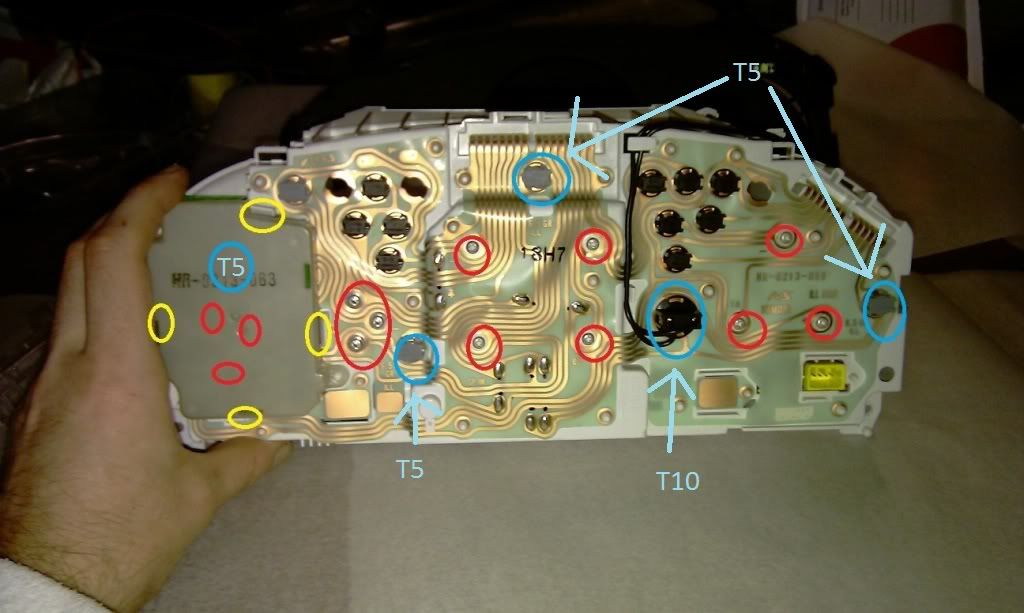
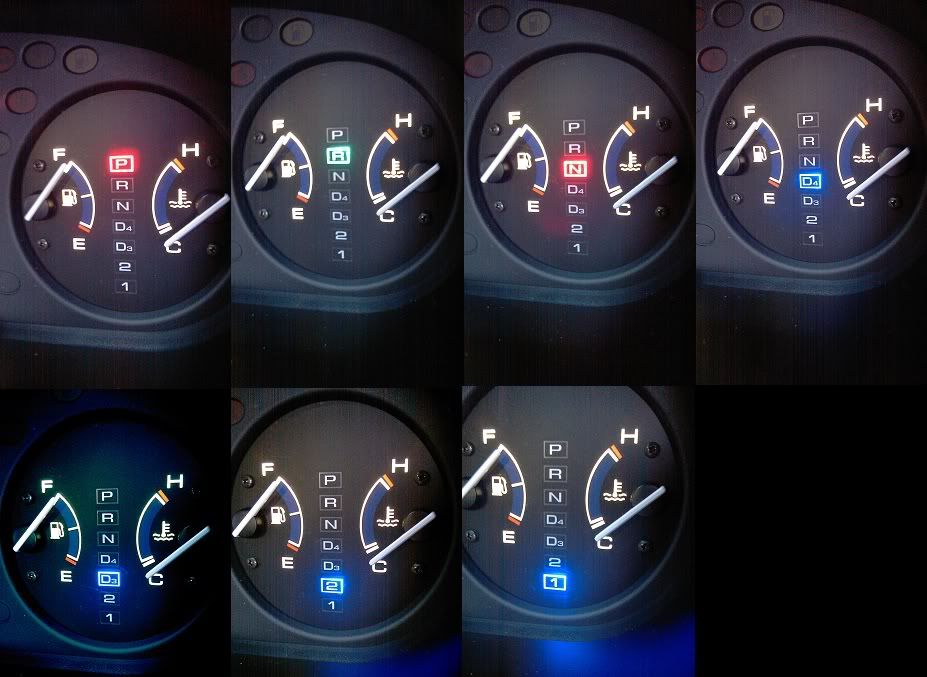
hey quick question yea, on the back of the cluster, theres like 2 T5 on the top and one on the middle, what size the rest (not including indicator and other stuff like engine light..."cause i even tried T10, doesn't fit in LOL
-
 Originally Posted by baoanh

hey quick question yea, on the back of the cluster, theres like 2 T5 on the top and one on the middle, what size the rest (not including indicator and other stuff like engine light..."cause i even tried T10, doesn't fit in LOL
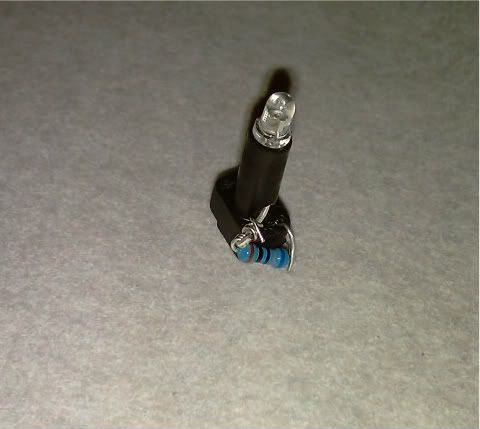
I updated the pic, i used T5 bulbs in the cluster. There are 5 sockets for the cluster backlight, four T5 and one T10 marked in the pic below.
-
-
^^ Thanks mate i hope it helps  My first DIY post so im still learning how to do them lol. My first DIY post so im still learning how to do them lol.
-
Hey mate do you have to take off the whole climate control to change the bulbs for the backlight?
Im just planning to make the lights amber.
Cheers.
 Posting Permissions
- You may not post new threads
- You may not post replies
- You may not post attachments
- You may not edit your posts
-
Forum Rules
|


 Reply With Quote

Bookmarks