Page 1 of 3 123 LastLast
Results 1 to 12 of 32
  1. #1

    Cheapo's guide: to fix a leaking tail-light gasket

    DISCLAIMER: The following is provided as a GUIDE ONLY, and neither myself nor Ozhonda take any responsibility for the outcomes of someone else doing the following. You follow these steps at your own risk!

    This is my first DIY! Maybe i'll do a series of Cheapo's guides =P

    Thought I’d do something simple and cheap - BUT EFFECTIVE.

    Getting moisture in the tail-light and/or water in the boot is a common problem on Honda’s… Unfortunately we just have S$$$ gaskets. This is the cheapass and IMO better option to buying another $50 gasket… I’ve done this to my left tail-light a few months ago and just last night to my right tail-light after all this crappy weather we’re getting in Syd =[


    AIM: to create a silicon seal around the tail-light gasket

    Required:
    - $10Tube of silicon sealant (Selley’s Roof and Gutter Silicone Sealant)
    - FREE: Toilet Paper
    Optional:
    - Free: Water
    - $?: Tube gun thing

    STEPZ:
    1) Remove the tail-light from the compartment.


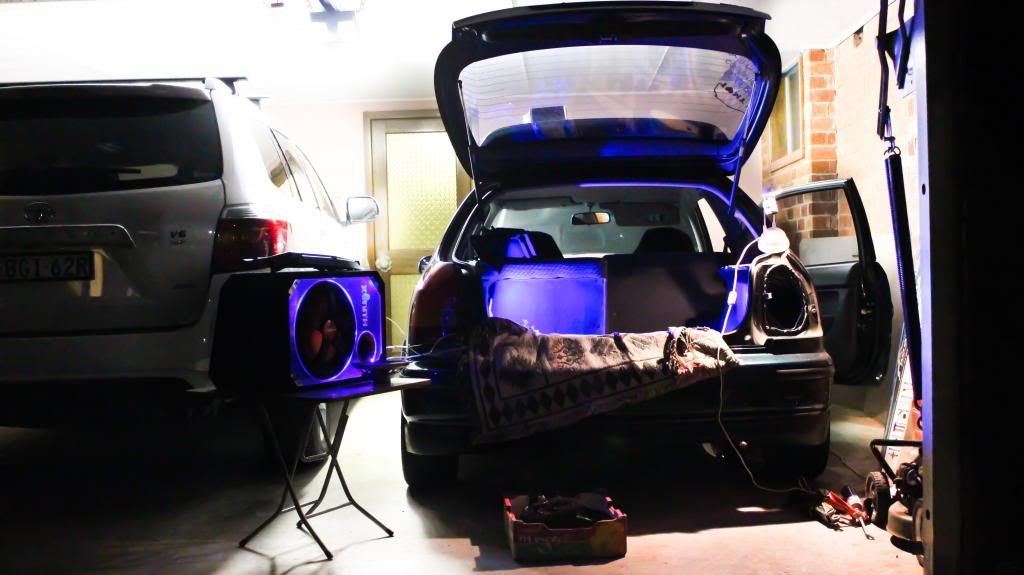
    2) On the EK Hatchback, remove the speaker housing (2 screws on the top of the plastic trim and 1 screw you get to by pushing the seat forward where it would normally be hidden between the back of the seat and the speaker housing.


    3) Remove the speaker (4 screws) and unplug. Now is a good time to change those fuzzy speakers too!


    4) Unscrew the 4 nuts holding the tail-light in. Wrenches and spanners work well. Then the tail-light should just slide out. This shot taken from inside the boot looking into the tail-light compartment.


    5) Clean all the grime around the gasket and the metal. Careful if you decide to remove your gasket cos it’s pretty easy to tear


    6) Apply the silicone onto the metal where the taillight usually comes into contact with the metal. A good way to tell is any dirt stains left on the metal after a good clean. Don’t be afraid to be generous! Can cut the silicone away when it’s dry.


    7) Wait for 24 hours.


    8) Put everything back together! DONE!


    PM me or comment for questions or words of wisdom! Happy DIYing
    Last edited by FongPei; 26-05-2013 at 12:29 AM.
    https://www.facebook.com/ISOMedia.Photography

    WP: 1:10.0
    Winton: 1:40.5
    Marulan: 0:48.7

  2. #2
    sorry but terrible idea IMO

    when it starts leaking again and u decide to replace it with a new gasket, you're not gunna enjoy removing that silicone

    do it once do it right

  3. #3
    Member Array
    Join Date
    May 2008
    Location
    Sydney
    Car:
    CRX
    Same cost would be to go to Clark rubber and buy something to make a new gasket with ....personally I would have just bought one from honda

  4. #4
    Quote Originally Posted by dorikin View Post
    sorry but terrible idea IMO

    when it starts leaking again and u decide to replace it with a new gasket, you're not gunna enjoy removing that silicone

    do it once do it right
    It peels right off (Y) the silicone isn't applied to the backing of the tail-light - rather the metal so anything which comes in contact with the silicone after it's dry won't stick.

    Quote Originally Posted by _CRX_ View Post
    Same cost would be to go to Clark rubber and buy something to make a new gasket with ....personally I would have just bought one from honda
    What's the Clark rubber option like?
    https://www.facebook.com/ISOMedia.Photography

    WP: 1:10.0
    Winton: 1:40.5
    Marulan: 0:48.7

  5. #5
    Member Array
    Join Date
    Aug 2005
    Location
    Wollongong
    Car:
    Turbo 85 Civic
    Quote Originally Posted by FongPei View Post
    What's the Clark rubber option like?
    A lot better than using silicone. You can get closed cell foam similar to what the original gaskets are made of and make mew ones. Much better idea. I wouldn't suggest anyone use silicone to seal them up

  6. #6
    Member Array
    Join Date
    Nov 2009
    Location
    The Guy Next Door, Lol.
    Car:
    KSWAPPED STi -R
    All this hard work to save $50 bucks?

  7. #7
    Quote Originally Posted by amant02 View Post
    All this hard work to save $50 bucks?
    Buddy you call this hard work? lol.. $50 saving in 30-45 minutes sounds alright to me. this is a DIY afterall
    https://www.facebook.com/ISOMedia.Photography

    WP: 1:10.0
    Winton: 1:40.5
    Marulan: 0:48.7

  8. #8
    Member Array
    Join Date
    May 2008
    Location
    Sydney
    Car:
    CRX
    Quote Originally Posted by FongPei View Post
    Buddy you call this hard work? lol.. $50 saving in 30-45 minutes sounds alright to me. this is a DIY afterall
    This isn't a DIY ...this is not what to do.
    Really this thread shouldn't even be in this section.

  9. #9
    So many rustled jimmies in here. OP is thinking outside of the box here, instead of bad mouthing his idea, try and better it by coming up with something you think is better!

  10. #10
    Member Array
    Join Date
    May 2008
    Location
    Sydney
    Car:
    CRX
    Quote Originally Posted by lolmclol View Post
    So many rustled jimmies in here. OP is thinking outside of the box here, instead of bad mouthing his idea, try and better it by coming up with something you think is better!
    3rd post down

  11. #11
    Quote Originally Posted by _CRX_ View Post
    3rd post down
    Where's the link to your DIY? I only saw text.

  12. #12
    Quote Originally Posted by _CRX_ View Post
    This isn't a DIY ...this is not what to do.
    Really this thread shouldn't even be in this section.
    You serious? This WORKS. and is totally functional - with no damages to the car whatsoever. No leakages - just pure DIY. You want a gasket go ahead and buy yourself one. don't like it - get out of my thread.

    COS ALL THIS IS JUST ADVICE. YOU CAN DO WHATEVER **** YOU WANNA DO. - Hodge Twins

    douchebag
    https://www.facebook.com/ISOMedia.Photography

    WP: 1:10.0
    Winton: 1:40.5
    Marulan: 0:48.7

Tags for this Thread

Posting Permissions

  • You may not post new threads
  • You may not post replies
  • You may not post attachments
  • You may not edit your posts
  •  
Powered by vBadvanced CMPS v4.1.3


Terms and Conditions
Ozhonda.com is in no way affiliated with the Honda motor company or Honda Australia in anyway whatsoever.