|
-
You need dedicated tools or you need to exert upward force on the knuckle and downward force onto the lca.
You can exert upward force to the knuckle by propping it up with a Jack.
Once a substantial amount of force is applied, swear at it and threaten to burn it if it doesn't come off. Then you hit it as hard as you can with the biggest hammer you can find. (Bigger = more force)
If all else fails. Cbauto does home visits.
-
try a mini sledge hammer or spanner trick
make sure you're hitting the lca not the balljoint
-
out of all that list-
no to hardrace camber arms, rubbish, shit hardware that comes with, shit overall finish, will rust where its not painted, ugly welds
no to plm header, i had to pay an exhaust place 2 hours labor to make mine fit (i installed it, took it to the exhaust shop to marry up with my exhaust, the piece of shit header was facing up into my floor )
if its your daily don't delete aircon, i strongly regret doing this to my car (summer up north sucks hard)
why two different tyres?
rest looks ok
ball joint- put weight on it (jack) the hit the arm with a hammer, or buy a ball joint separator for 30ish bucks
Last edited by renzokukenj; Today at 12:34 AM. Reason: hehe
-
 Originally Posted by u mad?

out of all that list-
no to hardrace camber arms, rubbish, shit hardware that comes with, shit overall finish, will rust where its not painted, ugly welds
no to plm header, i had to pay an exhaust place 2 hours labor to make mine fit (i installed it, took it to the exhaust shop to marry up with my exhaust, the piece of shit header was facing up into my floor )
if its your daily don't delete aircon, i strongly regret doing this to my car (summer up north sucks hard)
why two different tyres?
rest looks ok
ball joint- put weight on it (jack) the hit the arm with a hammer, or buy a ball joint separator for 30ish bucks
Fuk up
-
Do everything opposite what user u mad said just for extreme challenge
Users I've upset: EKVTIR-T | Renaissance_x | Integra-GSi | Stevil | vteckiller | dyln_bxtr | zedries | joyride | eren | Brian FD2R | AusS2000 | amant02 - II | CRXDEL501 | Indie | UiK | mnc | neut
-
Originally Posted by cbauto
Fuk up
nh but u fuk up
Originally Posted by RenzokukenJ
Do everything opposite what user u mad said just for extreme challenge
or you can do this also, up to you eh heeeeeeeeeeeeeeeeeeeeeeee
Last edited by renzokukenj; Today at 12:34 AM. Reason: hehe
-
Just go out and buy a balljoint remover. Repco or sca has it about $20-40. Will make that balljoint pop out very easily. As mentioned you could hammer the shit out of it like literally but you need alot of room space. Buy the ball joint popper.
-

My jumper harness which I got from Mr. Toda Aus last yr doesn't fit my '98 JDM ECU. =/
Looks it's for an obd2b ecu, yea?
In the process of stripping the engine bcuz cuz, it's a definite YES to engine bay respray, estimate it'll cost around 500 dolla to be done professionally. I haz made up my mind. I want this car be looking brand-spankingly meticulously as close to new, clean as fk, as expressed in this meme.

Motivated to say yes when I saw this pic: 

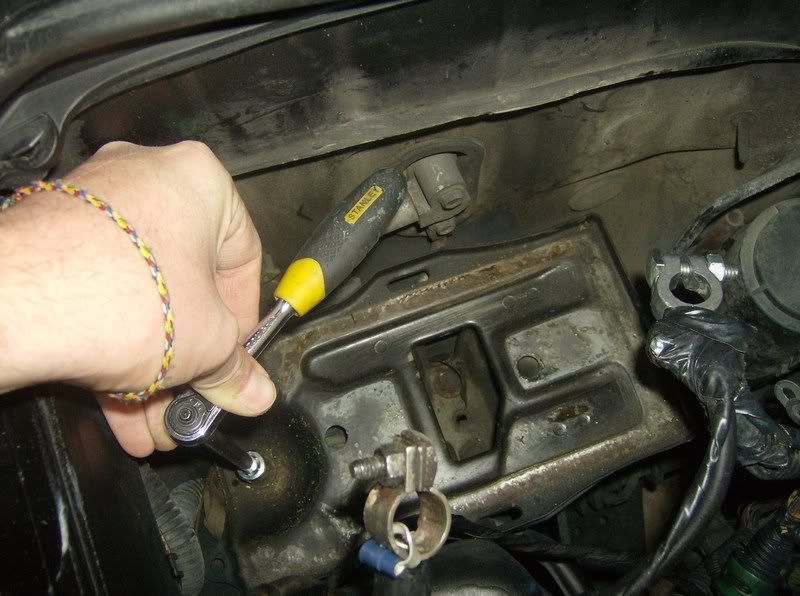
Before respraying the bay, I'll ask my repair shop to fully fix up the front radiator support, out of shape and needs a few spot welds.


L(o.o)k at dat rust. Covered in dirt, rusty rust and sh!t. Worried about that bolts holding it wouldn't come off easily.

It took a few minutes of archaeology-ing with my flat-head screwdriver to to remove the crap to uncover the three bolts.
=/ As suspected, the bolt's head have gone with the flow of corrioding. They all have lost their shape, how to heck am I gonna remove it? They were 12mm bolts. Tried 12mm, nup. Then 11mm, it slips. 10mm, too small.
Any suggestions Ozhondies?

Here's what it's meant to look like in a nice condition.
So jelly. 
Out of date ground wires. Better upgrade it then.

Freakin' fking fossilised fugly fuel filter (ffffff hehe).

One side of the fuel filter bracket was broken, so I couldn't apply decent force to remove the fuel line (one coming from tank). Bloody bent the filter 90 degrees!


Have got tube cutters, but decided to bend the line even more till complete metal fatigue. (Problem solving of a lazy eng. student. =).) I'll fix up the line with fitting later.
L(o.o)k at where the rear mounts mounted to. The untouched surface hidden underneath the bolts' head is so nice.

So, I am gonna aim to finish stripping the bay in 2 days time. 2 dayz? Because I am a noOb. 
The front end is completed stripped. Lights, radiator, condenser, lines, horn, ground wires, power steering reservoir, receiver/dryer, washer fluid tank, bonnet latch and so on, are off. Also undone some stuff here and there.
I need to remove the rusted as fk metal battery tray to remove AC lines, PS hose, and wiring.
Couldn't undo one of the lines from the BMC with a regular open end wrench. Looks like I'll need to invest in flare nut wrenches.
Yo.
Last edited by 3K9; 27-12-2015 at 03:46 AM.
-
Originally Posted by u mad?
out of all that list-
no to hardrace camber arms, rubbish, shit hardware that comes with, shit overall finish, will rust where its not painted, ugly welds
no to plm header, i had to pay an exhaust place 2 hours labor to make mine fit (i installed it, took it to the exhaust shop to marry up with my exhaust, the piece of shit header was facing up into my floor )
if its your daily don't delete aircon, i strongly regret doing this to my car (summer up north sucks hard)
why two different tyres?
rest looks ok
ball joint- put weight on it (jack) the hit the arm with a hammer, or buy a ball joint separator for 30ish bucks
u mad. Have you gone mad? Hardrace is lovely quality!
Have you read the delete sound system and headunit part?
Have see my Jazz thread? Dat auto is my daily. 
Might as well start racecar diet now.
Bought the set of my DC2R stockies with used Toyos. Two had excessive camber wear just down to the wire at one part.
Originally Posted by MIKO_OL
Just go out and buy a balljoint remover. Repco or sca has it about $20-40. Will make that balljoint pop out very easily. As mentioned you could hammer the shit out of it like literally but you need alot of room space. Buy the ball joint popper.
Roger that.
Last edited by 3K9; 27-12-2015 at 04:14 AM.
-
I deleted my sound system as well, another stupid thing i regret doing lol.
i have a jazz daily as well, nice
if you delete the heater core and blower fan under the dash, make sure you plug up the holes, other wise kunt tonnes of hot air will constantly be flooding into the cabin, almost like you have the heater on full blast 24/7
Last edited by renzokukenj; Today at 12:34 AM. Reason: hehe
-
Bought rounded socket set to attempt to remove metal rusty tray. Nup, that didn't work.

Stripped! (Minus two rubber plugs)
Do I need to remove steering rack too? But need steering at the repair though I reckon.
The pin of the brake and especially the clutch pedal was a b!tch to remove. Took too long!
All I had left these past few days were the wiring looms and the AC hose to remove.
Figured out how to pull the wiring loom into the firewall.
Just managed to pull the passenger side loom and AC hose through the gap under the tray. Was tight.
Had to remove Airbox cabin box for passenger side to remove the loom.
Last edited by 3K9; 05-01-2016 at 04:20 PM.
-
Did this awhile ago, stripped firewall insulation, because weight reduction!

Big plastic bag of 4.7+ kg of unnecessary baggage.
Jack in the pic to give you a scale of the BIG bag.

Does the firewall/footwell area get hot on the track without insulation?
In
other
slow
news,
today:

Repair shop - round 2.

OMFG, it looks soo farr king good in the sun, the paint hasn't even been buffed/polished yet!
Things to fix from respray:
- Door handles
- Side mirrors –,left mirror left corner touch up, right side in front of mirror touch up
- Passenger door sider moulding edge
- Dot of paint at left handle side taillight
- Fix rear license plate light lense, was too resprayed red
- Fix front end damage, straighten up and weld up radiator support, and additional spot welds if necessary.
- Bumps on left side, side skirt
- Fix both front inner edge of fenders, straighten them.
- Crack developed infront left rear wheel, and corner of both doors.
Other things that I would like to done:
- Respray front radiator support and engine bay – Honda red R81. – Shave small mount on right shock tower, - weld up 4 screw holes in firewall. Respray bay from outside edge.
- Respray inside area of doors – Red R81
- Cut off rusted battery tray
- Make the seams in engine bay seamless, smooth with flexible filler?
- Respray whole rear hatch area. Initially I asked to just respray the outside, however from the respray, some paint has leaked through and got mixed with dirt
- Adding to above, respray underside of rear spoiler (and touch up marks)
- Fix both front door’s edge and when they meet
- Respray my original front bumper bar - Red R81. (sitting in your storage area) Grille: Matt/non gloss black.
- Respray inner fuel door area
- Respray both side skirts to matt/non gloss black.
- Respray front lip to matt/non gloss black.
- Seal rear boot crack.
Getting an OEM front bar resprayed as I don't like the fitment of the aftermarket. Getting my front lip and side skirts resprayed from shiny black to, matt/non-gloss black, changed of mind. The main feature is the sxc red paint, not shiny black.
Yes, we should of sprayed inside (inner doors, bay, hatch area) first, then outside. However, I have more funds working part-time at the 'Fresh Food People' now than last year.
Last edited by 3K9; 03-06-2016 at 12:04 AM.
 Posting Permissions
- You may not post new threads
- You may not post replies
- You may not post attachments
- You may not edit your posts
-
Forum Rules
|


 Reply With Quote
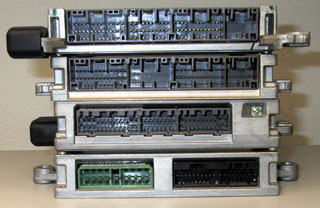
Bookmarks