|
-
DIY - Koni & Ground Control Civic Install
Disclaimer: The following is provided as a GUIDE ONLY, and neither myself nor Ozhonda take any responsibility for the outcomes of someone else doing the following. You follow these steps at your own risk!
Hey guys I searched the whole net for a Koni/ground control DIY for myself, and couldn’t find one, so I thought I might as well finally contribute to our DIY forum.
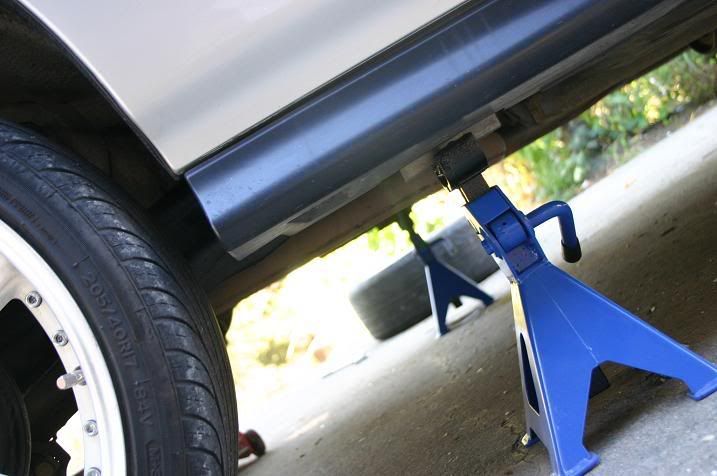
Firstly, Jack the car up and place it on jack stands, on flat ground. If you only have two like me, that’s not an issue, place the end of the car you’re working on, on jack stands, and remove the wheels so you’ve got room to work. NEVER WORK UNDER A CAR SUPORTED ONLY BY A JACK.
Rear Suspension
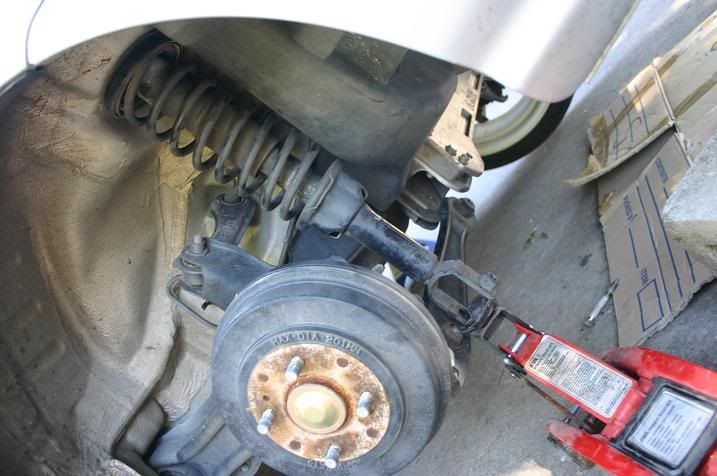
Firstly you will need to remove the original shock/spring combo.
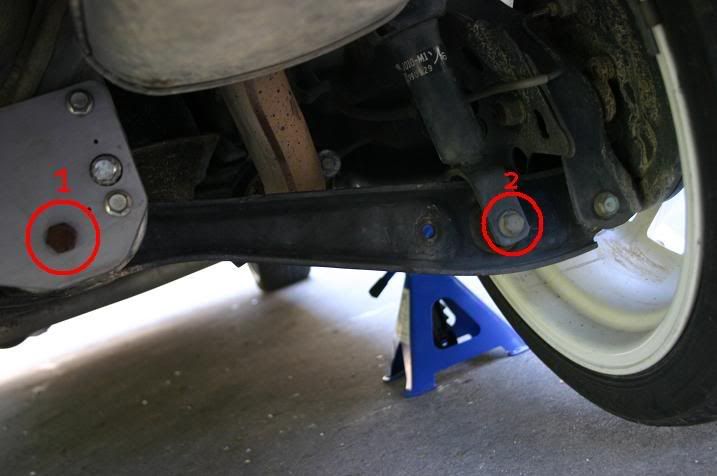
Start by removing the lower shock bolt (2), and the LCA’s inner bolt (1).
Remove the two bolts holding the strut top in place, ignore the allen key in the shock shaft, only undo the 2 outer bolts.
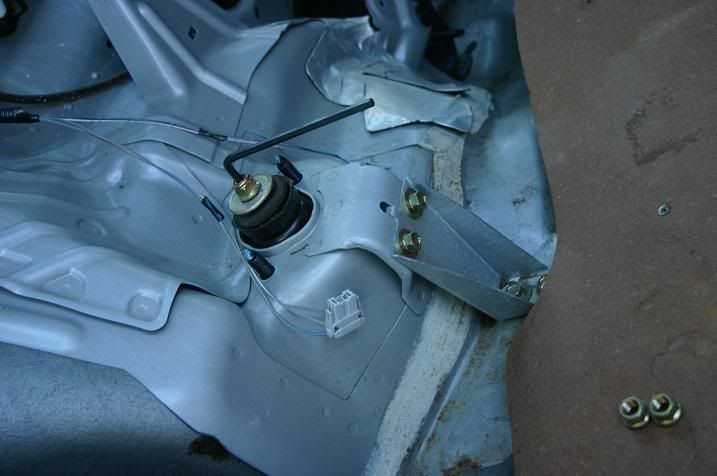
Now the shock is free to remove, wriggle it around and pull it free.
……………………………………………………………………
If your new suspension is a complete strut (it comes with the top hats, and is all joined together), install it in the same order, just reversed. Simple!
When reinstalling, start by just hand tightening the two bolts holding the top hat, so the shock can still wriggle around a bit.
Go under the car again and put in the lower shock bolt and the LCA bolt, however, don’t do them up all the way to the point that there providing any clamping force, but still to the point that there pretty much fully in.
Go back and tighten the 2 bolts holding the top of the suspension up to the correct torque, which can be found in a helms manual, or alternatively in an online manual.
Now lower that end of the car onto the ground so it is sitting at ride height, now its time to tighten the LCA bolt, and the lower shock bolt up to the correct torque.
Whenever working on the suspension, you should torque the bolts up with the car at its static ride height, not with the suspension fully extended.
……………………………………………………………………….
Now if your like me, chances are you cant just bolt in the new suspension as above, as you will need to reuse the stock shocks top hats and bump stops.
Its now time to pull apart the shock, you will need a spring compressor.
Compress the spring so there is no force pushing up on the top hat from the spring.
Undo the shocks top bolt, using a spanner, and an Allen key in the top of the shocks shaft (See the 2nd last pic). Remember the order that the components come off the shock.
I didn’t have a spring compressor so I went all ghetto and did it with the jack. I don’t recommend this at all, you’ll need a spring compressor as there’s no way to do this at the front. So go buy, borrow or rent one and make life easier.
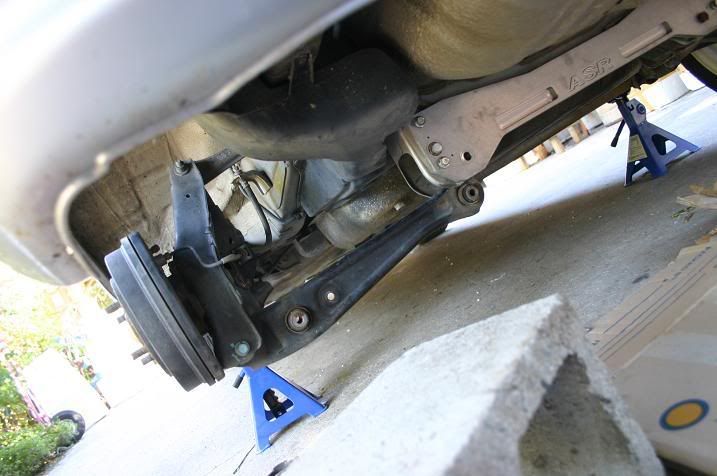
I put the struts back in place and did the top 2 bolts up tight by hand, I then placed the jack under the shock, and jacked it up to compress the unit like so.
I undid the nut on the top of the shock shaft, then slowly lowered the jack down, it worked a charm. If you do this, try and place the jack, and the bottom of the shaft exactly where the bottom of the shock would naturally sit.
OK so now you have this:
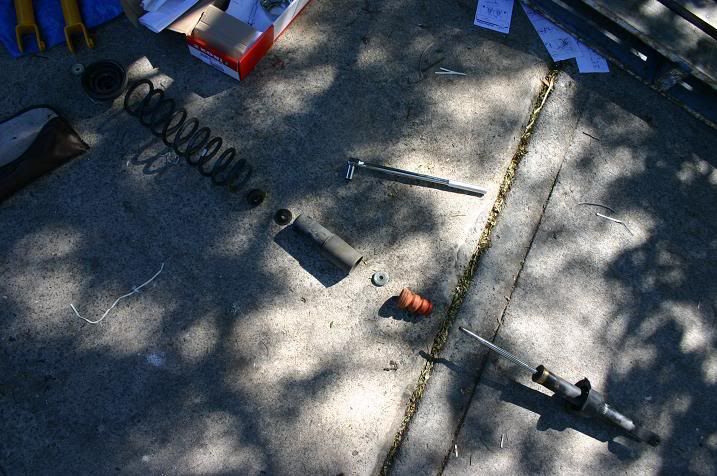
The order goes:
1. Shock
2. Bump stop
3. Washer (smaller and thicker)
4. Dust shield
5. Washer (larger and thinner)
6. Spring
7. Lower top hat bush (has a flat side and a curved side, flat side presses into the top hat)
8. Top hat
9. Upper top hat bush (has a flat side and a curved side, flat side presses into the top hat)
10. Washer (has a bit of a lip which curls up)
11. Top bolt.
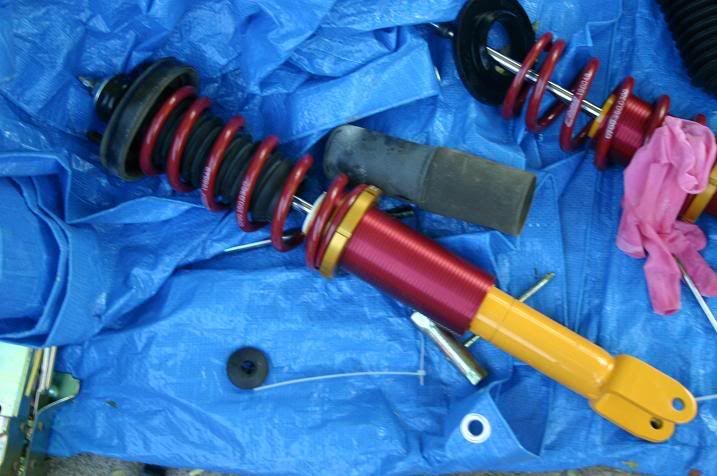
It’s now time to put together your new shock spring combo following the instructions supplied with your suspension parts.
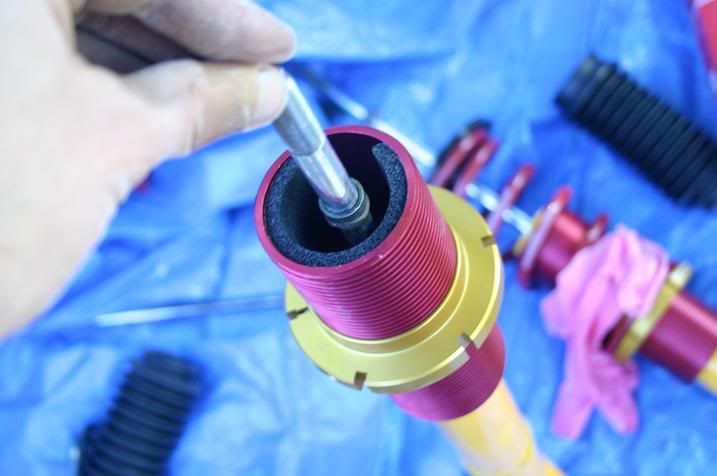
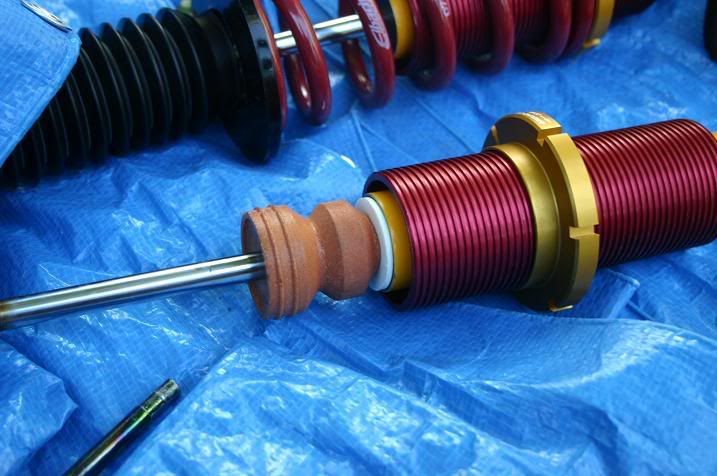
The first step was installing the coilover sleaves. This simply involved sliding the sleave onto the shock, so the sleaves ring is sitting on the shocks circlip. I decided to add a thick and wide strip of adhesive foam around the inside of the sleave, just to hold the sleave to the shock really firmly. There’s no real need (the sleave fits very firmly already), but it will stop any chance of the sleave sliding up and down the shock if the wheel gets air borne in any way. Make sure the sleaves inner ring slips over the shocks circlip properly.
The stock shocks bump stop needs to be cut in half. Cut along the green line, and use the top (thicker) half.
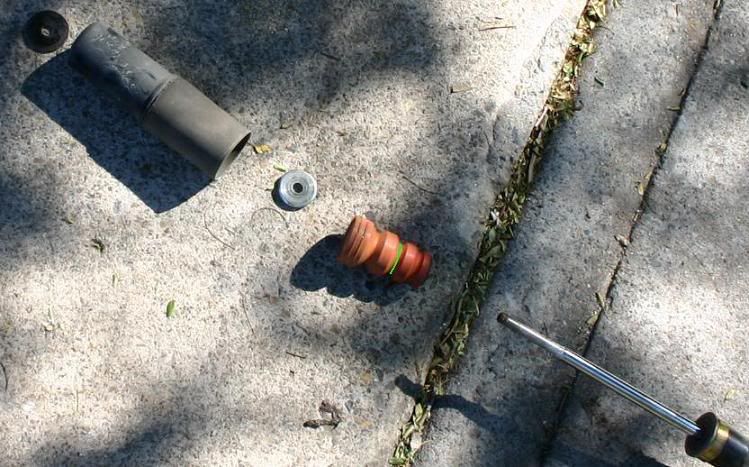
Slide the white plastic ring on the shock.
Slide the bump stop onto the shaft.
You should now have this
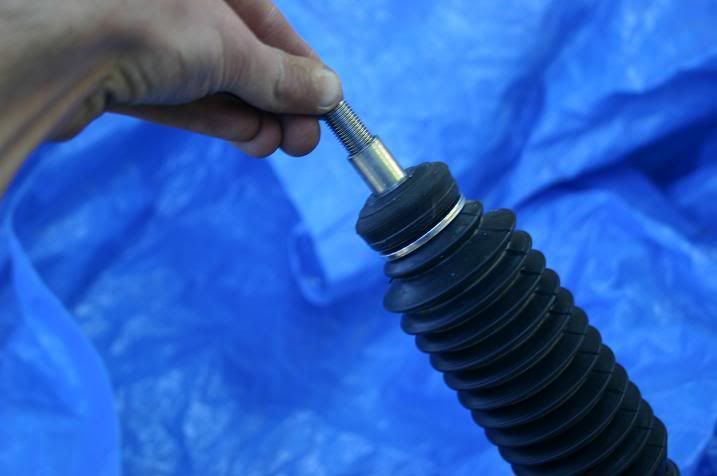
The next step would usually be to install the stock shocks dust shield on the koni's, by placing the (new) smaller thicker washer on the shaft, the dust shield (which first needs the shaft hole drilled out to 12mm), then the larger washer.
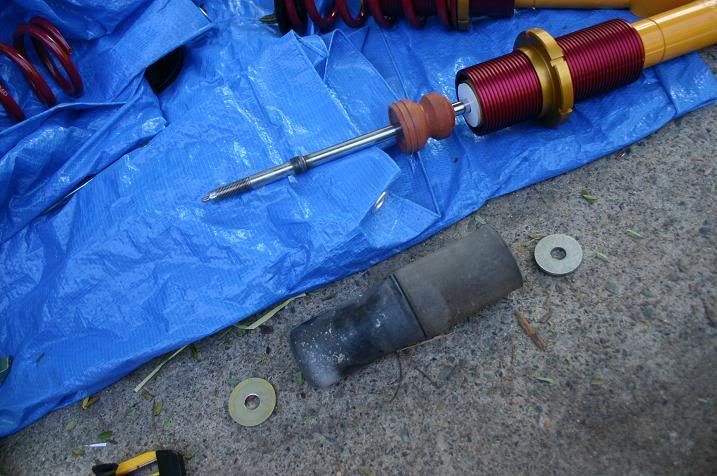
Unfortunaly you cant use the stock dust shields with the coilover sleaves. I went to our local auto parts store and got me some universal dust boots which are made for the steering rack, oddly enough they fitted the shocks perfectly. Go around to any local autoparts store and ask if they have any replacement dust boots for shocks or steering racks, youll find somthing.

I pressed the smaller washer into the dust boot, it fitted nice and tightly in the 2nd last ring, so I cut the dust boot so that the lip going over the top of the washer was as long as possible. The washer on top will hold it nice and tight.

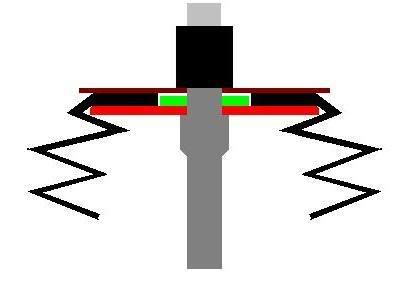
You should also add a small washer before putting the top washer on like below (small washer is green). This will reduce the clamping force on the rubber.
In my case, the rubber on my dust boot was about 3mm thick, I used a 2mm washer, so that the rubber could only be compressed 1mm or so. This means that if the top bolt was compressing everything with 100kg of force, the rubber might only see a maximum of 30kg of force, with the small washer taking up the other 70kg. No matter how much more clamping force is applied, the force on the rubber wont change as your not compressing it any further, the washer is taking the extra force.
Also to extend the life of the rubber boot, I filed the outer top edge, of the lower washer as in the drawing, so there would be no sharp edges being squeezed into the boots rubber.
Next you slide the metal tube on the shaft. Ignore the washer on top.
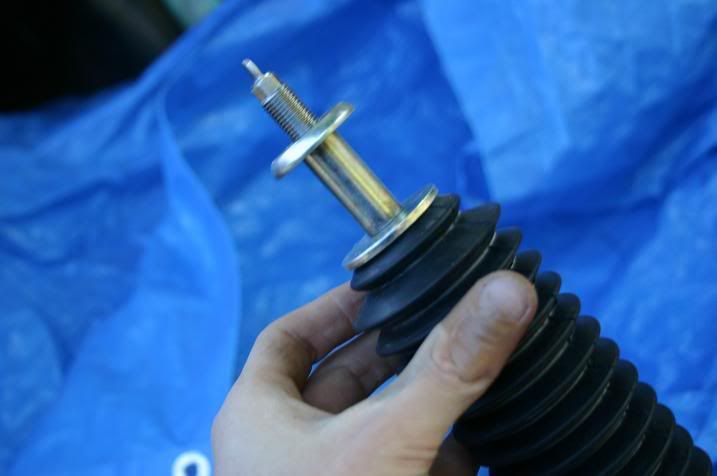
Slide the bushing that’s in the lower half of your stock top hats over the metal sleave, its on the wrong way in this pic, its meant to have the flat side facing up into the top hat. It’s a tight fit as the bushings hole is for a 10mm shaft, the Koni shaft is 12mm. A lot of people drill the bushing out to 12mm, but there’s absolutely no reason. Since the bushings being squeezed more in the top hat, the bushing will be stiffer, and it’ll hold the top of the shocks shaft firmer than usual.
Pull out the stock rubber spring isolator from the stock top hat. Replace it with the ones that came with the ground control kit. Slide the spring on the shock.
Slide the top hat onto the bushing and squeeze the top bushing over the metal tube and into the top of the top hat, face the flat side of the bushing down into the top hat.
Place the lipped washer on top of this, with the lip facing upward.
Bolt it all down with the 2 supplied bolts, torque them one at a time. I did them up to the stock shocks torque level as per my manual, because the Koni instructions didn’t state how tight they need to be.
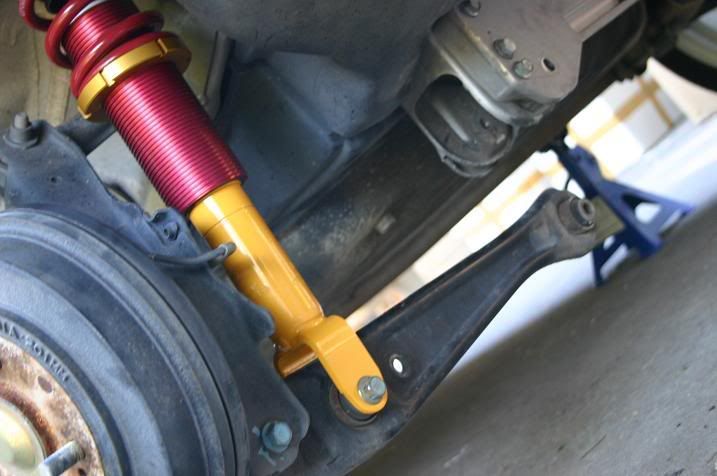
Now bolt these units into your car! (rubber boot not cable tied down in picture).
I’ve already covered how to bolt the complete unit back in up near the top of this thread, so I wont go to far into it.
Basically just:
Get the shock into place.
Do up the 2 nuts on the top hat upto correct spec.
Put in the lower shock bolt and the LCA bolt (do not tighten to the point that their clamping anything)
Adjust ride height using the adjustable perch and tighten the spring perch with the Alan key, you may need to lower it down to check, and jack it back up to adjust a few times.
Once the desired ride height is reached, lower the car onto the ground and torque the lower shock bolt and the LCA bolt up to correct specs, as per your cars manual.
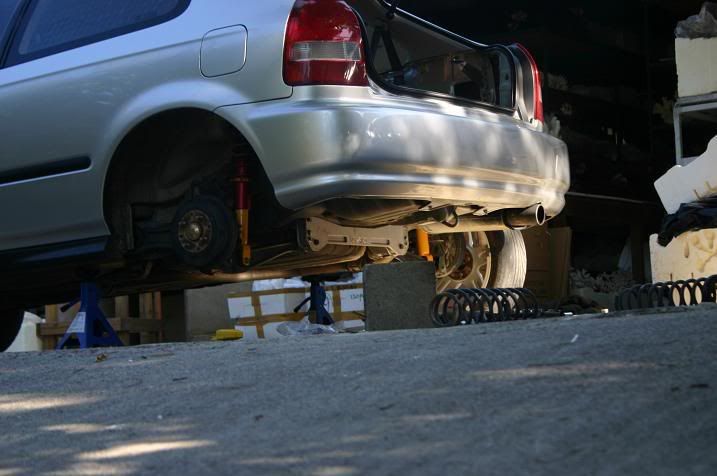
Stand back and admire your hard work from a distance! 
Last edited by Muzz; 24-07-2007 at 06:27 PM.
Back from the dead 
 Posting Permissions
- You may not post new threads
- You may not post replies
- You may not post attachments
- You may not edit your posts
-
Forum Rules
|


 Reply With Quote
Bookmarks