

Disclaimer: The following is provided as a GUIDE ONLY, and neither myself nor Ozhonda take any responsibility for the outcomes of someone else doing the following. You follow these steps at your own risk!
Parts Required :
* Boot release module
* Actuator kit
* Wire (min 4 m)
* Wire washer
Tools required :
* Screw driver
* 10 mm socket driver
* electric sticky tape
STEP I
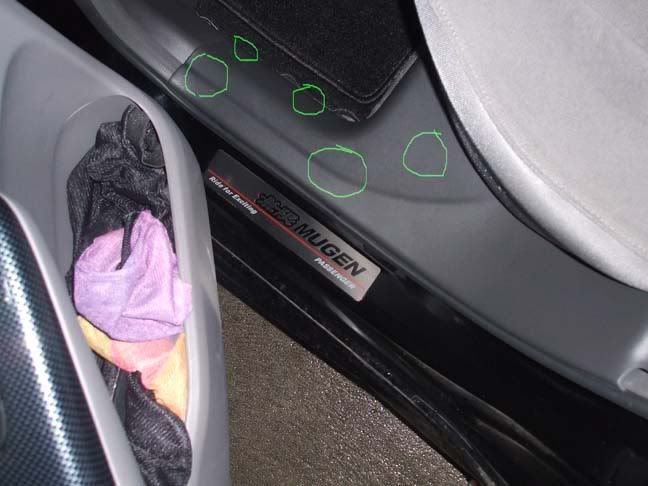
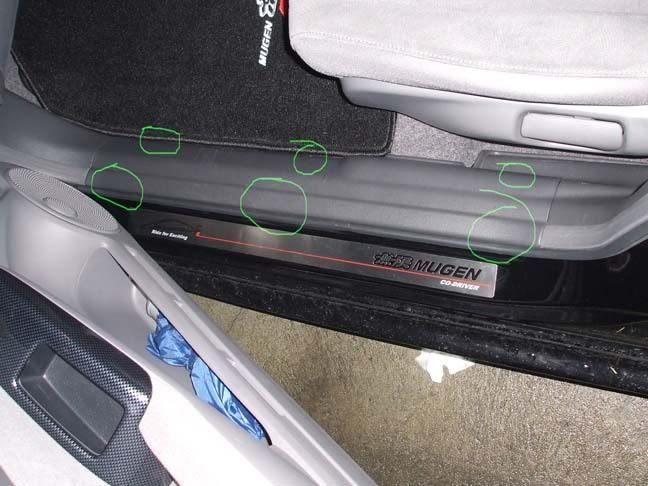
1. Remove rear left passenger side foot panel by pull out the panel (4-5 clips)
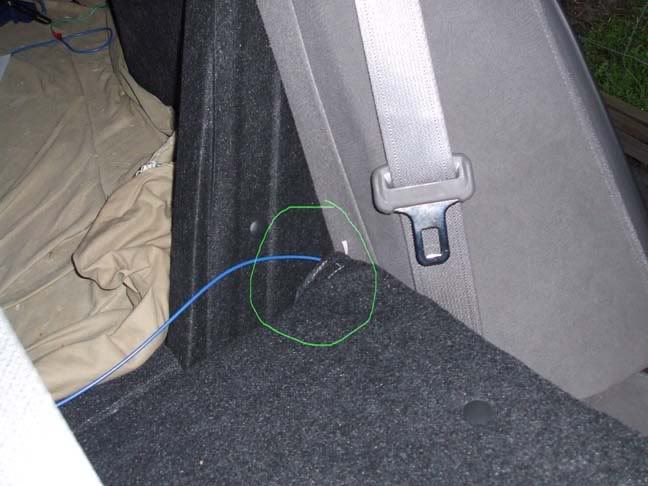
2. Open/flip rear seat, run the wire through this hole
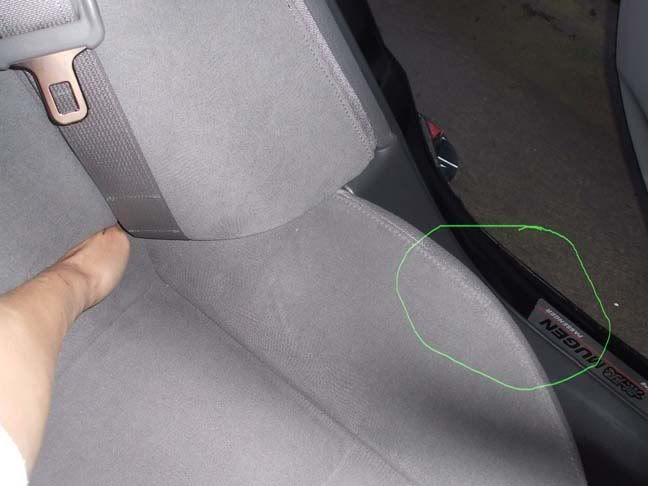
3. Put back rear seat, and put your hand in through this area (Glove used recommended), and from open foot panel, pull the wire out (see circle) - sorry, i only have 2 hands - one in the pic and another to take a pic -
4. Remove the front passenger side foot panel by pull the panel (5-6 clips)
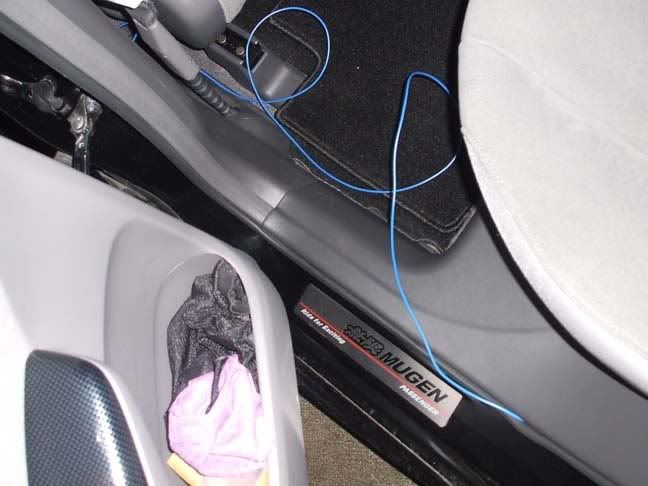
5. Run the wire to front passenger side, tie on something.
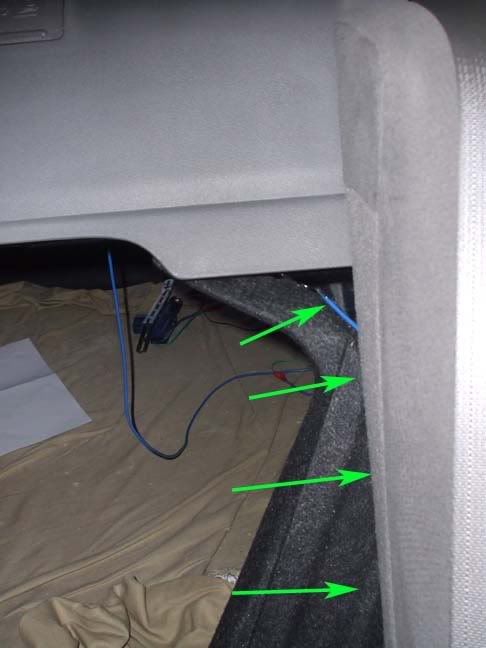
6. Tidy the wire by hide under the panel along to boot area (dont' forget open/flip rear seat again) - see arrow
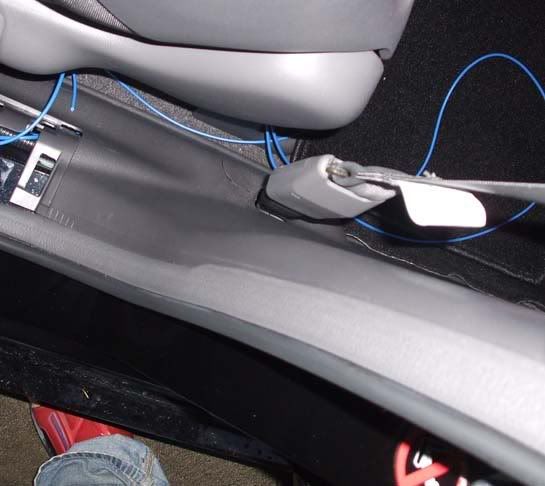
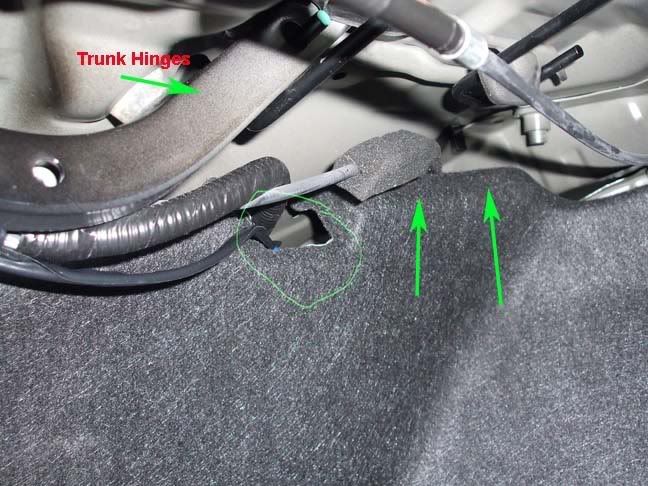
7. And the wire must come out from this hole
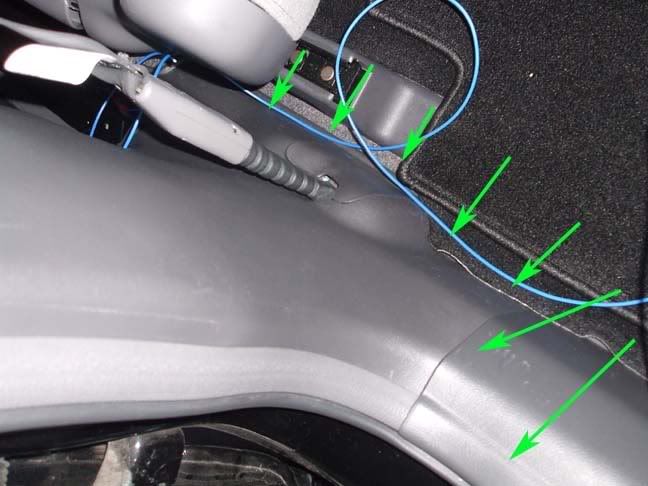
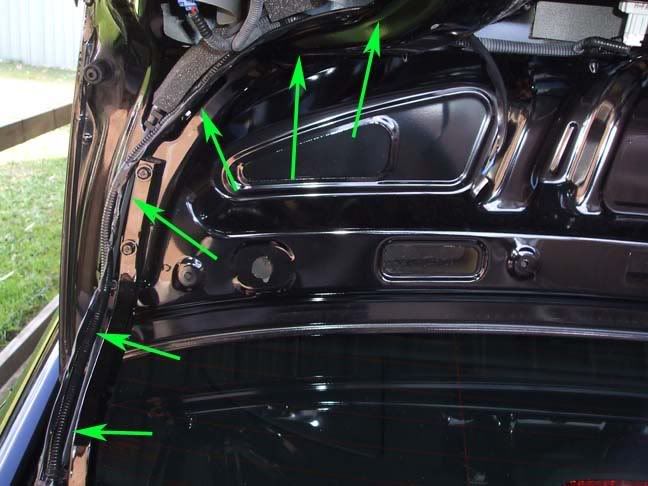
8. Continue along the hinge to the trunk area. You might need some tie cable/tape to make it tidy along the hinge
9. Put back left rear passenger foot panel, close rear seat. and REST !!!
STEP II
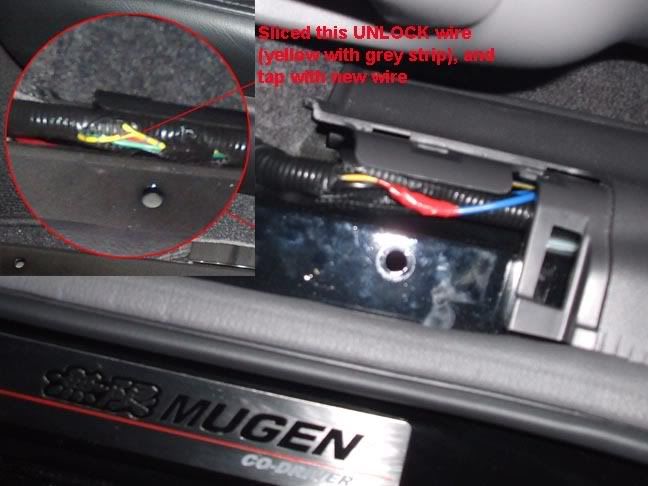
1. At the front passenger, at the side of seat, find this closed plastic cable, open it, find YELLOW with grey strip wire.
2. Slice and tap with new wire
3. Put back the foot panel and REST !!!
STEP III
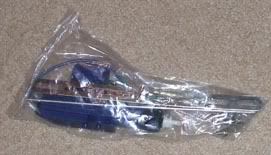
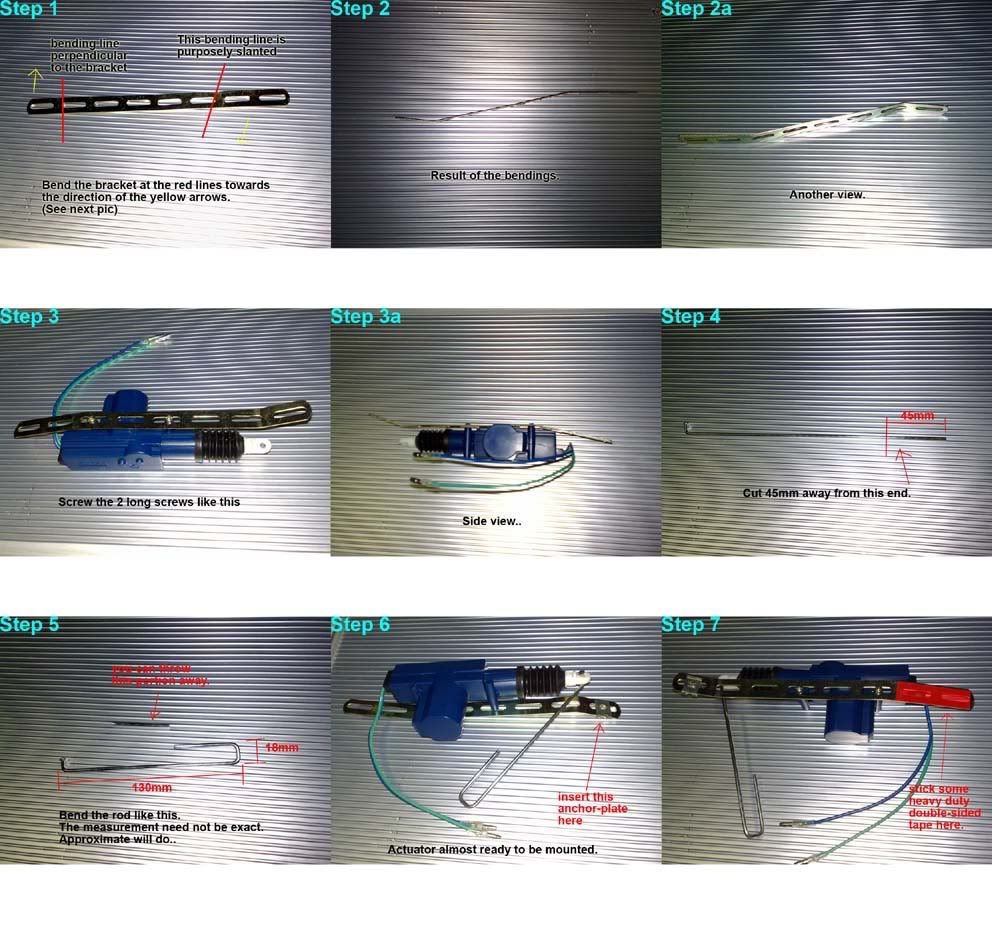
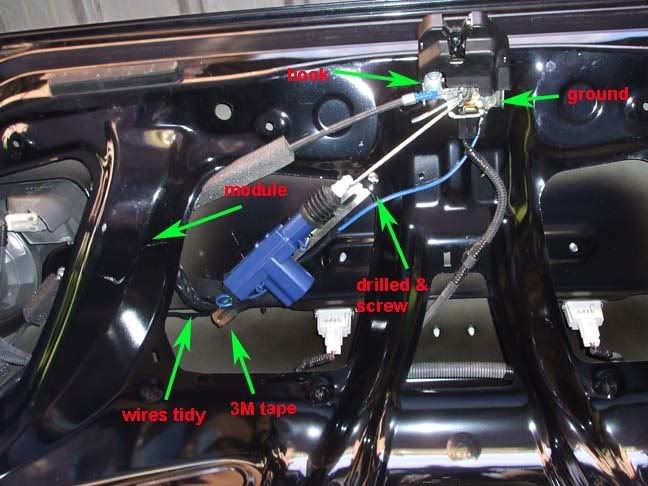
1. Prepare the actuator with this pic
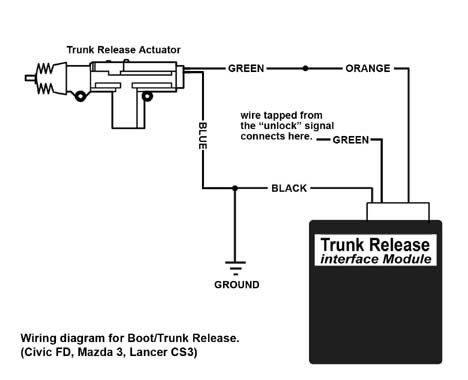
2. Connect the module with actuator and new wire, see diagram
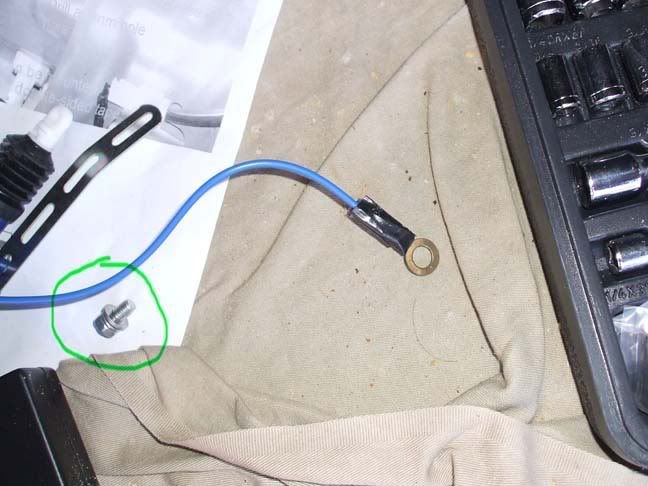
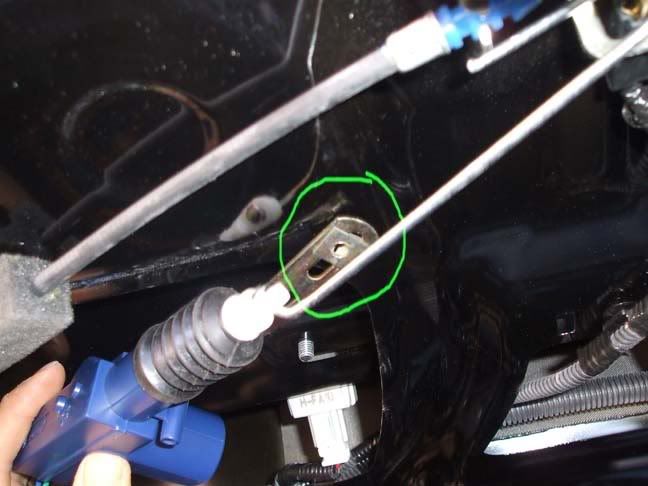
3. Put some washer tap to ground wire and remove 1 screw from trunk latch
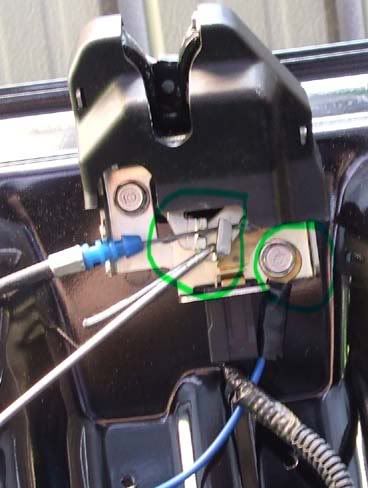
4. Hook the actuator rod to latch and connect the ground wire to the latch screw
5. Push the latch mechanism to lock, pull the actuator to full extended. try to find screw/drill spot, and drill after that.
6. FINAL step : screw and double tape the actuator, double tape the module inside the trunk(hidden), tidy up the wires.
RESULT :
To open the boot : push unlock button at remote twice (note: door lock also will unlock - so make sure lock the door after close the boot)
1. http://www.youtube.com/watch?v=_SIG0kUWWEE
2. http://www.youtube.com/watch?v=4-0wprYmBmY
It's also can open the boot by push unlock button at driver door window control button twice
3. http://www.youtube.com/watch?v=JkToiKUDsuM


 Reply With Quote
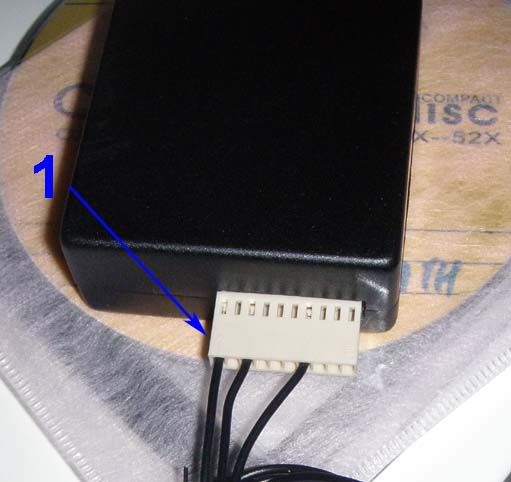


Bookmarks