|
-
-
Step 3: Reassembly
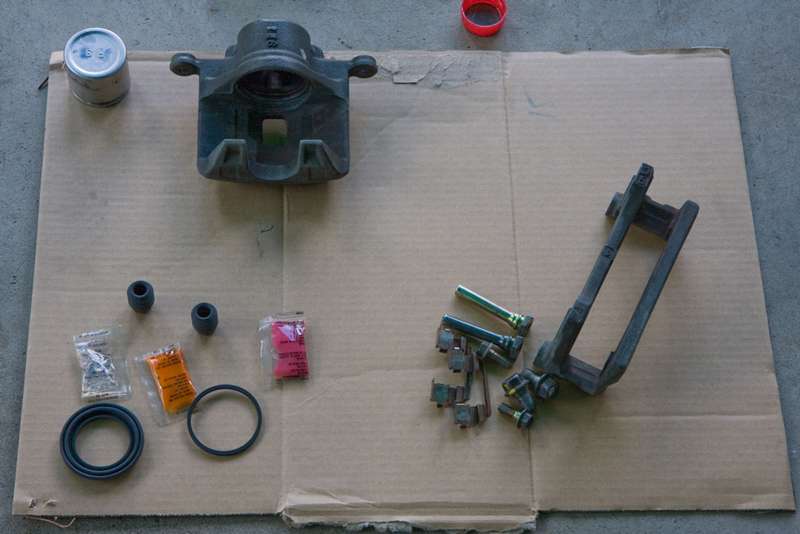
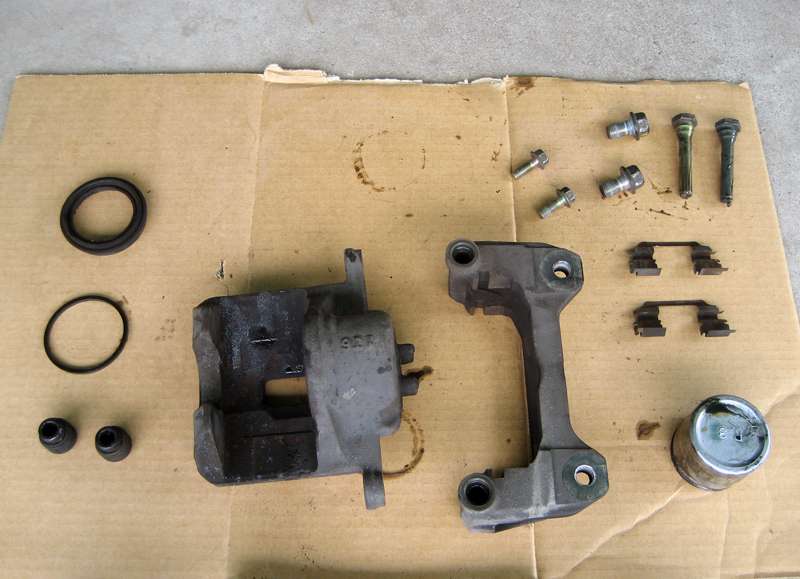
Now comes the fun part. Your caliper rebuild kit should contain the following items, mostly pictured in Figure 7:
1 piston dust boot
1 piston seal
2 slider boots
2 sealing washers
3 sachets of grease
First coat the bore of the caliper and the piston in brake fluid (this can be seen in Figure 7), I just used some RBF600 that I had lying around. Wear gloves, don't be foolish like me. Then coat the piston seal in the clear grease picture in Figure 7 and insert it into its groove, the one that is deeper into the caliper, in the caliper bore as shown in Figure 8. I then coated the caliper dust boot with the supplied rubber grease, which I guessed was the pink stuff, and inserted it into its groove in the caliper bore, which is the upper of the two grooves, as shown in Figure 9.
The next part of the reassembly is the most difficult. Getting the piston into the caliper with the dust boot correctly seated around it. The way I did it was to make a clever device to spread the dust boot out to a large enough diameter to be able to fit the piston in using a cut up aerosol can cap. The process for making this awesome tool is shown in Figure 10 stolen from someone else on the internets. Mine can be seen in the top right corner of Figure 7. Even with this special tool it takes quite a bit of fiddling to get the dust boot around the piston. Once the dust boot is around the piston and seated in the groove on the piston one can carefully push the piston into the caliper and end up with something resembling Figure 11. Be careful when pushing the piston back in that it is going in square to the bore to avoid damage to the piston seal, it should not take a great deal of effort. I used one hand to push it back in.
Figure 7: The contents of the rebuild kit
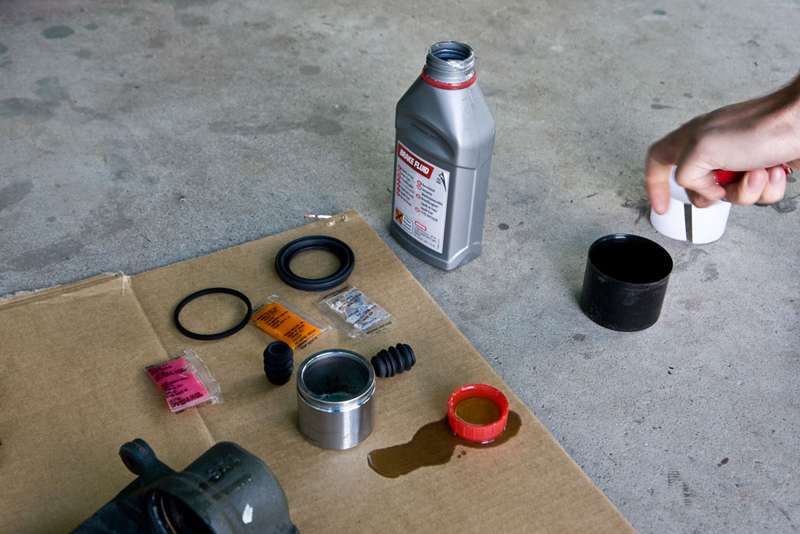
Figure 8: Piston seal in place
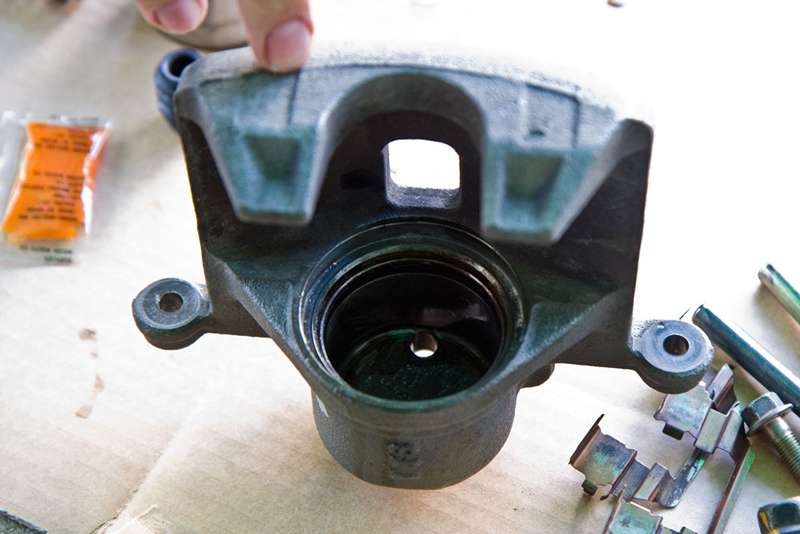
Figure 9: Dust boot in place
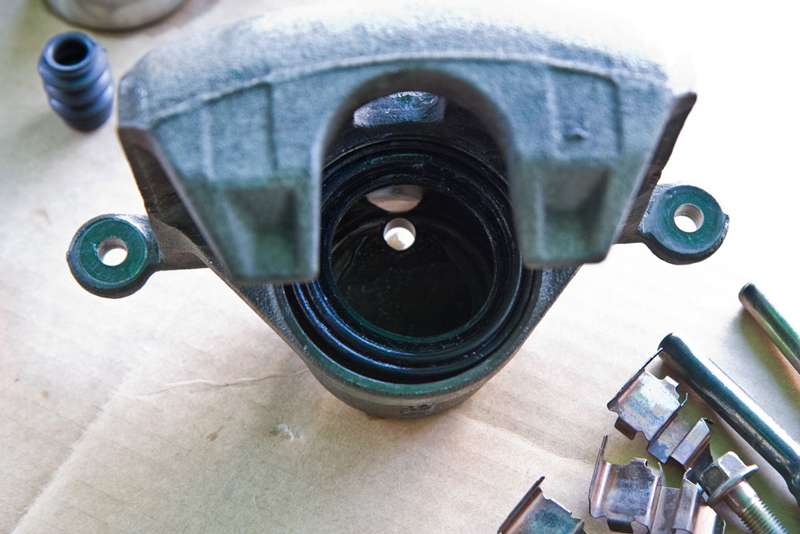
Figure 10: Making a boot spreading tool
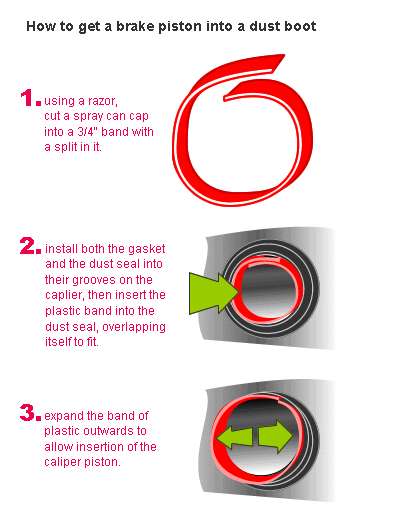
The alternative method I have read to get the boot around the piston is to place the piston against the boot and then blow compressed air into the back of the caliper to blow the boot up like a balloon and around the piston.
Finally all that needs to be done is to put the slider pins back on the caliper if they were removed and torque the bolts holding them to the desired 32Nm. The pins are then greased using the orange grease as shown in Figure 12 and the pin boots greased using the pink grease. I am not entirely sure whether I used the correct greases for each application, so before doing your own seek clarification from an authorised factory manual as to which grease is suitable for which parts of the caliper. Then the caliper body can be slid into the caliper bracket and the slider boots seated correctly. It should slide back and forth very smoothly, if it doesn't pull it back out and put more grease on the pins. One caliper freshly rebuilt as shown in Figure 13.
Figure 11: Piston in
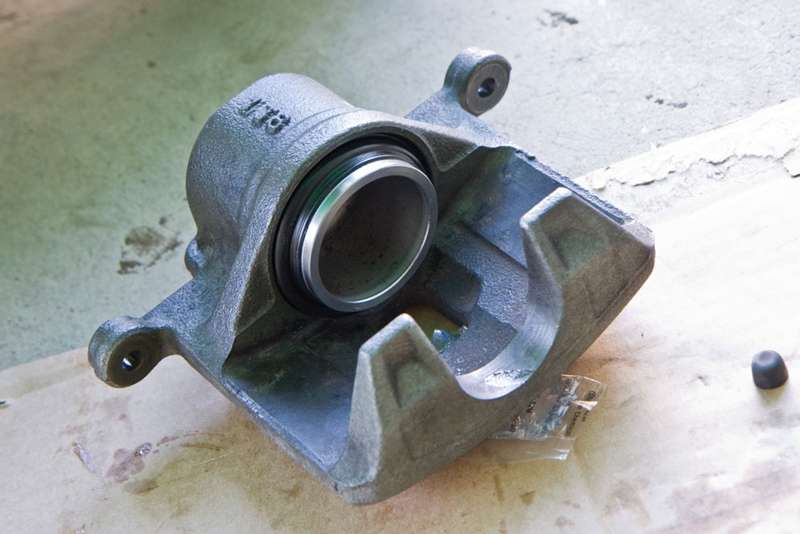
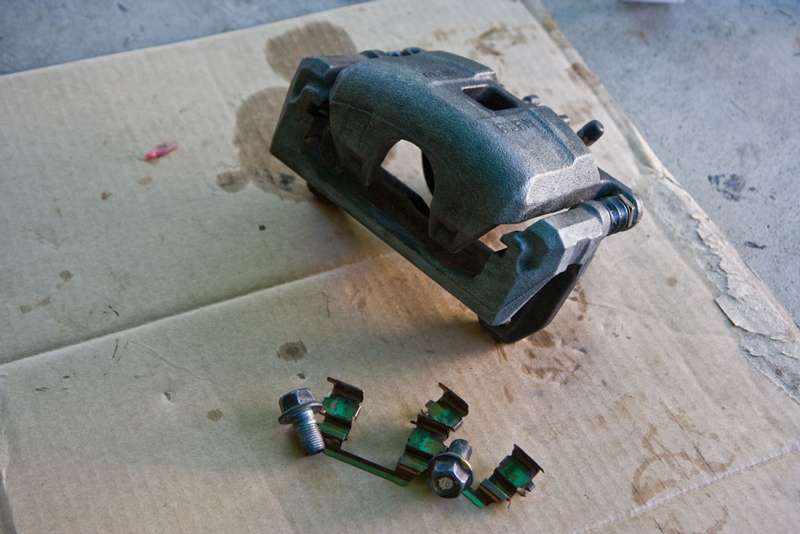
Figure 12: Slider pin in and greased

Figure 13: Completed caliper
Step 4: Refitting caliper to car
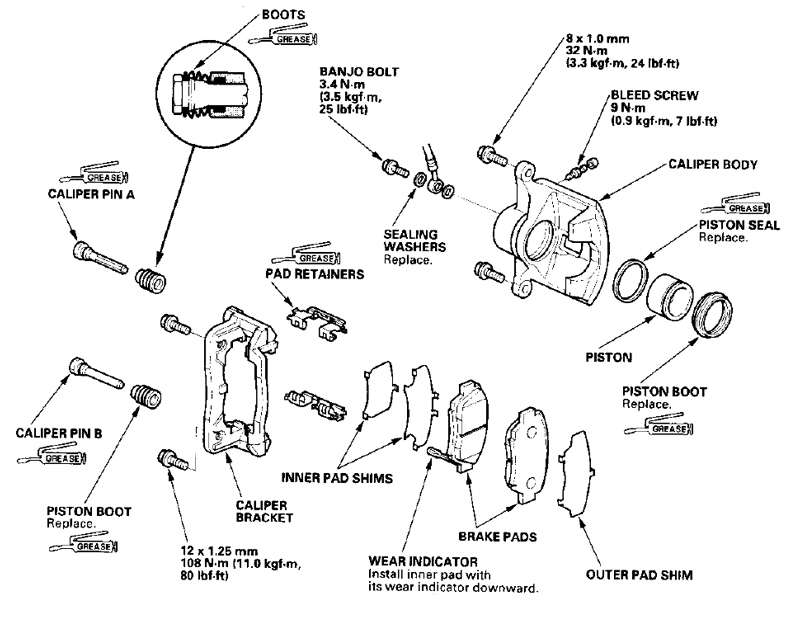
Again I have no pics of this part but basically install the caliper in the reverse order of removal taking care to torque all bolts to the recommended settings given in Figure 1. Also be sure you refit all shims and put the pads back in the same positions in the caliper to ensure no loss of braking efficiency. Also this is where the new sealing washers included are to be used, they go either side of the banjo fitting that bolts to the caliper. Once the caliper is fitted the brakes will need to be bled. Take the car for a test drive to make sure it still stops. All done.
Last edited by chargeR; 10-12-2008 at 06:17 PM.
-
Let me know if anything needs clarification or if you believe any part of this DIY to be in error.
-
Green block gangster
Array
nice work, looks good,
you can use a clamping tool to gently clamp the brake line to stop it leaking, ( <$15 from supa cheap or repco )
you may want to point out that you should inspect the piston and bore for corrosion ( make sure they are not pitted or badly scored )
also take care when removing the old seal from teh bore not to scratch the bore
please add the OH disclaimer
Last edited by ECU-MAN; 10-12-2008 at 04:53 PM.
-
 Originally Posted by ECU-MAN

nice work, looks good,
you can use a clamping tool to gently clamp the brake line to stop it leaking, ( <$15 from supa cheap or repco )
you may want to point out that you should inspect the piston and bore for corrosion ( make sure they are not pitted or badly scored )
also take care when removing the old seal from teh bore not to scratch the bore
please add the OH disclaimer
Thanks I added those changes and the disclaimer  . .
-
can u be more specific explain on where are we need to use the 'pink' colour grease ?
Last edited by dynosaur; 10-12-2008 at 05:43 PM.
 Yo~~! Vtec go ! go ! go !
Check this :
Garage Sales ( Brand New items ) For sale : http://www.ozhonda.com/forum/showthread.php?t=83889
-
Originally Posted by dynosaur
can u be more specific explain on where are we need to use the 'pink' colour grease ?
Well the rebuild kit came with 3 different sachets of grease: one pink, one orange, one clear.
The only one that said what it was to be used for was the pink one which stated for use on rubber like the boots. I used the orange one on the sliders because that is what colour some of the grease already in there was, and I used the clear one on the piston seal because it was the only one left  . .
-
-
are there going to be any different with or without inner & outer pad shims (brake pads)?
Yo~~! Vtec go ! go ! go !
Check this :
Garage Sales ( Brand New items ) For sale : http://www.ozhonda.com/forum/showthread.php?t=83889
-
does NSX caliper rebuild kit can get in Aus ?
(as i know the NSX caliper is twin blocks, correct me if i m wrong)
Last edited by dynosaur; 10-12-2008 at 10:27 PM.
Yo~~! Vtec go ! go ! go !
Check this :
Garage Sales ( Brand New items ) For sale : http://www.ozhonda.com/forum/showthread.php?t=83889
-
Originally Posted by dynosaur
does NSX caliper rebuild kit can get in Aus ?
(as i know the NSX caliper is twin blocks, correct me if i m wrong)
If you can find a part number and have a sympathetic local Honda parts department you should have no trouble getting such a rebuild kit. Any Honda parts department should be able to look it up on their system and order it in anyway.
Originally Posted by dynosaur
are there going to be any different with or without inner & outer pad shims (brake pads)?
The caliper I was rebuilding did not have the caliper backing plates/shims with it but I did use my existing ones when I swapped the caliper back on to the car .
-
hi chargeR,
I got some question...
do u know what is the re built kit part number dc2 ITR calipers ?
thanks
 Posting Permissions
- You may not post new threads
- You may not post replies
- You may not post attachments
- You may not edit your posts
-
Forum Rules
|


 Reply With Quote
Bookmarks