|
-
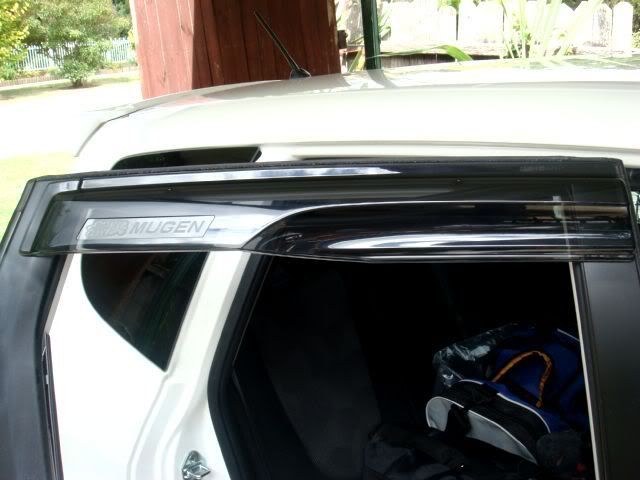
DIY - Installing Mugen Visors (Demoed on a Jazz)
hey all, this is the follow up to my review on the replica vs original mugen visors. the instructions supplied by mugen are only in japanese but by looking at the images you can figure out how to do it. heres my explanation as to how i did it.

Firstly, grab one of the supplied clips and remove the pin, it's not too hard so pull with just enough energy, otherwise if u lose grip of it and it goes flying off somewhere, ur really gonna hate urself! position the clip in the position shown and push the pin through from the outside of the visor through to the inside, it reaches a point where the pin pops through and expands the slot which it goes through, exactly like how a pop-rivot works. do this on both clip slots of each visor.

next, open you door, roll the window down and pull the rubber out as shown above. don't fear, ur not going to stuff anything up or create a potential for rain leakage. only pull out whats shown, there is no need to pass the corners, it'll make it a little harder to put back in and i believe there is some adhesive material in the corners, don't wanna disturb that.


in the contents of the visor is a PVC primer, grab it and give the contact sections of the door where it'll meet the adhesive a good wipe. if the sections have a lot of dirt on it, give it a good wipe with fine microfibre cloth, then use the primer. on the third pic u can compare the left to right, primed and unprimed respectively. you want to always save this step of each door installation to last to minimise the time/chance for dirt to make contact again with ur newly primed surfaces. also, if possible keep the primer "cloth" in its pack and in a takeaway container or something air tight, otherwise it will dry up eventually and by the time u reach the last door it won't be as effective anymore.


with the visor ur going to install, peel back the part of the adhesive and fold it in a way that it'll hold its position and sticking out/away from the visor.


in the first pic u can see the shot of the side cavity of the door where ur clips will sit. grab ur visor and carefully bring it close to the door, as vertically parallel to the window frame as possible. u want to be able to fit the trough/dip of the clip onto the black section of the door (obviously may be different for other vehicles, but basically the most outer section) and push the perpendicular flat part of the clip into the gap of the door where you pulled the rubbers out of. you might find that sometimes the adhesive touches the window frame first before u get the clip on, just pull it off gently then try again. keep it minimal cause every contact reduces the adhesive's effectiveness.


once u have the clips on and firmly pushed up into the door cavity, push the rubbers back in. u'll then have the visor sitting nicely with the clips on, next u gotta peel the adhesive guard off. hopefully u peeled and folded the guard back well so that it'll be sticking out like shown. if you didn't, just grab a thin flat head screw driver and peel it out enough for u to be able to pinch it. now simply peel the guard completely of whilst running ur finger just behind it and pressing down on the contact sections. at the same time, push the visor up so that it sits parallel with the top of the window frame. i noticed the instructions said something about keeping a 2mm gap between the top of the window frame and the top of the visor, but i had it sitting perfectly on top of each other instead. when ur done, give it an overall check and press and test ur windows to make sure they sit back into the rubber correctly. the parts where the clips are will be a little bit tighter than the rest of the sections.
now your done! stand back, and enjoy the fruits of your labour and get onto the next one! really enjoy it once ur finally done all four, take photos then post them up!
-
good writeup buddy... thanks for the DIY... i might get one too... :P
-
nice write up once again!
i see your bouldering bag there robbo :P
- [ * AℓвєятяoN ] illegal street racing is bad hao map ! says:
haha. i'll marry you.
||nam|| says:
ok thats just wrong
-
lol yeah it pretty much lives in there, ready for climbing anytime!
-
Bought from: Taleb Tyres, scyt7e 
-
great write up chigerG..
im thinking of getting them mugen visor soon for my car and with your instruction.. im sure it will turn out good..
cheers mate!
-
wow... this is exactly what i need... the mugen visor just arrived this afternoon...
and all i got is japanese instruction... lol.....
thanks so much...
 Posting Permissions
- You may not post new threads
- You may not post replies
- You may not post attachments
- You may not edit your posts
-
Forum Rules
|


 Reply With Quote
Bookmarks