|
-
DIY: Tranny removal and Input Shaft Bearing change
Disclaimer: The following is provided as a GUIDE ONLY, and neither myself nor Ozhonda take any responsibility for the outcomes of someone else doing the following. You follow these steps at your own risk!
OK, so this kills two birds with one stone. THe first part of taking the tranny out is the same procedure for changing a clutch.
Aim: Remove transmission to change Input Shaft Bearing (ISB) and any other bearings.
Required:
(Sorry if I haven't mentioned tool/bolt/socket sizes as I don't remember them exactly!)
Tools
- A good set of sockets from 9mm upto 32mm
- 3/8 or 1/2inch (recomended) drive ratchets
- Socket extensions to get into those hard to reach places
- 1/2inch Breaker bar
- Hex key for interlock guide bolt
- Flat and phillips head scredrivers
- Torque wrench
- Trolley jack
- Axel stands
Other
- Around 2.5 to 3L of Manual Tranmission Fluid (MTF)
- High temp CV joint grease
- Hondabond or equivalent sealant to seal up the transmission housing
- Input Shaft Bearing (duh!)
- Rubber oil seal under the ISB
- Any other bearings that might need to be changed (check them now cause you don't wanna do this again!)
Ok so lets do it!
Steps:
1. First we need to jack up the car and support it with axle stands. Then take both rims off and disconnect the negative terminal from the battery.
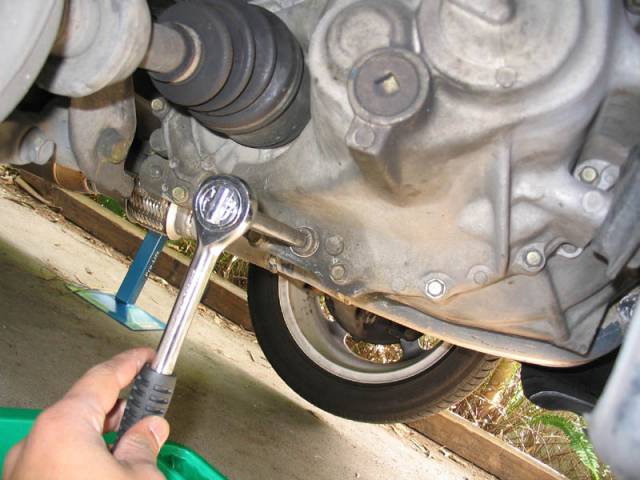
2. Next we need to drain the gearbox oil. With the car properly supported by jack stands, look through the driver side wheel arch and undo the oil drain bolt till all the oil in the gearbox is empty.
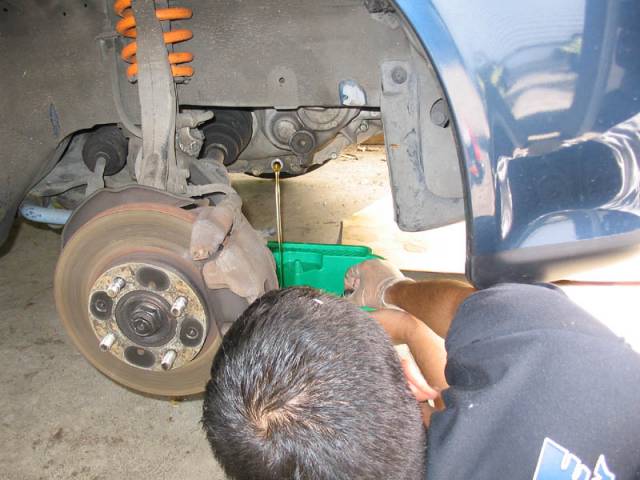
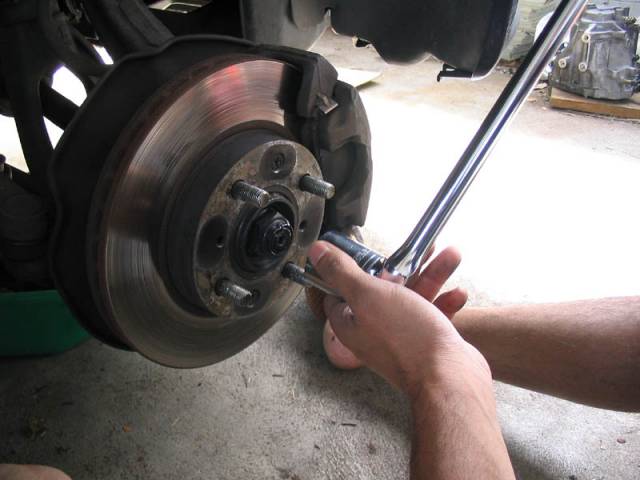
3. Next, undo the 32mm hub nut that holds the driveshaft to the wheel hub. Use a flat head screwdriver to lift up the tab of the hub nut that keeps it from spining. Once this is done, unscrew the 32mm hub nut. You might need an air tool for this, but otherwise a breaker bar for sure. There's a few ways to remove this without an air tool, reply back and I'll tell you how.
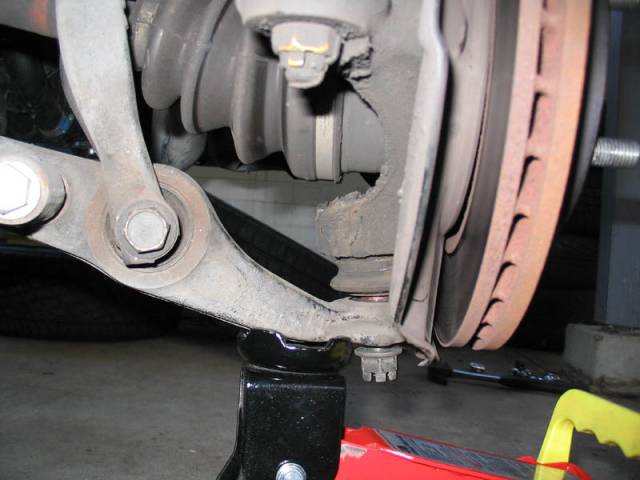
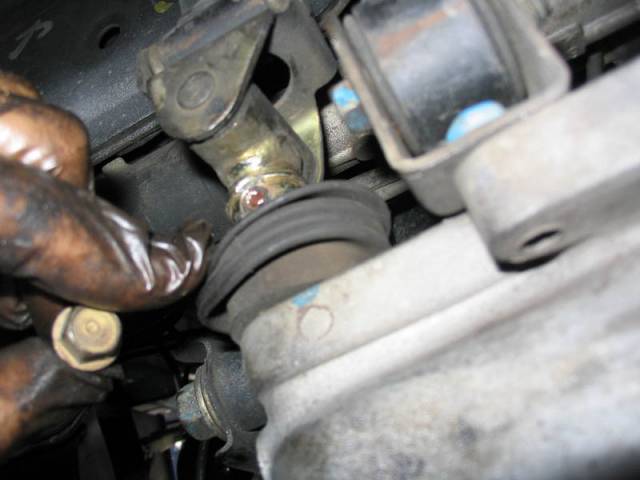
4. We now need to pop the lower ball joint out. Many people have trouble with this. Most people tend to hammer the crap out of the lower control arm (LCA) to pop the joint but there is an easier way. Firstly, jack the entire hub assembly up by placing the jack under the LCA. Then, take out the cotter pin going through the castle nut at the bottom of the ball joint. Undo the castle nut but don't take it off, leave it a few turns on the ball joint bolt. Jack the hub enough so you can wedge the end of your breaker bar (or ratchet/anything solid) between the lower control arm and ball joint holder like so:
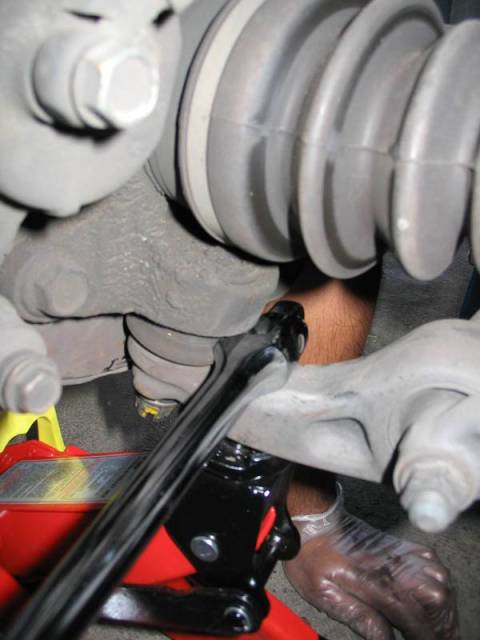
Make sure its sitting securely. Then lower you jack and the joint should pop. If it doesn't, just use your foot and give the wheel hub a whack straight down. I took a little video of it and it sounded like this when the joint popped. Ball Joint Vid
The popped ball joint should look like this:
5. Once the ball joint is popped, push the tip of the axle through the centre of the hub (use an extension and a hammer to hit it through if its hard to just push it) and let the drive shaft sit out like so:

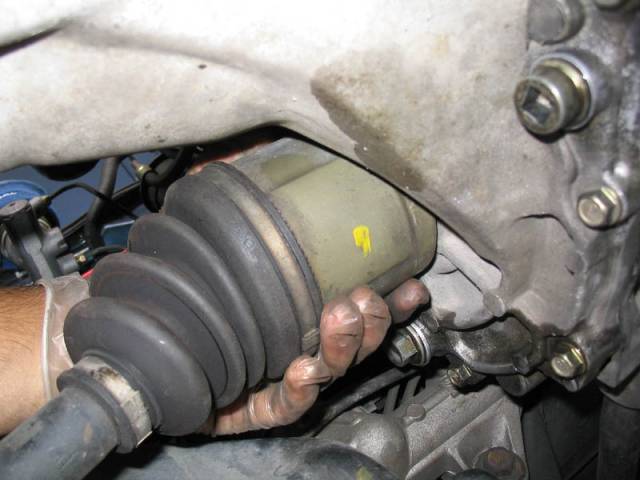
6. Next we need to seperate the driver side driveshaft from the transmission housing. When doing this, NEVER just pull on the shaft as you will pop the joints! To get it loose, you will have to wedge a screwdriver between the transmission casing and the inboard joint to pry it apart from the casing. Hold the driveshaft like so when prying it/pulling it out:
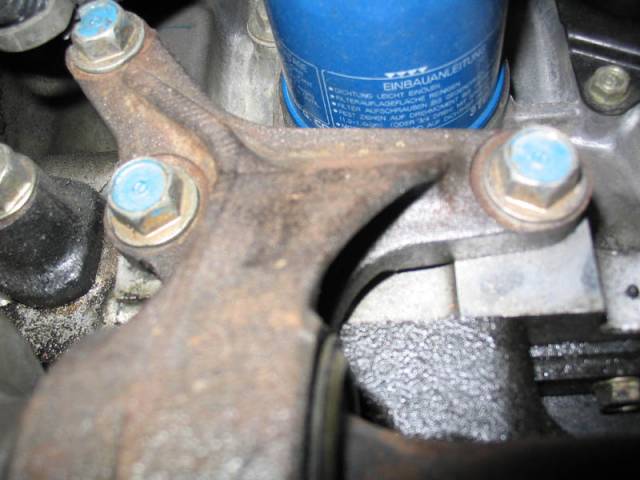
7. The passenger side driveshaft and intermediate shaft are a bit easier. After you have popped the passenger side lower ball joint and seperated the axle from the hub, simply undo the 3 bolts near the oil filter that hold the intermediate shaft in place. Once these are undone, you can just slide the passenger side driveshaft and intermediate shaft out together as a single piece. These are the 3 bolts holding the intermediate shaft:
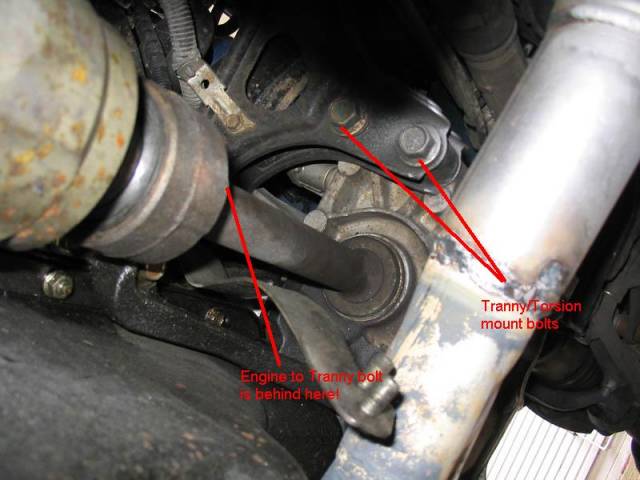
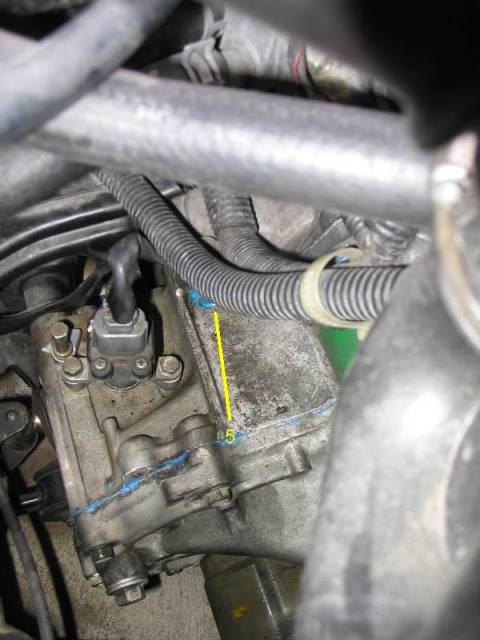
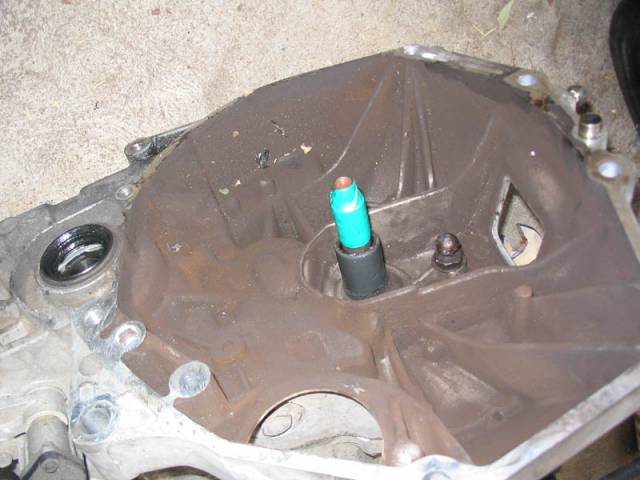
8. While we are under the car, we might as well take out the 2 bolts that connect the rear tortion mount to the tranny. There is also another bolt that connects the engine to the tranny. I didn't get a chance to take a pic of it, but i've marked where it is in the pic.
9. While we are still under the car, there are another 3-4 bolts that hold the flywheel cover in place (Sorry I haven't got a pic, but they are pretty obvious!)
10. Next we need to undo the shift linkage(s). There is only one rod for changing gears, the other one is a stabiliser. The stabiliser comes off easy by simply undoing the bolt. Undo it and move it out of the way.
The next bit is a bitch to do. You basically have to whack the spring clip out (use a hole punch or the like, i used a bolt that I had lying around) so you can seperate the spring clip. It requires a heck of a lot of pounding to get out!!! I actually couldnt be bothered pounding it under the car, so I undid the linkage at the base of the shifter and lowered the tranny with the linkage still attached to the tranny.
(Below: Shift linkage on the left, stabiliser linkage on the right)
11. Once this is done, get out from under the car and move towards the top. Firstly you need to unplug the following connectors from the top of the transmission housing. (It is best that you take out your airbox and intake arm to get easy access.)
A. Vehicle speed sensor (VSS)*
B. Backup light switch*
C. O2 sensor connector
D. The two connectors going to the back of the starter
*You do not have to take these sensors out yet, just unplug their connectors
12. Next we take out the starter motor. There are two bolts that hold the starter motor in place on either side of the starter. Take them out, and then the starter motor should just slide out.
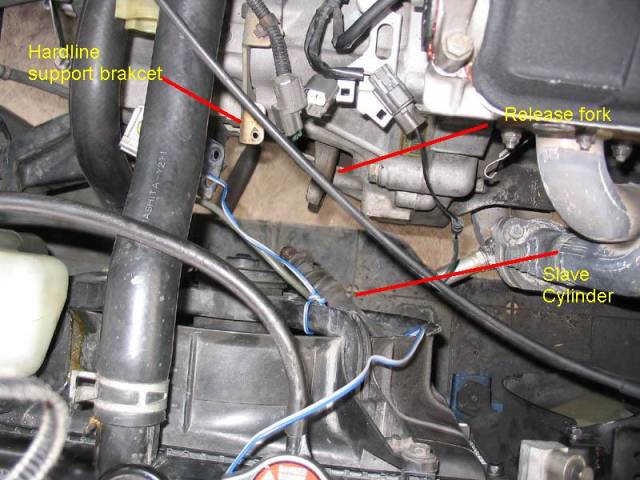
13. Now lets take out the clutch slave cylinder. Firstly remove the dust cover that protects the slave cylinder piston and the release fork. Then undo the 2 bolts that hold the slave cylinder hardline in place. Next undo the 2 bolts that hold the slave cylinder in place and then you can move the slave cylinder out of the way. We just tied the slave cylinder to the radiator fan bracket with some old wire! Be very careful that you do not bend the clutch hard line and also make sure you don't operate the clutch once this is done!
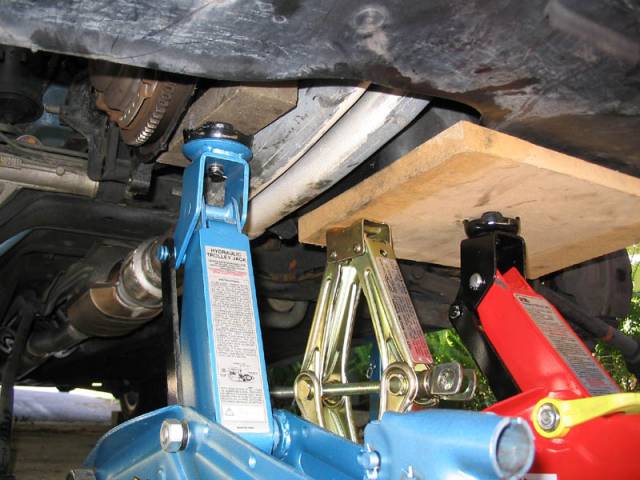
14. Now lets proceed to removing the tranny from the engine. We need to support the engine first, so place a piece of wood under the sump, and use a jack to support the engine under the sump (the wood prevents the sump getting damaged by the jack). You can use your trolley jack or even the stock honda jack. Jack it up till the engine/tranny rise up a little so you know for sure the jack(s) are taking the weight. I was paranoid so I used a few jacks I had he he he. Looks a bit like something from a construction site eh?
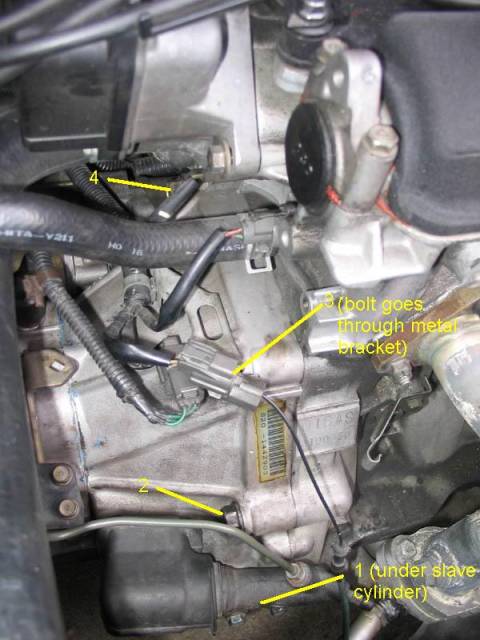
15. With the engine/tranny properly supported, lets get to seperating the tranny from the engine. Take out the 5 bolts that hold the tranny to the engine. I've numbered them the best I can in the pics (note there is one bolt under where the slave cylinder sits #1.
16. Next are the transmission mounts. THere are two on the driver side. The top mount and the front mount. Around now is a good time to put another jack under the transmission to help support it while you take it out. The tranny is not all that heavy, but its weight distribution makes it hard to handle.
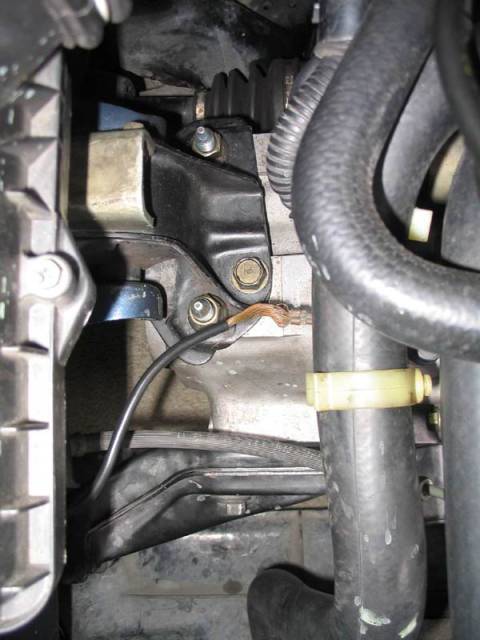
Take out the earthing cable that connects from the car body to the transmission first (see pic below), then undo the 3 bolts that hold the top mount to the transmission.
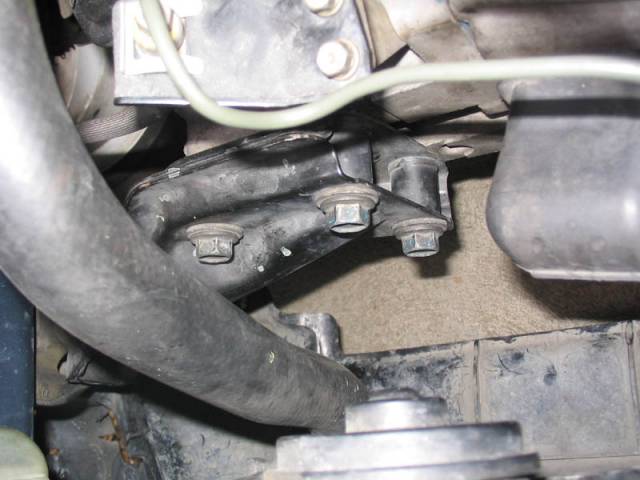
17. The undo the 3 bolts that hold the front tranny mount to the tranny.
18. To remove the front mount completely, there are two bolts that go into the body (sorry no pic, but once you pop your head under the car and move away the splash guard you'll see it!)
Now all the bolts are out and the tranny is ready to be seperated
19. Lean over the driver side front quarter panel and (with a jack positioned with some wood on it, under the tranny) shake the tranny from side to side to get apart from the engine. We found the best way was to use a hammer and hit against the opening for the release fork a few times, then do the same on the opposite end, hiting the tranny against the diff casing. Once it is loose, make sure you support it properly as you slide the tranny out. Putting excessive weight on the input shaft splines could damage not only the splines and the input shaft, but also your clutch!
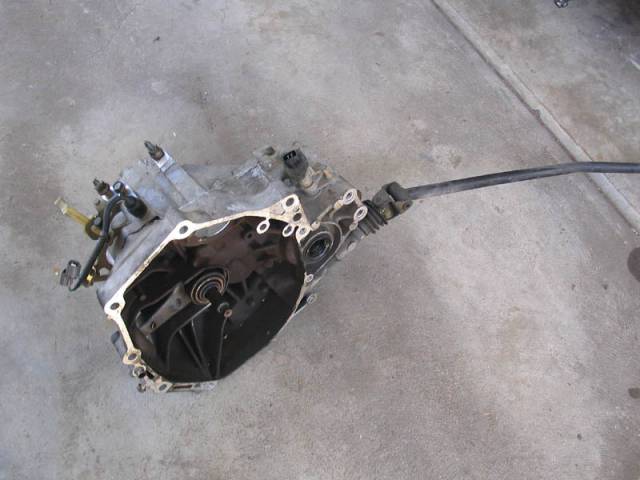
20. As I said before, I didn't seperate the shift linkage from the tranny, so once the tranny was out, it looked like this:
21. If you are going to do any work on the tranny, I recommend you tape up the input shaft splines to protect it. I used some electrical tape on it.
Now that the tranny is out, lets get started on opening it up and changing the ISB!
Last edited by wynode; 25-08-2008 at 09:59 PM.
Reason: Ball Joint Vid URL updated
Tags for this Thread
 Posting Permissions
- You may not post new threads
- You may not post replies
- You may not post attachments
- You may not edit your posts
-
Forum Rules
|


 Reply With Quote
Bookmarks