

Disclaimer: The following is provided as a GUIDE ONLY, and neither myself nor Ozhonda take any responsibility for the outcomes of someone else doing the following. You follow these steps at your own risk!
So here's a quick run down of what I did to make my shift boot a little less tacky.
Required:
- Screwdriver
- Needle
- Coloured thread
Time Required:
2 hours, give or take 30 mins depending on your sewing skills.
Steps:
1) First of all, you're going to need to take your shift boot off your car.
To remove your centre console in an EK, follow the steps from Fr3aKi3's thread.
(For other models, search 'em up)
http://www.ozhonda.com/forum/showthr...andbrake+cover
2) Unscrew your gearknob, pull the handbrake cover backwards, then up to take it off.
Once that's taken off, the plastic part which has your shift boot attached should come right off with a bit of wiggling.
3) Turn the plastic part with the shift boot over. You should be able to see 2 screws which hold the shift boot in place. Unscrew those.
4) You'll have your shift boot detached.
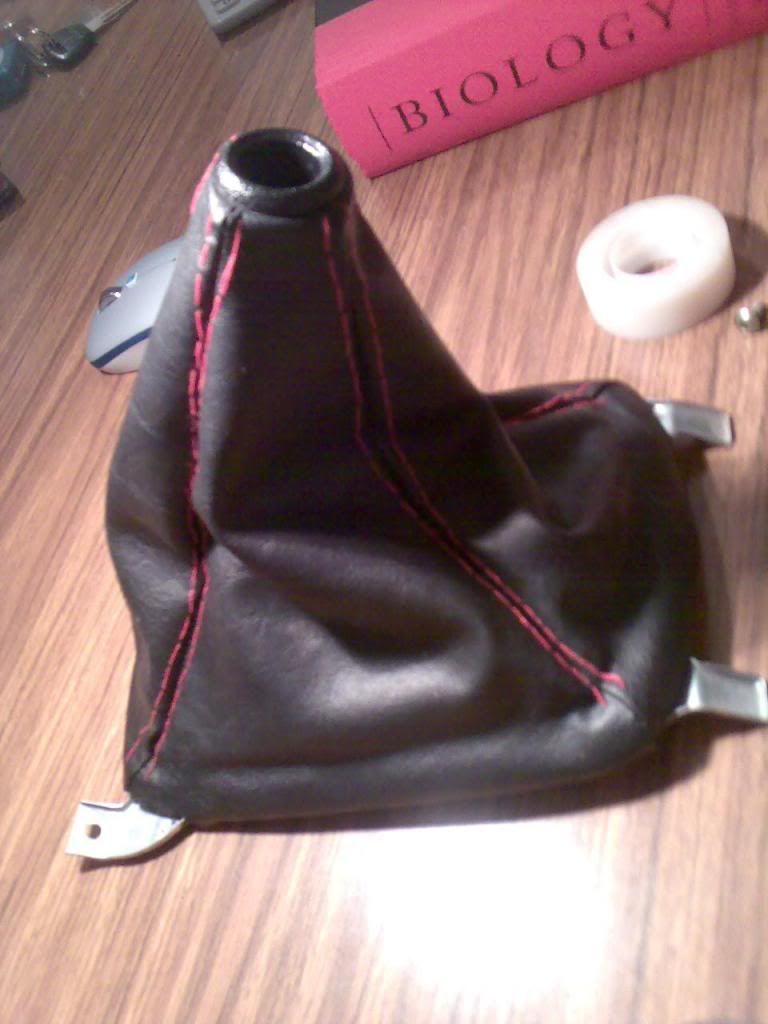
5) Grab your thread and needle and start threading from the bottom up. The way to thread it is quite straightforward. Over and under. This will take a long time.
Depending on how your shift boot is connected to the metal housing, you may be able to just pop it off which will make it much easier.
Don't worry the lines not being completely 100% straight. When the shift boot goes back on, it'll fold and you won't be able to tell the difference.
Good arts and crafts exercise I think.
-Tom


 Reply With Quote
Bookmarks