|
-
Custom AP1 tail lights...Here is how I made mine
Ok you have seen many AP 1 owners modify their cars to have AP 2 tail lights. I did not want to cut up my car and I wanted some stand out tail lights so I cut up a set of AP 1 lights and fitted custom LED assemblies.
This is how I did it . Not for the feint hearted as it took maybe 40 to 50 hours and a lot of fiddly experimentation.
Obtain a set of tail lights (unless you want your car unuseable for a few weeks)
Instead of a dremel, I used a thin , flat blade like a stainless steel .2mm thickness mixing spatula and heated this to red hot in a gas BBQ camping stove. You go through maybe three cans of gas to cut through the tail lights. Be prepared to breathe in a bit of toxic fumes.
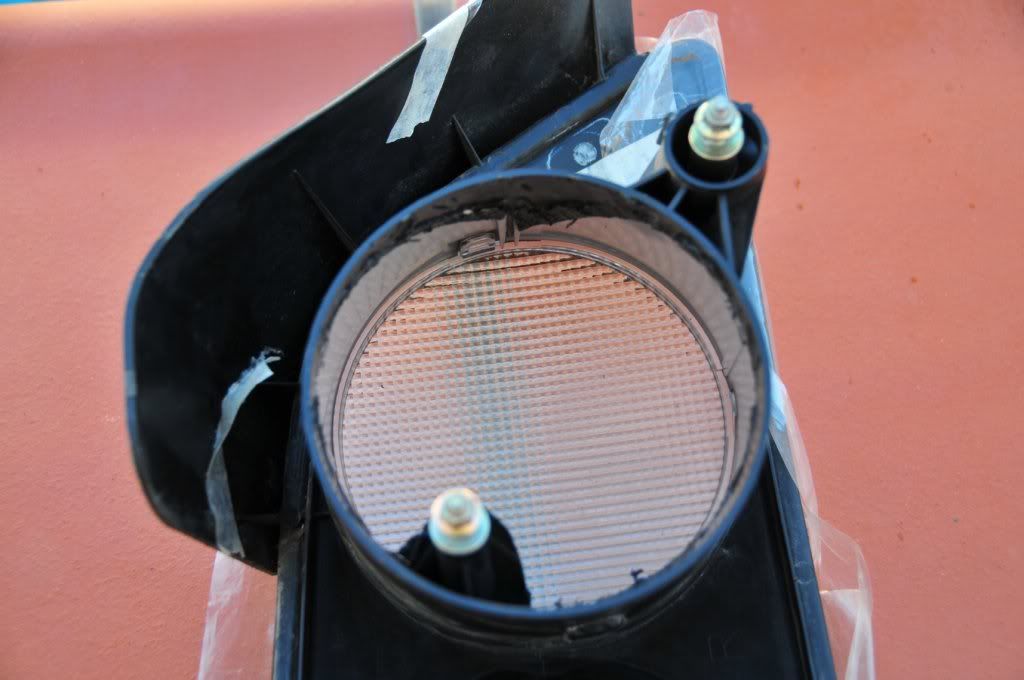
These show the light sections removed after about 5 hours of plastic melting
The clean cut assembles are put aside and the electronics are then made to fit the red and clear lenses
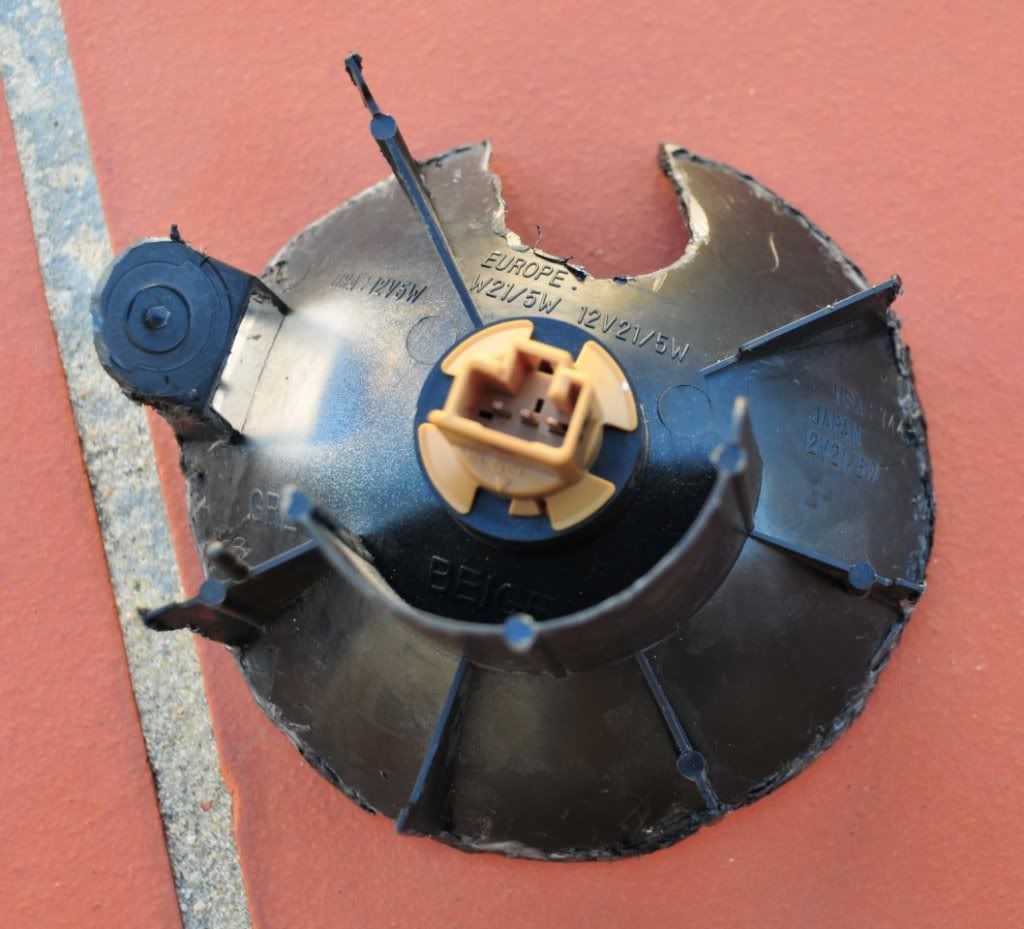
it is important to cut around the mounting points so that the completed tail light can be fitted back to the S2000 once completed
I used plywood to make circular cut outs
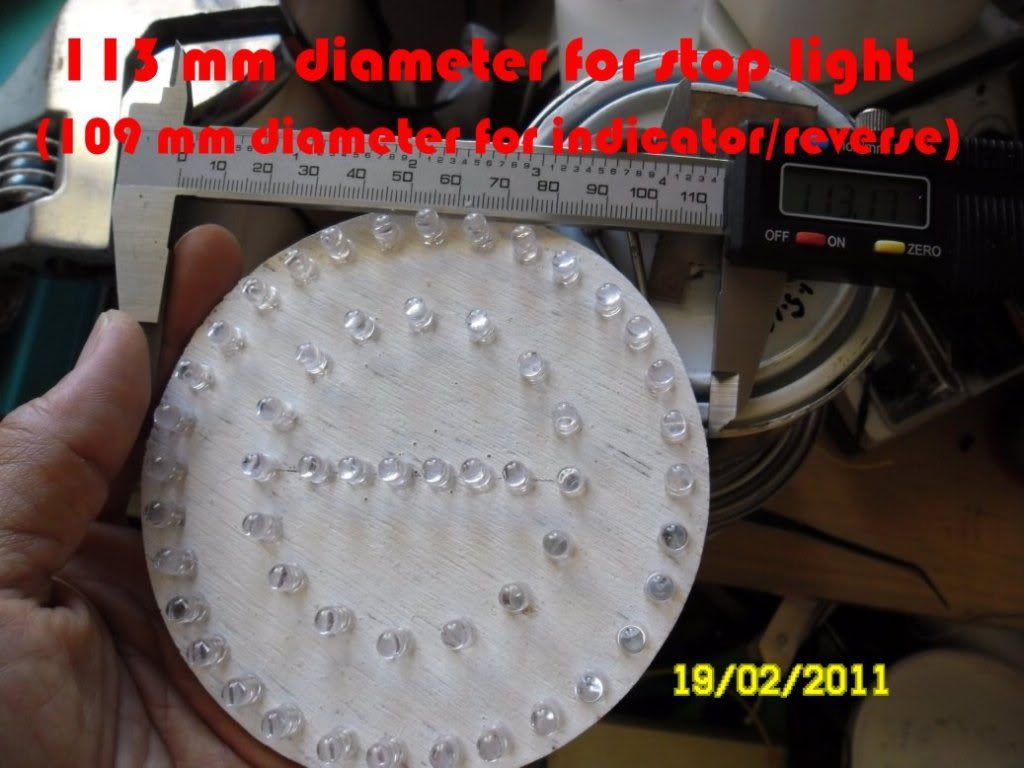
The stop/tail board is 113mm and the reverse/indicator board was 109mm
As you can see, here I just drew circles, then cut many holes, inserted the LEDs so that the polarity is all matching and then soldered them all in series.
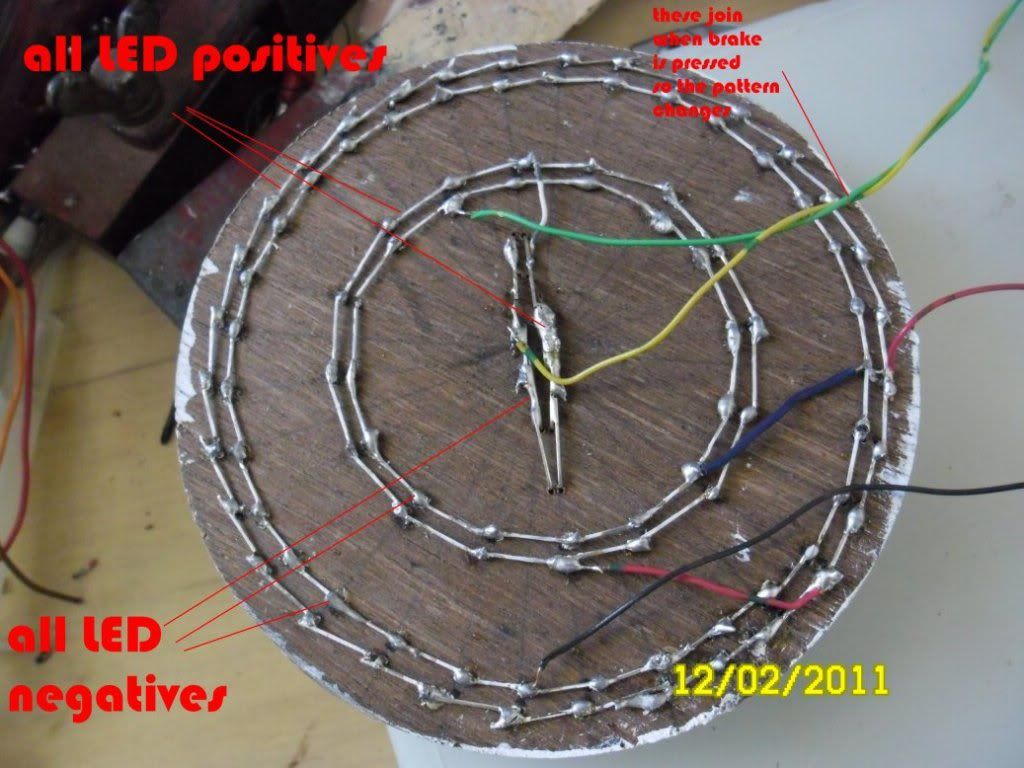
After a lot of trial and error, I decided that I wanted the park or tail light to be just a ring and when the brake is depressed, the outer ring lights as well as a horizintal bar PLUS the whole thing goes a lot brighter.
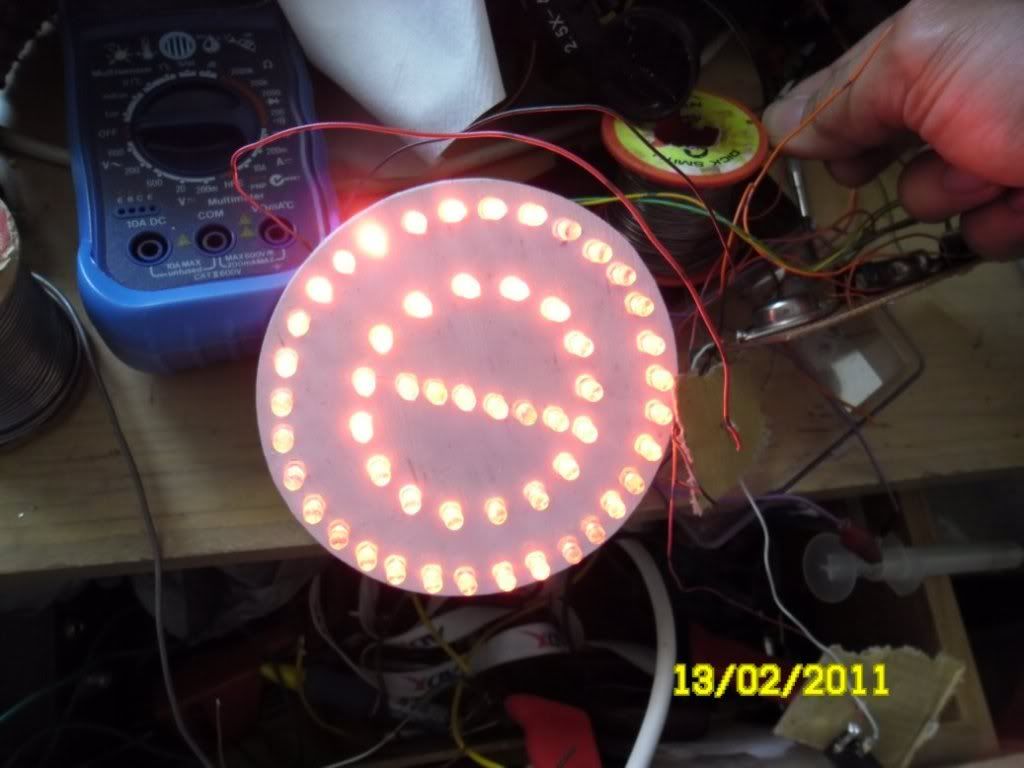
This shows the testing with the stop lights on
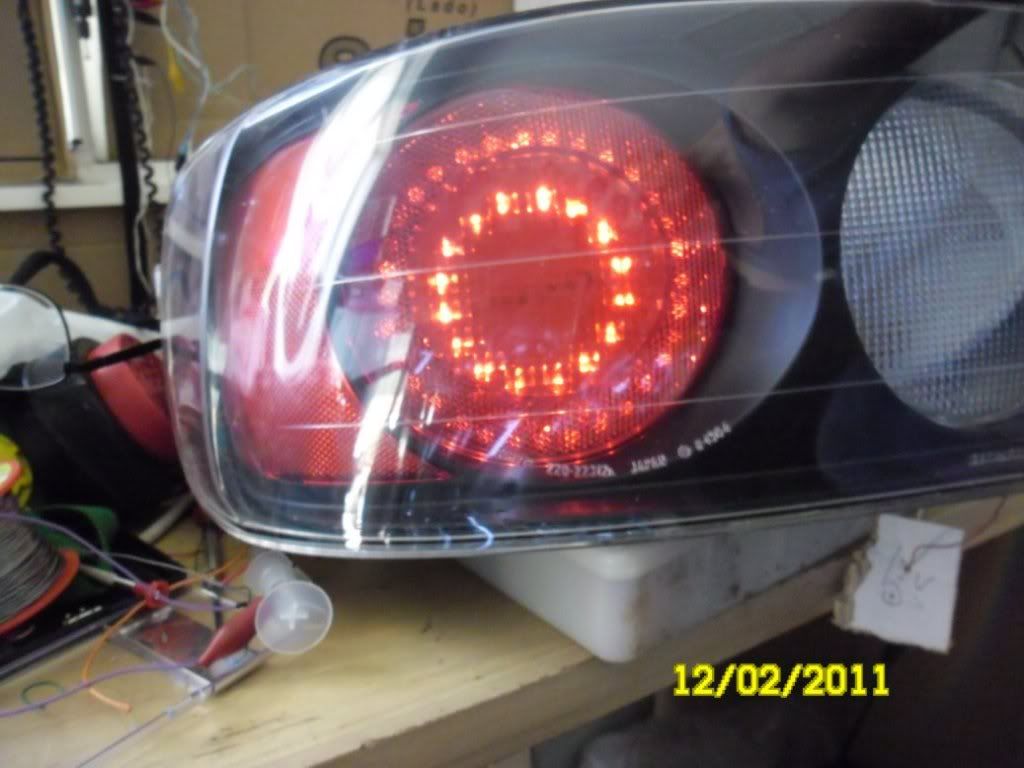
park lights in the housing
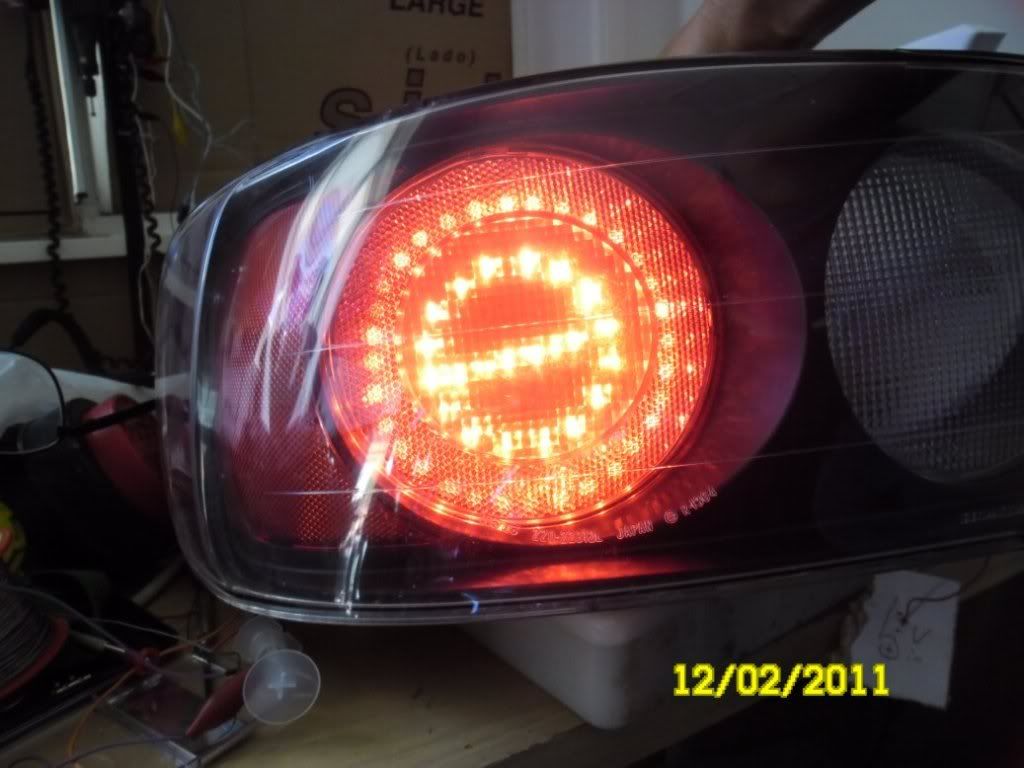
Stop lights in the housing
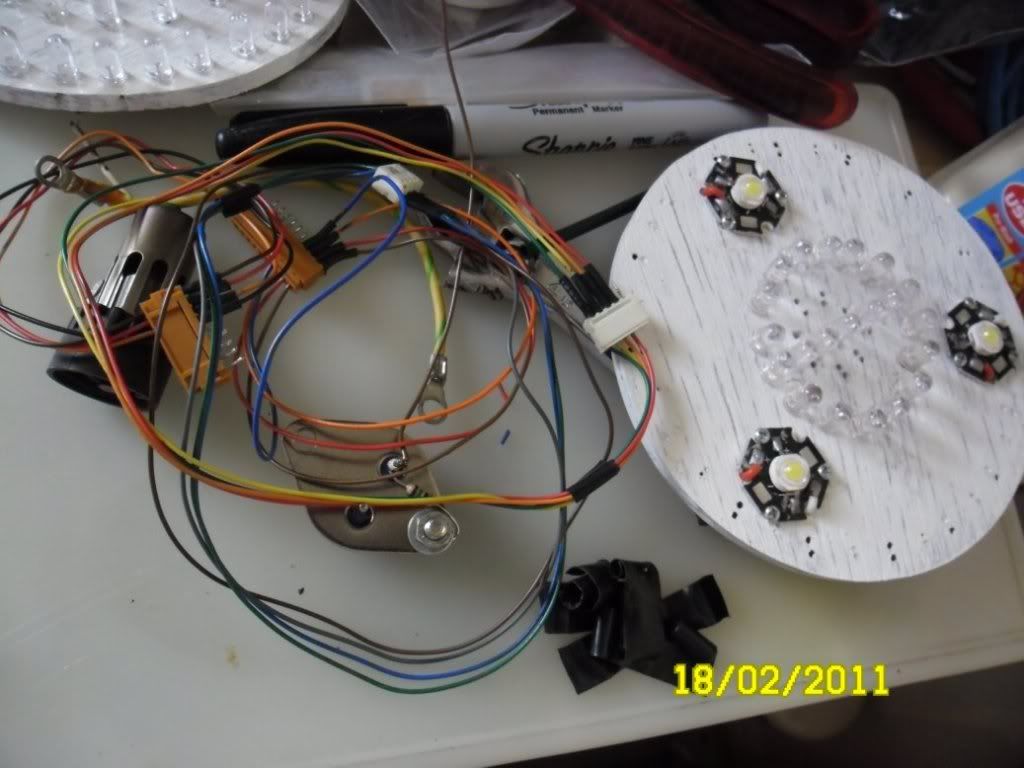
For the reverse LEDs I used in each assembly, three one watt LEDs that I cut out of LED downlights
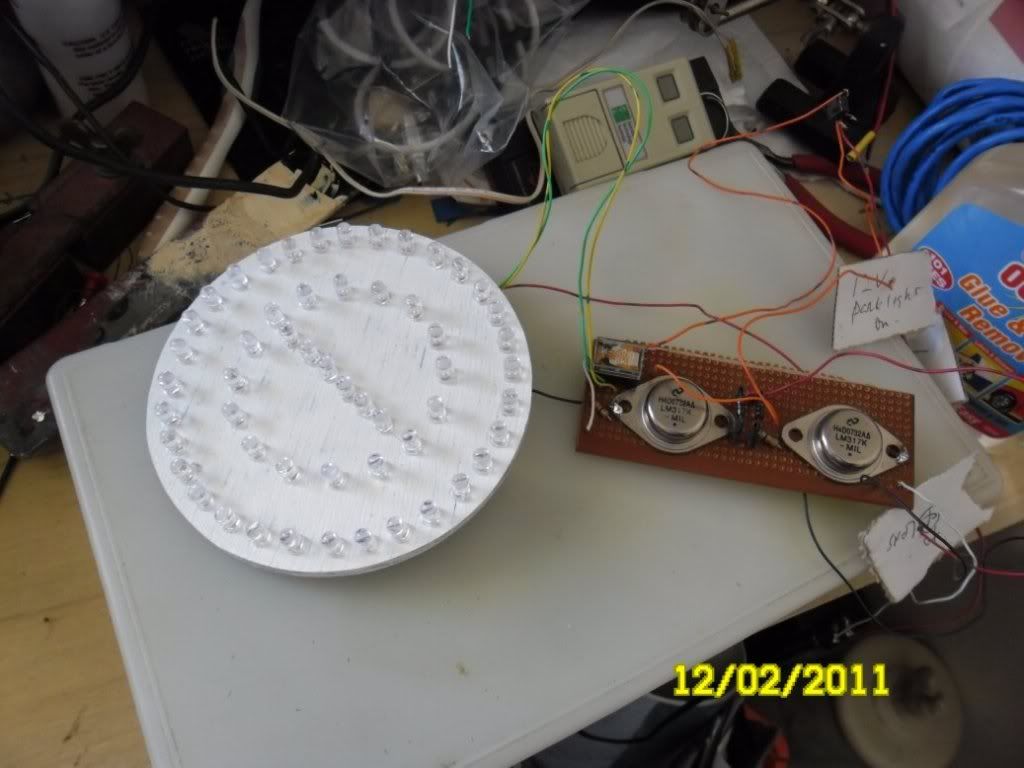
A bit of electronics was used to work out LEDs in series and constant current power supplies were made on veroboard (along with Diodes to allow same LEDs to have different currents and relays to switch different sequences of LEDs)
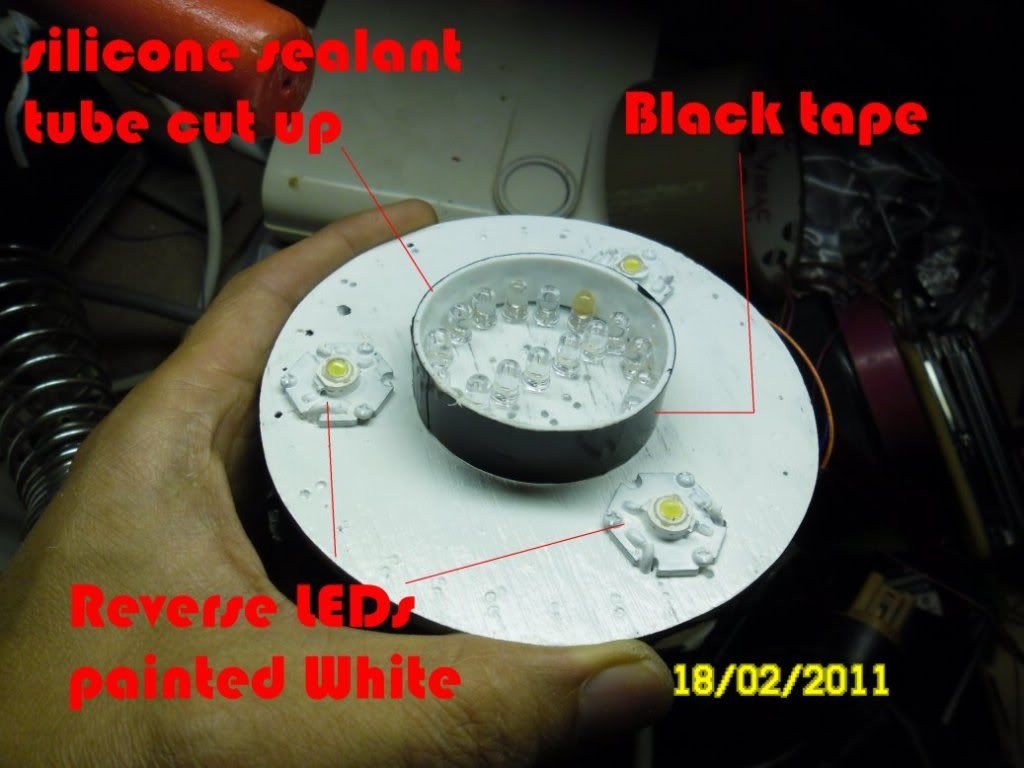
Black tape was used to isolate the indicator from the revrse and to also limit the orange LEDs when they are illuminated
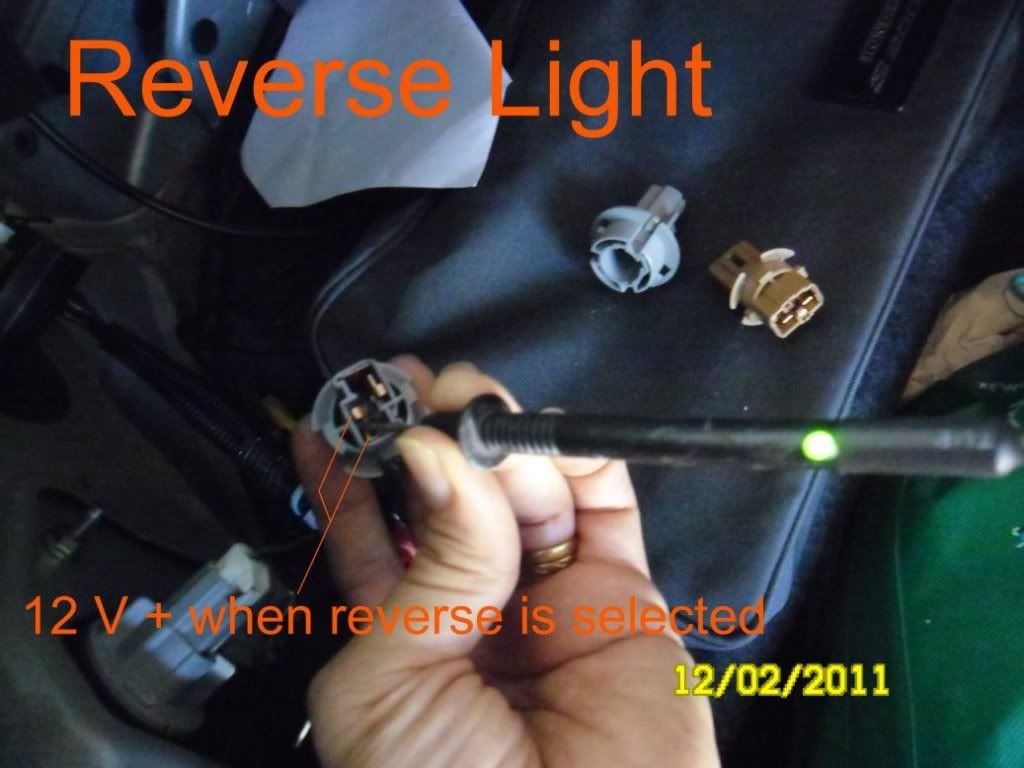
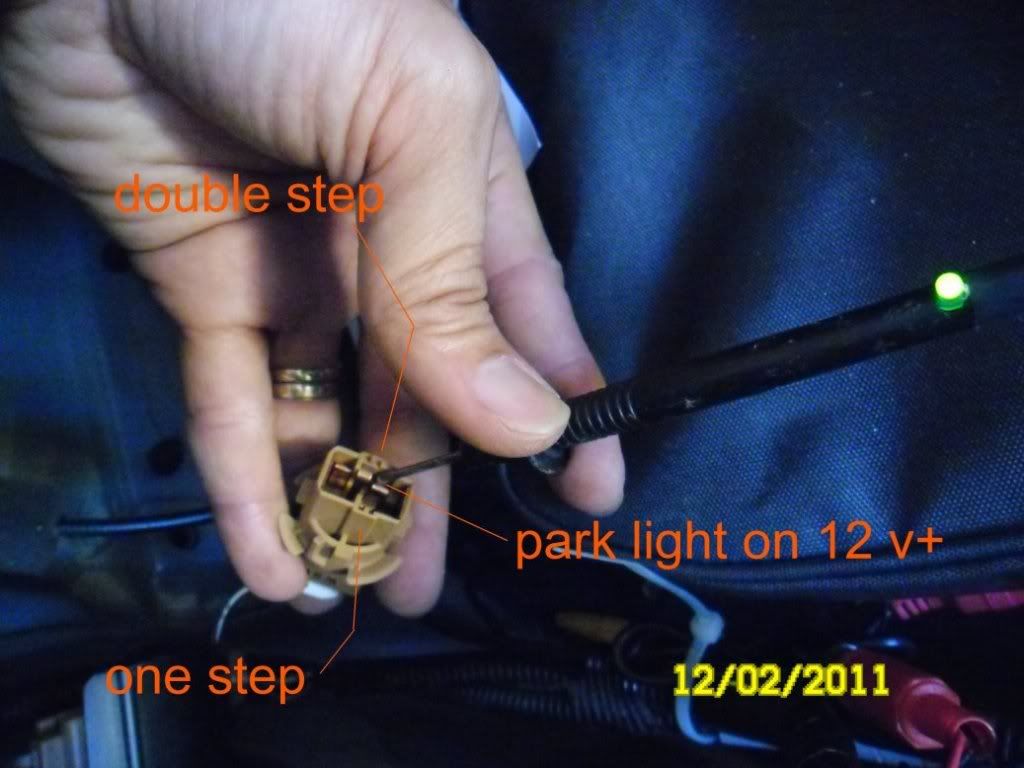
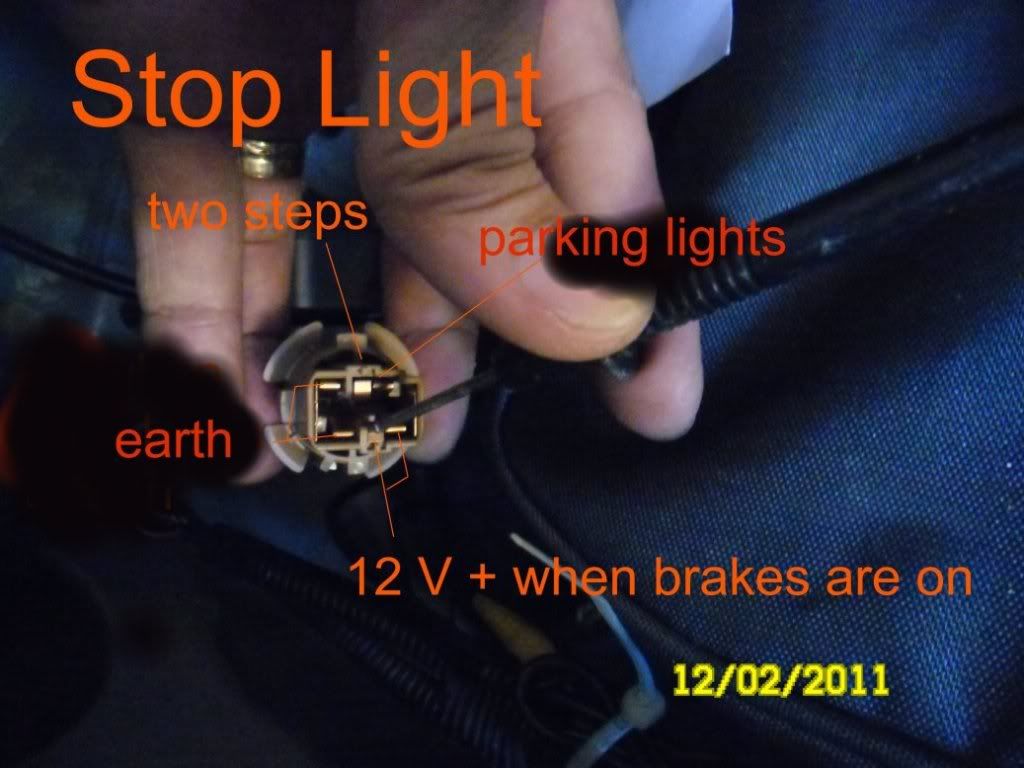
wiring was worked out
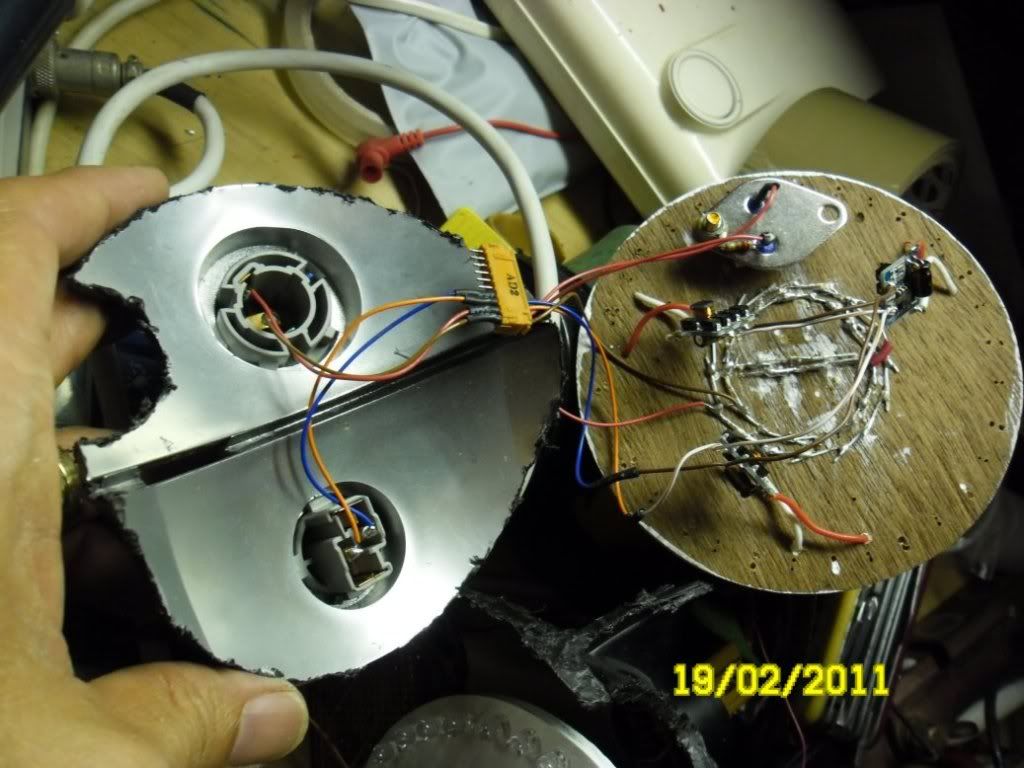
The original plugs were wired to the new electronics and the boards were fixed in place. This is difficult to get the LEDs centered as the original red and clear diffusers do diffract the LED light somewhat . In the case of the stop/tail light LED board, you may see in the photo that the board is mounted slightly off center so that when it is viewed from the rear, it is centered.
Reverse/Indicator board placed in housing and fixed in place
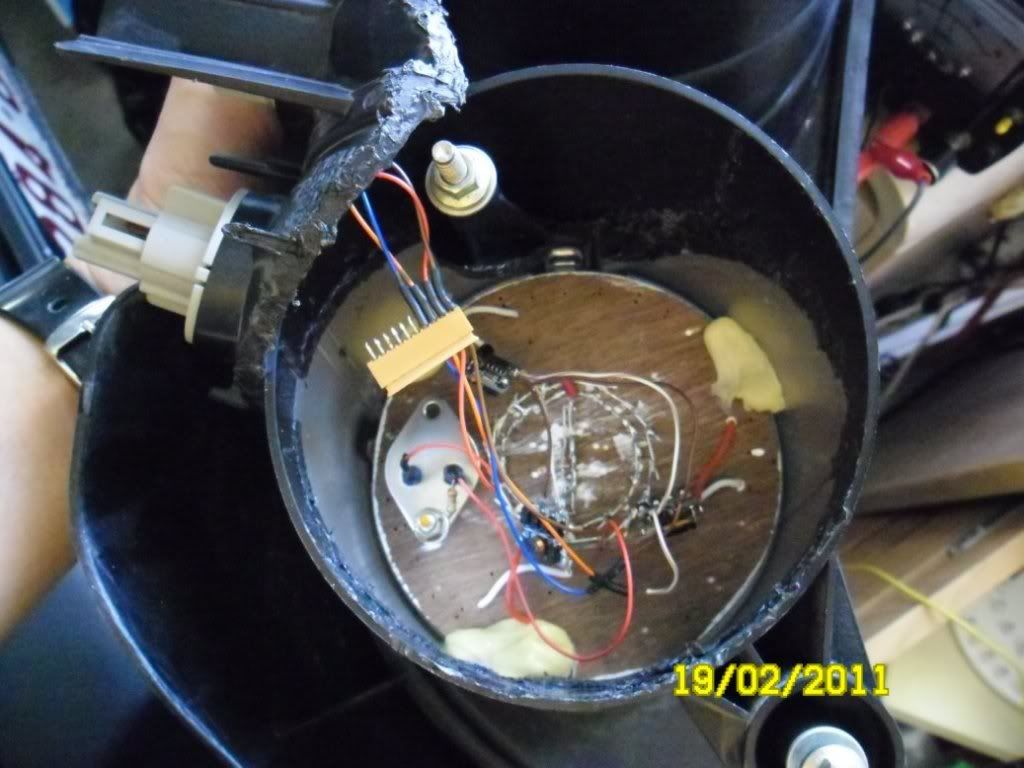
Stop/Tail light board placed in housing and fixed in place
both boards fixed in place
Electronics are insulated and packed into the light assembly before they are reassembled
This shows one unopened tail light and one that has been reassembled. The reassembled one looks almost untouched.
I think the hot knife method makes a finer cut.
Please remember that in some places, the plastic is almost 1 cm thick so the hot knife needs to be red hot.
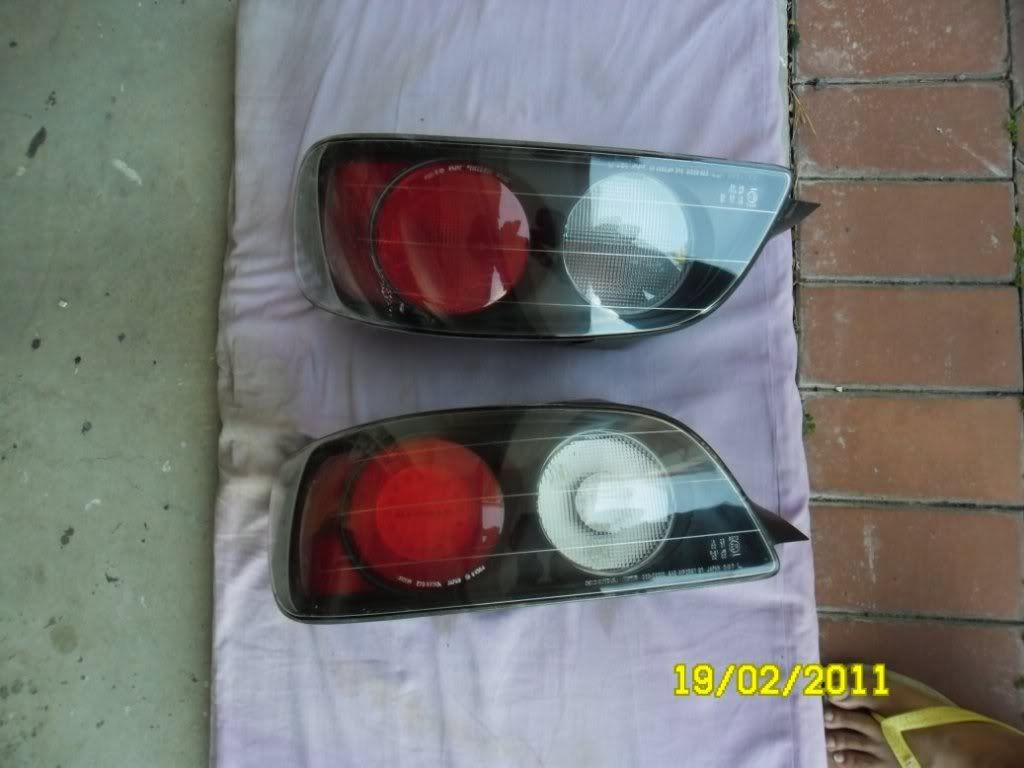
This shows a completed custom tail light and the original tail light. Note the black tape around the centre indicator. This , in my opinion, gives the centre indicator so depth when it is not on.
The assemblies were sealed along the cut lines with silicone. Please remeber that the clear section of the tail lights was never removed so the tail lights will be the same water tightness as original.
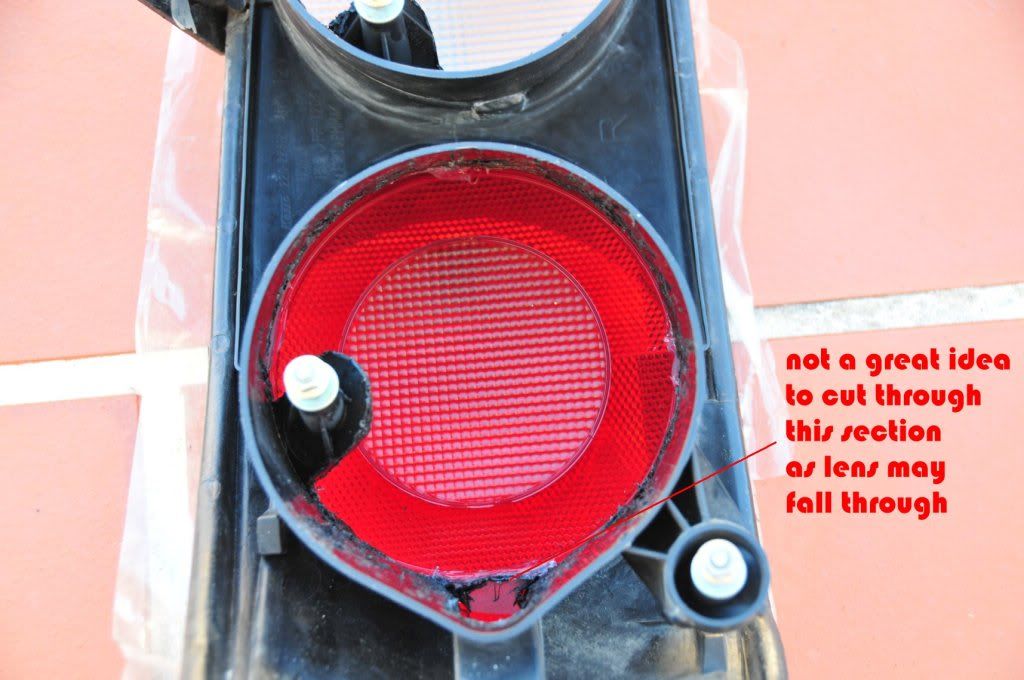
On my first light I did not cut as much as my second one and this was my mistake. I cut so much here that the red diffuser actually fell through. The only way i could get it back in was to push out the white diffuser and then attempt to push the red one back in and then the white one is easier to pul back in. Not a good sitution there so try and avoid this dilemma.
Old on right and new on left
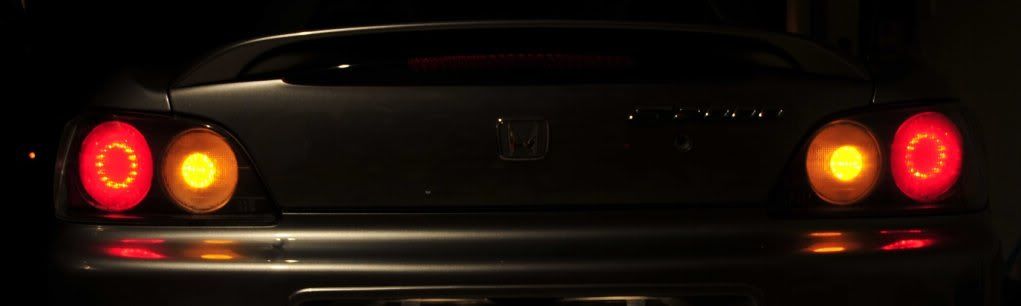
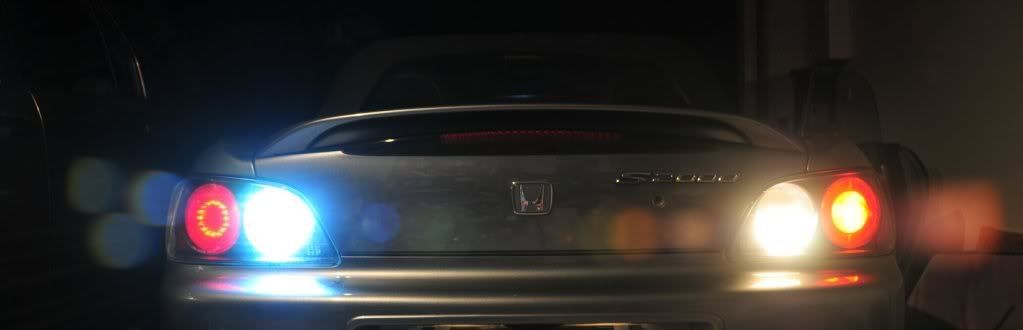
new indicators and tail lights
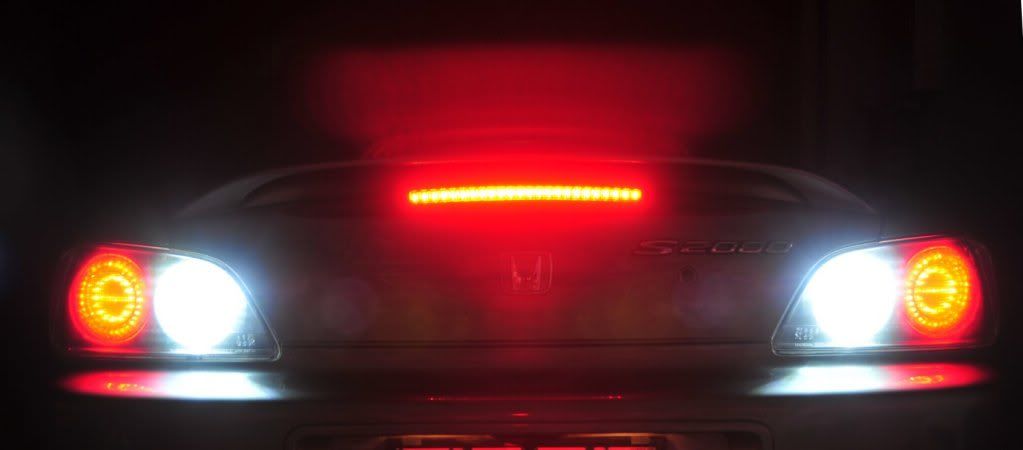
New reverse and stop lights
Oh , one other thing, when changing incandesent bulbs for LEDs, the indicator relay senses that the bulb is missing so there is a chance that the flasher will run too fast. I then had to either change the indicator relay or place a hidden bulb somewhere so that the car still thinks the bulb is there. I ran wires from each indicator and placed two small power diodes so that each indicator does not light the opposite side and then joined them to an old stop light bulb which I have simply placed somewhere inside the trim. This makes the indicators flash at the normal rate.
Well, just had to share this with you all. Damn lot of work and it is really easy to start and lose motivation but the end result is a exact fitting set of tail lights with custom LEDs and patterns.
I hope this inspires more out there to have S2000s that stand out and experiment until the desired outcome is achieved.
Last edited by twofake; 01-03-2011 at 07:34 AM.
Reason: update
-
A++++++++++ ****ING SICKCUUUNTT haha
i jsut went out and bought ap2 tail lights.. but good effort. really looks not only good but also different(in a good way)
-
Wow that if the f*kn coolest tail light mod I've ever seen! And what a write up! Must have taken you ages. Thanks for sharing. I bet pictures don't do them justice. Props to you man!
-
Hey thanks for telling me how to post the photos properly. It took a bit of doing but now my write up should have the images.
-
very nice - if you were to do it again, would you use a white PCB board or make it darker or black? because the light looks bit lighter than the OEM one during the daylight photo when it's off..
-
 Originally Posted by ncmx5

very nice - if you were to do it again, would you use a white PCB board or make it darker or black? because the light looks bit lighter than the OEM one during the daylight photo when it's off..
Good thinking. 
I didn't even think about black until you mentioned it. Maybe I could have even painted the board the same colour as the car. When the Reverse LEDs were black surrounds, they showed up like dogs balls (not that dogs have three balls) untill I painted them white (not the balls but the LEDs). During the day, no one can see what will light up until they are on.
If I could have gotten in without taking away too much housing, I would have preferred to have taken the reflectors out completely and placed just clear red and clear (for the reverse/Indicators) so that the full effect of the LEDs would show (like on modern cars ).
I would also have placed Chrome rings around these areas for a stand out effect.
Yes, would have and should have but that would take another 40 hours.
-
this is amazing work! Nice!!!
-
mate that's awesome stuff!!!! Would love someone to do that for me :P
-
A+ for effort and creativity
Good write up, love the idea!
-
so epic. if only i could be bothered haha  goodwork goodwork
-
This MOD is AWESOME! I would send my lights for you to MOD and pay you for it!
 Posting Permissions
- You may not post new threads
- You may not post replies
- You may not post attachments
- You may not edit your posts
-
Forum Rules
|


 Reply With Quote
Bookmarks