|
-
On/off switch for DC2 Integra radio antenna
Disclaimer: The following is provided as a GUIDE ONLY, and neither myself nor Ozhonda take any responsibility for the outcomes of someone else doing the following. You follow these steps at your own risk!
Aim: To control when the DC2 Integra radio antenna is up and down.
The radio antenna on the DC2 Integra goes up whenever the headunit is on. Even when it is not required, such as if a CD or MP3 player is being listened to. And let's be honest - it looks ugly. This mod allows you to keep the aerial down unless it is absolutely necessary.
Test car is a '00 DC2R. Should work on any dc2 and maybe dc4s.
Required:
Electrical wire
1x switch
Wire cutter
Wire stripper
Soldering iron, wire terminals (or alternatively wire connectors)
Duct tape
Multimeter (optional)
You shouldn't need any electrical knowledge to complete this DIY the way it is walked through below. However, it is handy to have someone on board with some wiring experience. If a problem arises they will be invaluable with a multimeter to diagnose a poor connection or a dodgy switch.
Steps:
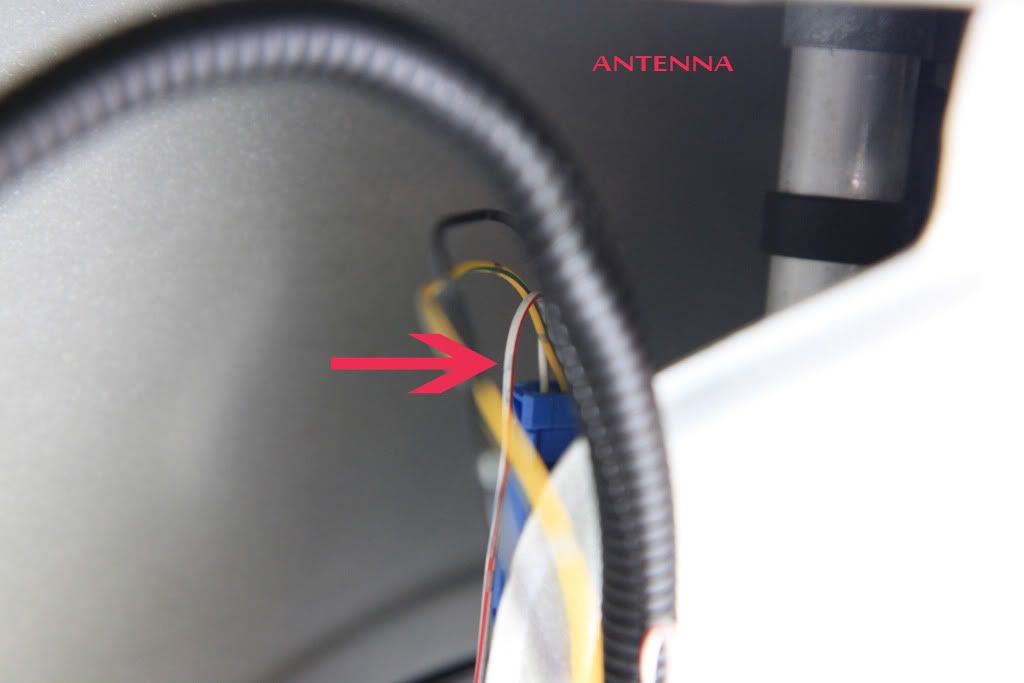
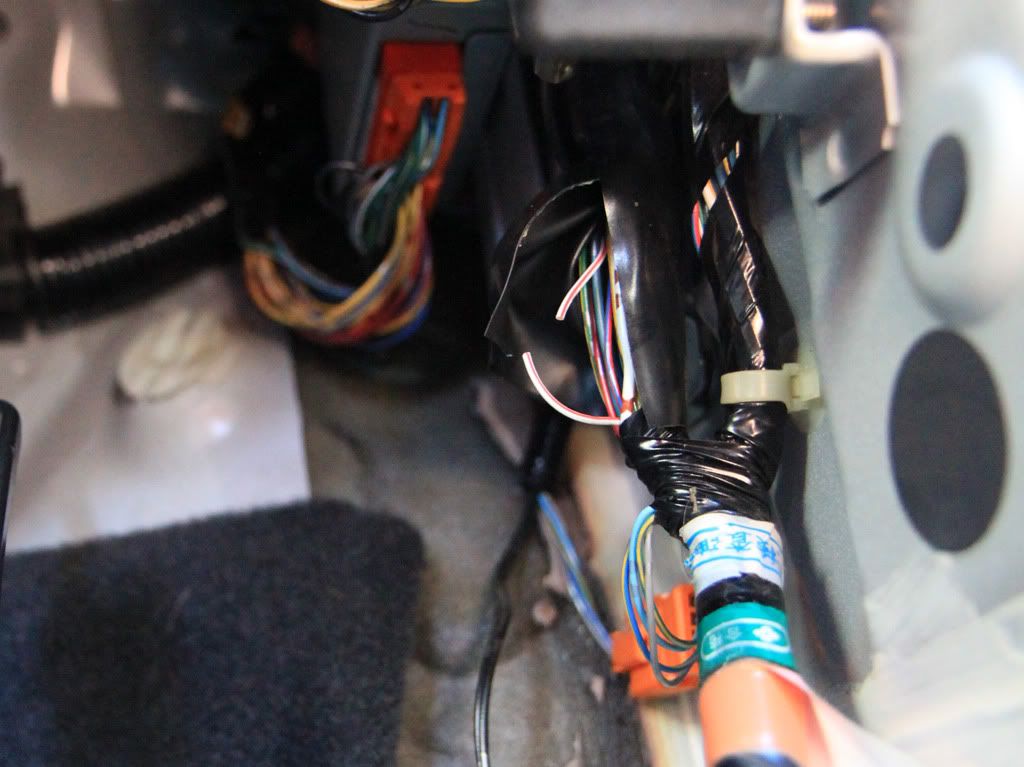
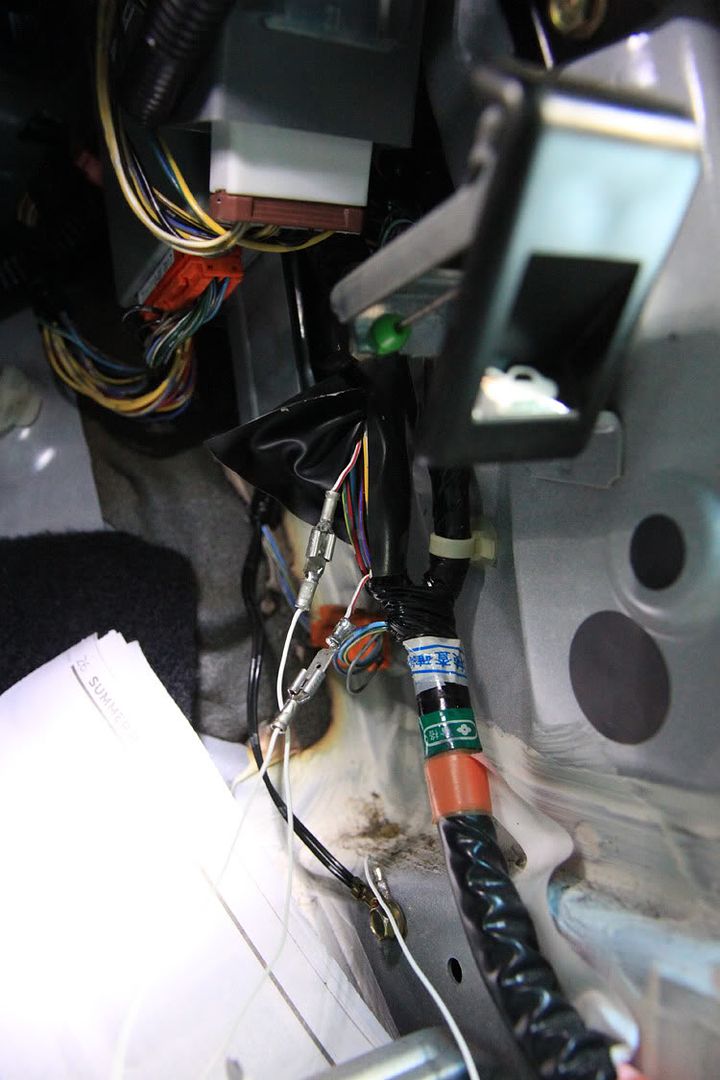
Before step 1: Key here is to find and locate the power source for the antenna. I have done the hard work for you by removing the rear plastics, locating the power wire at the source (antenna) and following it to the front of the car. The wire we are interested in is white with a red stripe, pictured below coming out of the antenna plug at the rear of the car:
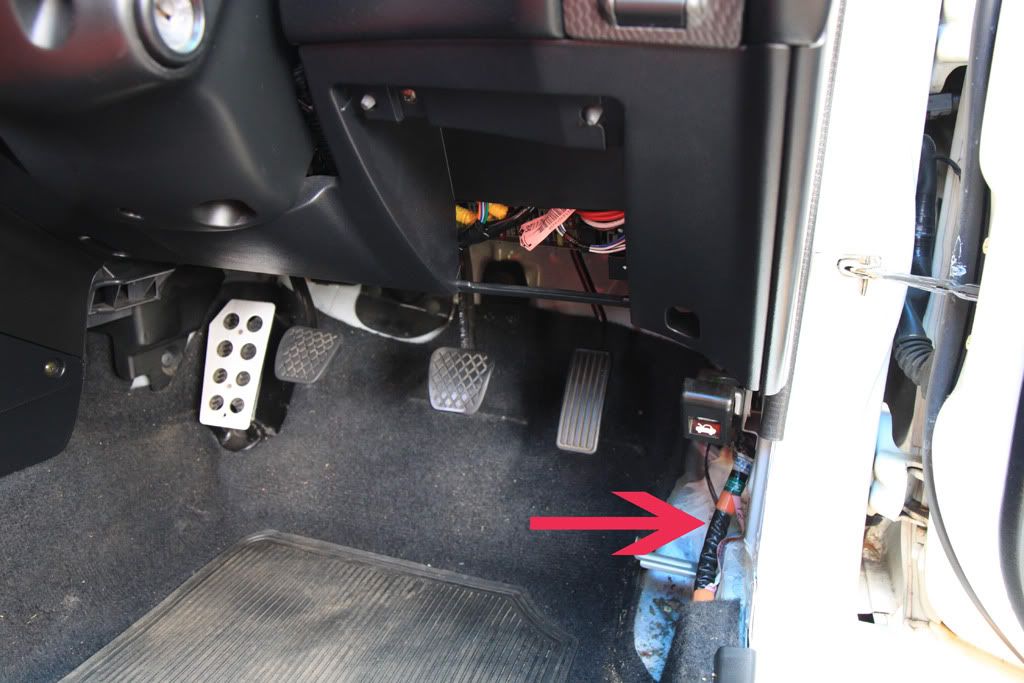
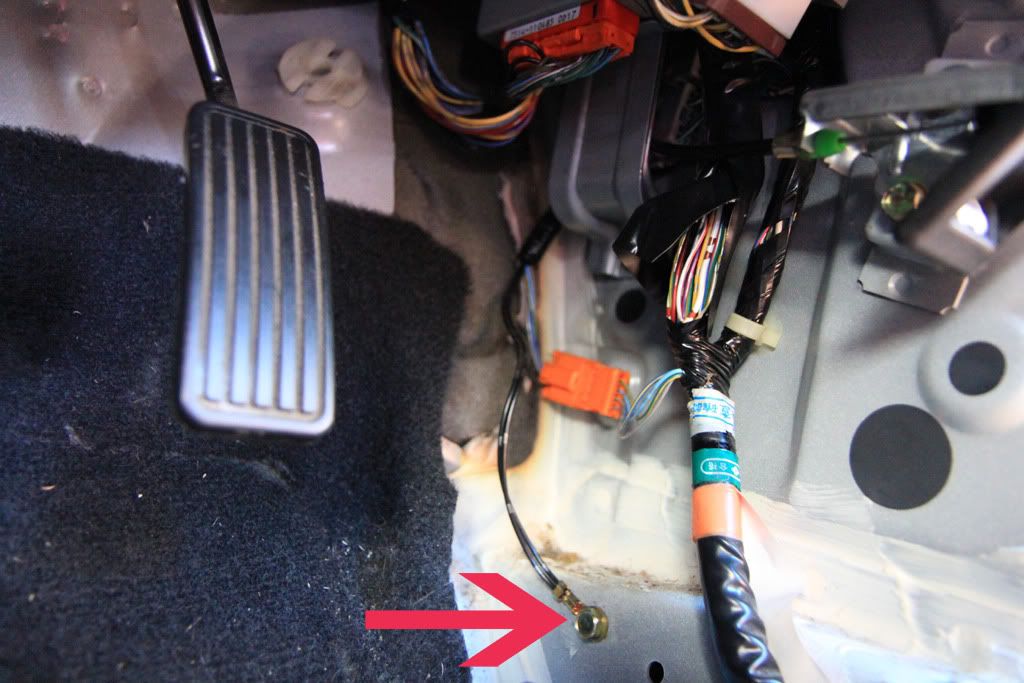
1) In the driver's side footwell, remove the kick panel (two plastic clips and a tug) and the fuse cover. Note the exposed body loom running next to the sill and up under the dash board (arrow):
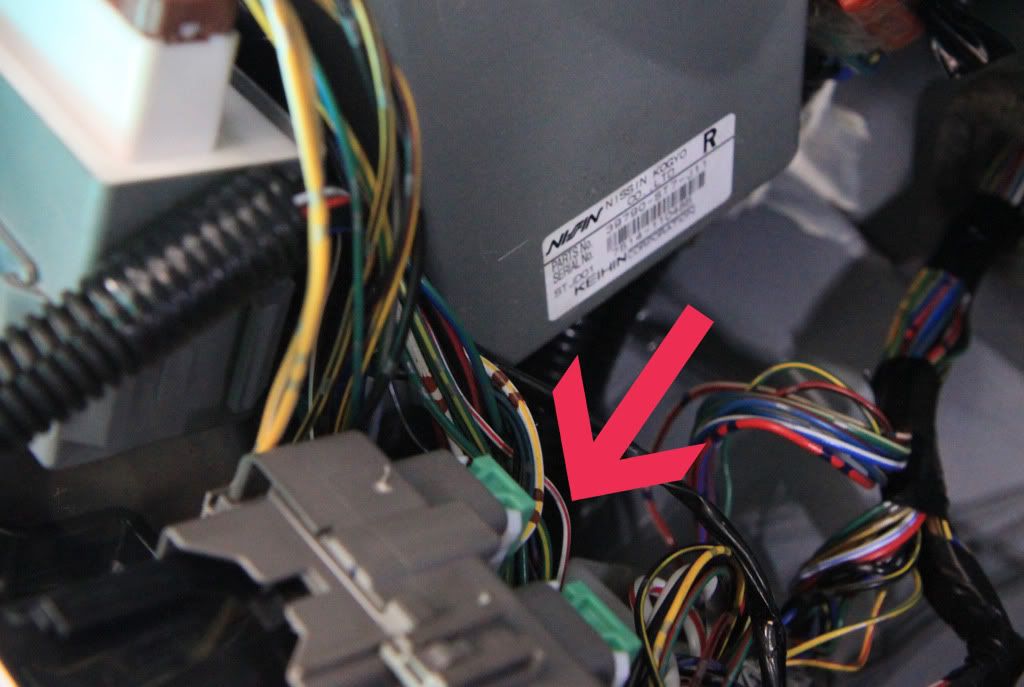
2) With your head in the driver's footwell looking up behind the dash, follow this loom with your eyes until it becomes uncased behind the dash. Locate our antenna power wire - white with a red stripe (to be called 'power' wire from here on in):
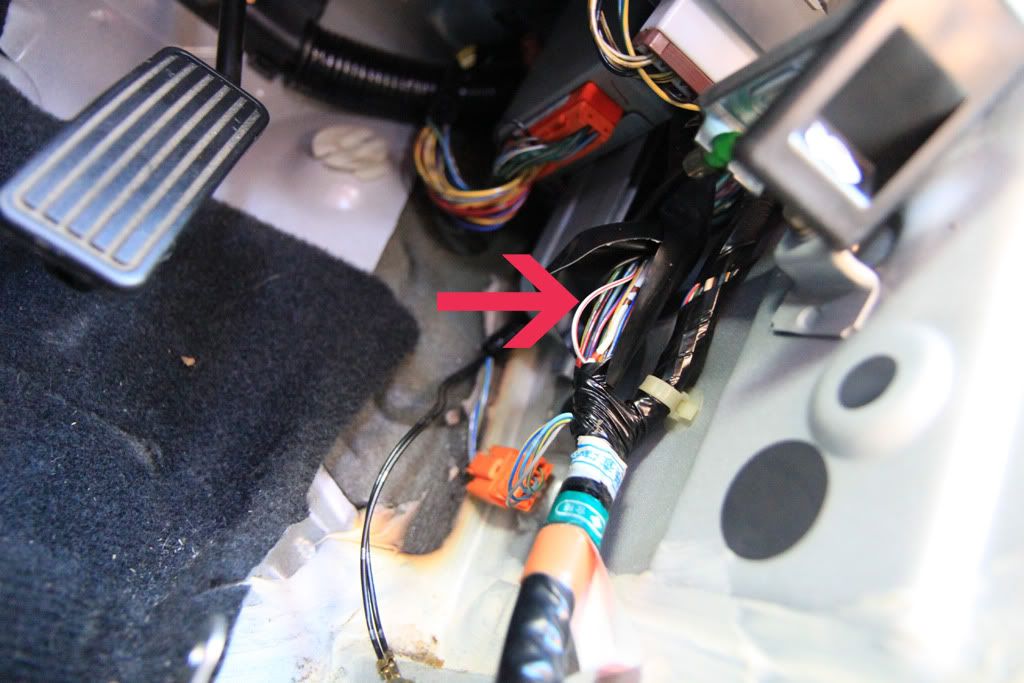
3) Unwrap the duct tape around the loom below this so you can access the power wire at ground level in the footwell:
4) Once you are confident you have the correct wire, pull out as much as you can (it is quite tight), and snip it. Test you cut the correct wire. Your antenna should no longer raise with the head deck/radio on.
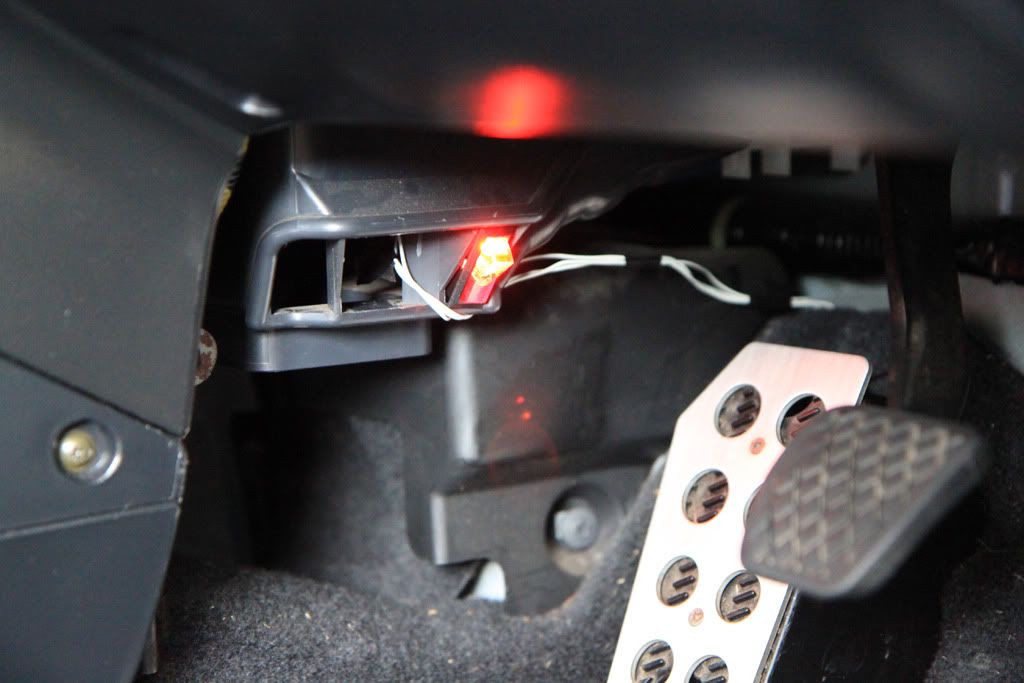
5) If you are planning on running an illuminated switch, note the position of the ground wire right adjacent to where you cut your power wire:
6) Chose a position for your switch. Estimate the lengths of wire you will need to run from the switch to your cut wires.
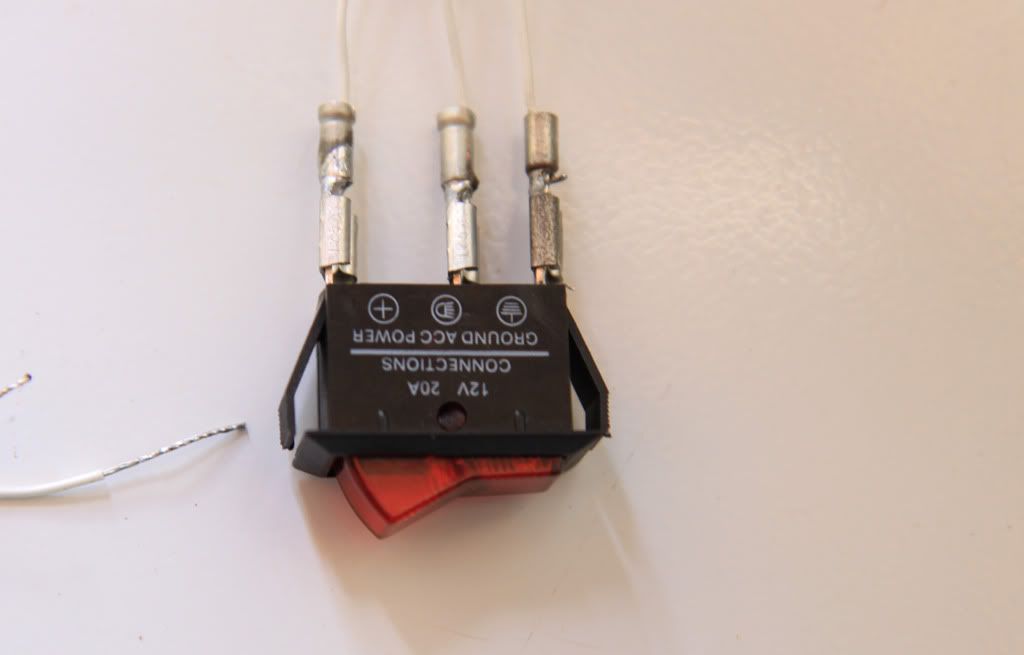
7) Check out your switch. If you have an illuminated switch, cut 3 bits of wire to a bit more than the length you estimated. If it is a standard switch, you will need 2 sections of wire. Mine was able to be illuminated and I wanted it to be, so I had 3 bits of wire.
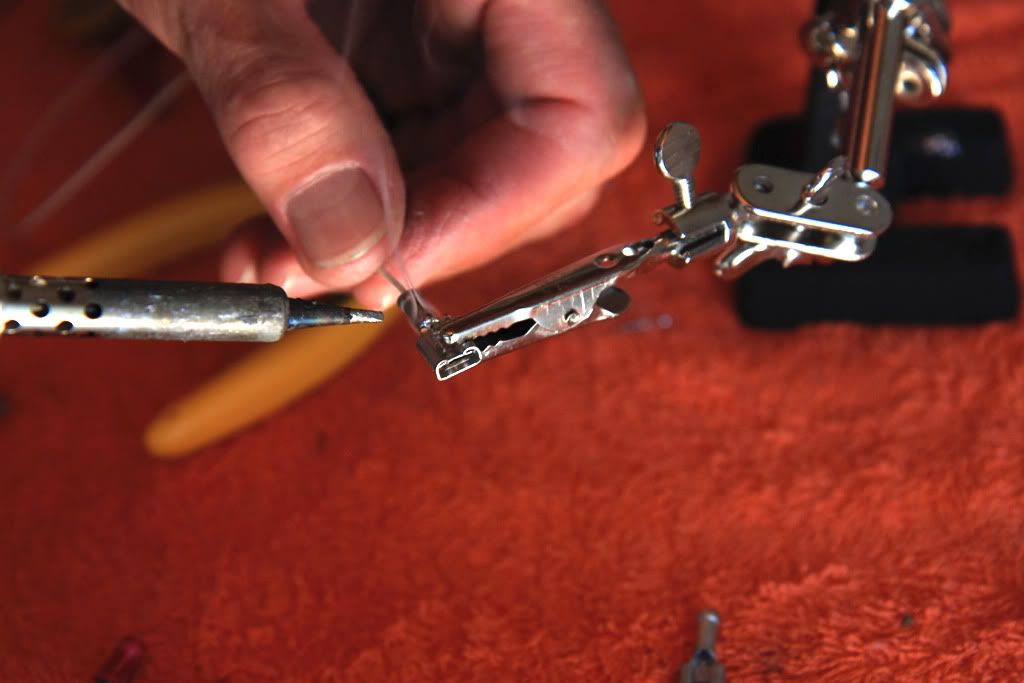
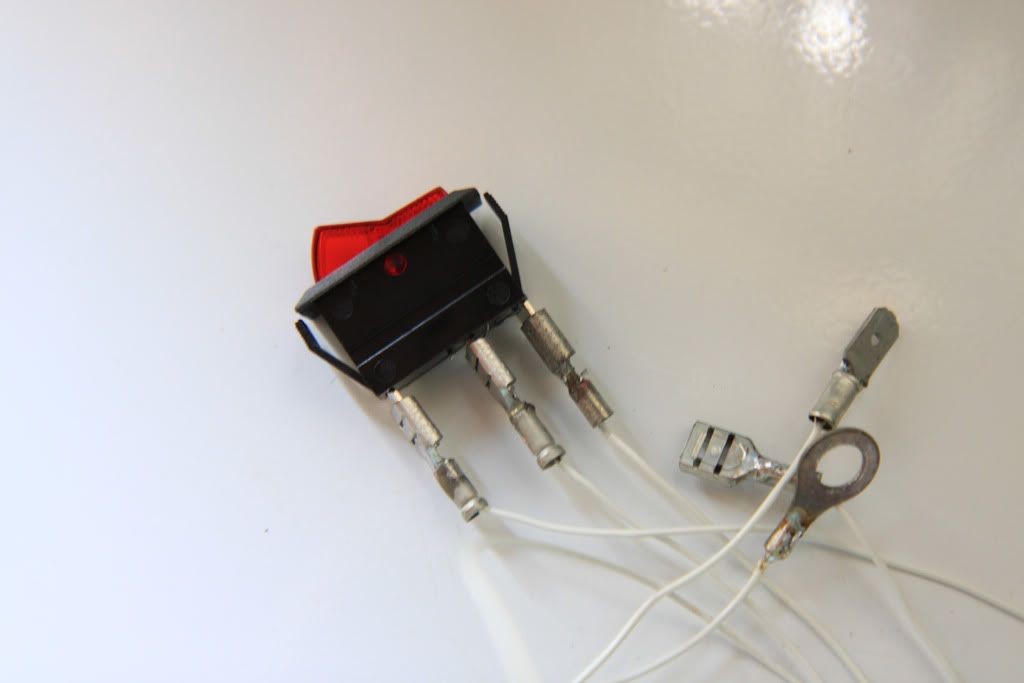
8) Solder some terminals to one end of your wires and connect them to the switch to test for fit:
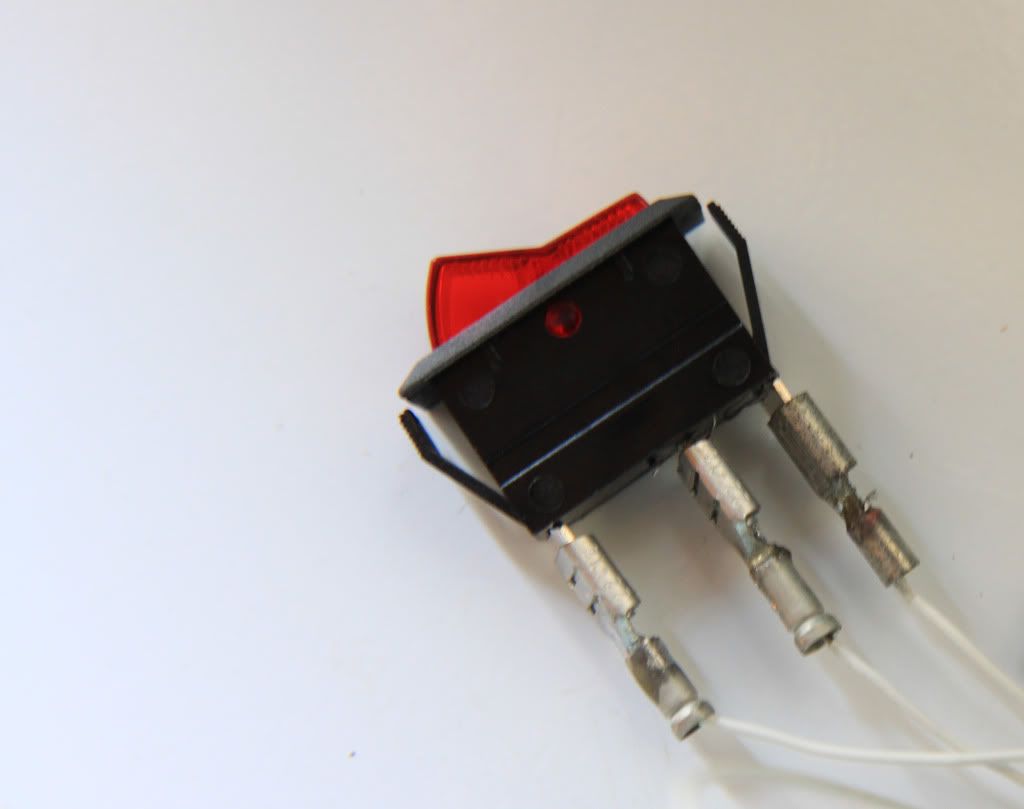
9) Solder terminals to the other end of your wires. If you are running a third wire for illumination, solder on a circular terminal as pictured. Make sure it is of a size that allows the grounding screw (in previous picture) in the driver's footwell to pass through.
You should have a setup looking something like below:
10) Take your setup out to the car. Take your cut power wire and solder on terminals opposite to those you soldered onto the end of the wire hanging off the switch.
The top piece of the power wire you cut (heading up into the dash) needs to connect to the wire coming out of the positive terminal in your switch. The bottom piece of the power wire needs to connect to the wire coming from accessory terminal of the switch. If you have an illuminated switch, the circular terminal you soldered goes under the grounding screw. DON'T CONNECT WIRES UP YET
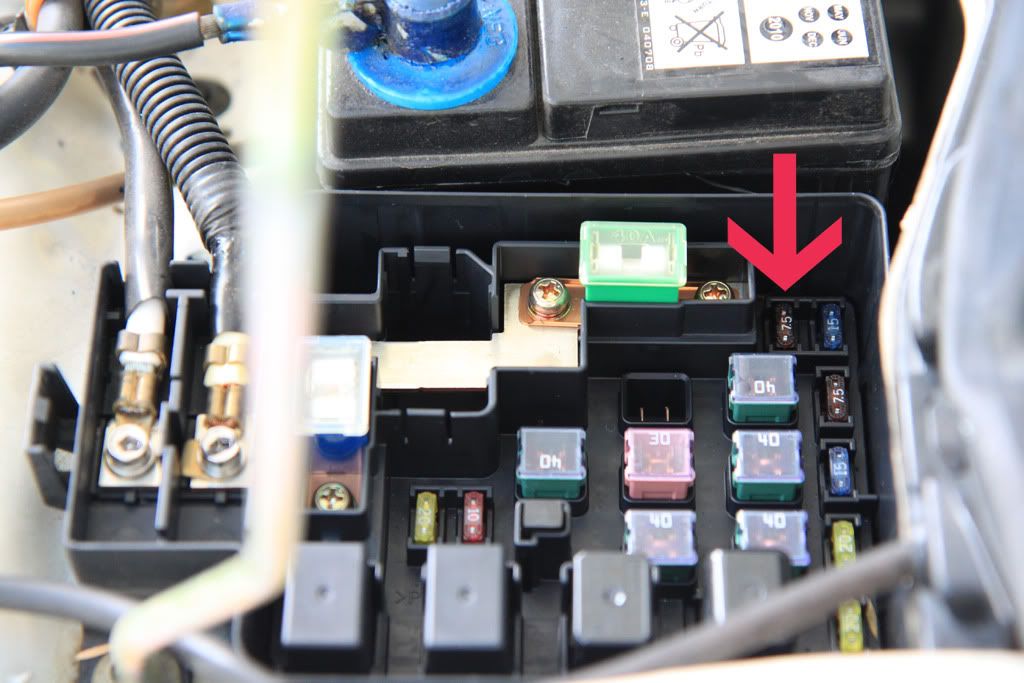
11) At this stage, before getting different wires near each other, I recommend you remove fuse no. 43 from the under-hood fuse box. The power wire receives power from the battery constantly (even without keys in the ignition) and if you let it or any wire attached to it touch the earth, you will blow the fuse. Easier to do than you think. This is the fuse:
12) Carefully connect your wires up. Put the fuse back in. Test it works. With the switch to one side, the antenna should not go up even with the head deck and radio on. If you then switch it to the other side, the antenna should immediately go up.
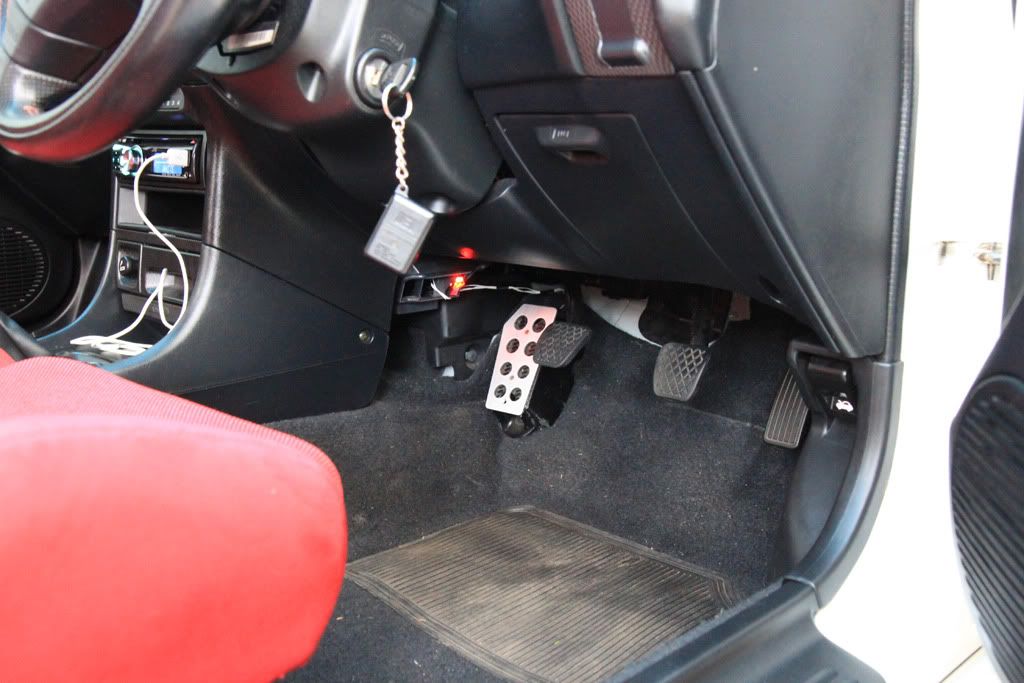
13) Position your switch where you want it. You may need to remove the wires again to do this. My switch miraculously slotted perfectly into one of the air vents in the driver's footwell. I wanted somewhere out the way, not obvioius and I didn't want to modify my dash.
14) Before wrapping the loom back together and reinstalling the kick panel, make sure you insulate the two connectors on the power wire from each other. I found some plastic tubing and duct taped it on, over the top of one connector.
15) Admire your hard work 
Other comments
You could go and buy a shark antenna but this method:
-Keeps the car looking stock.
-Allows you to keep an 'antenna-less' car when hard parked
-Shouldn't cost more than $5-10
Have fun! Any improvements, let me know.
Last edited by rhys.l; 06-01-2012 at 09:45 PM.
 Posting Permissions
- You may not post new threads
- You may not post replies
- You may not post attachments
- You may not edit your posts
-
Forum Rules
|


 Reply With Quote
Bookmarks