

Disclaimer: The following is provided as a GUIDE ONLY, and neither myself nor Ozhonda take any responsibility for the outcomes of someone else doing the following. You follow these steps at your own risk!
Aim:
My power steering pump on my B18c was leaking so I thought it would be a good opportunity to show others out there how to rebuild their leaking P/S pumps. Im sure this can be used on most P/S pumps.
Required:
P/S Rebuild Kit
12mm Spanner
10mm Socket
Rachet with 6inch Extension
Long Nose Pliers/ Multi Grips
Honda P/S Fluid
Steps:
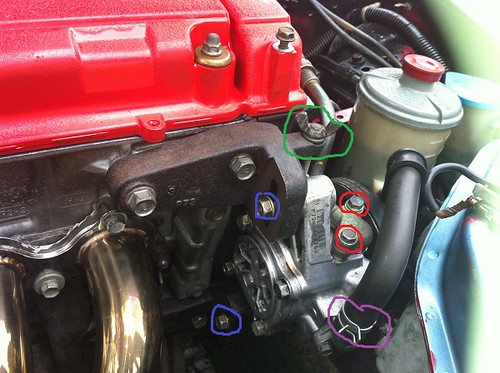
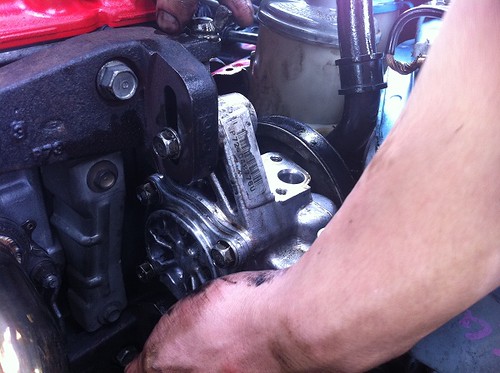
1- With the 12mm Spanner, crack open the two 12 bolts on the bracket (Blue). Don't undo it the whole way, just undo it a few rotations.
2- Then undo the the tensioner the whole way (Green). If its too hard to undo, use an adjustable wrench or multi grips.
3- Now use your set of long nose pliers or multigrips to undo the clamp on the hose (Purple). Remove the hose from the pump and drain all the fluid out.
4- Use your 10mm rachet with your extension to take off the two 10mm bolts holding your high pressure hose to the pump and remove from pump (Red).
5- Now use your 12mm Spanner and crack open the 4 12mm bolts on the back cover of the P/S pump (Black). It's easier to crack open now than when the pumps out. Don't undo it all the way, just 'crack' it.
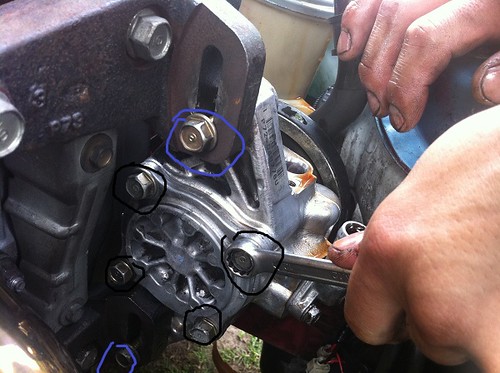
6- Now remove the P/S belt.
7- Remove the 2 12mm bolts on the bracket (Black) while holding the pump from falling. Remove Pump
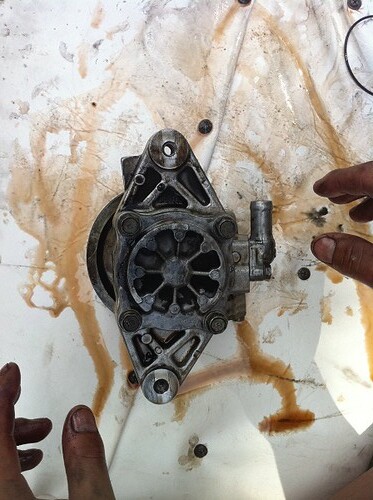
8- Remove the 4 12mm bolts from the back cover.
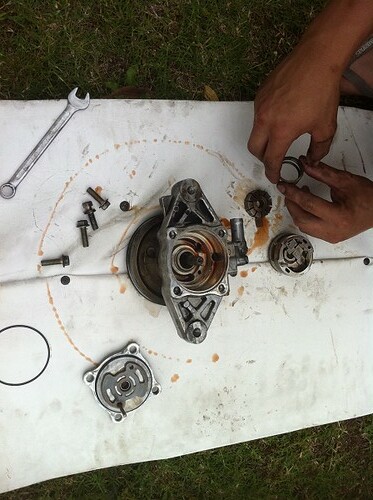
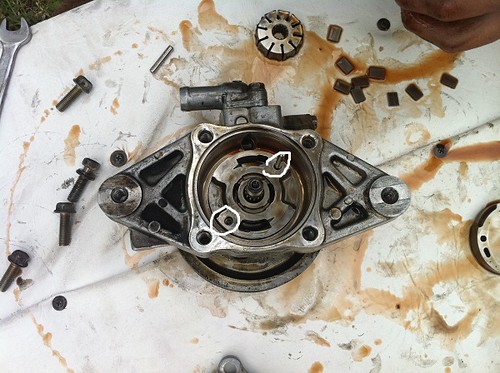
9- Remove cover. Now remove all the inner pieces, remembering how they were placed.
10- Place your spring and long dowel back in.
11- Lubricate and put the 2 o-rings on the bottom plate.
12- Now install the bottom plate. The side with the 2 dowel holes facing up (White).
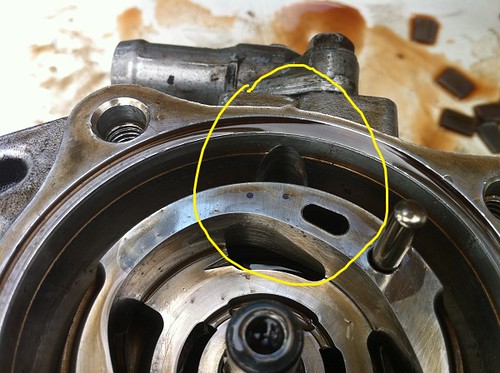
13- Install the top plate. Make sure the make on the pump is in between the 2 dots on the top plate. (Yellow)
14- Put the shorter dowel in the other hole.
15- Install the rotor. The Rotor has two marks. Each mark should be facing a dowel.
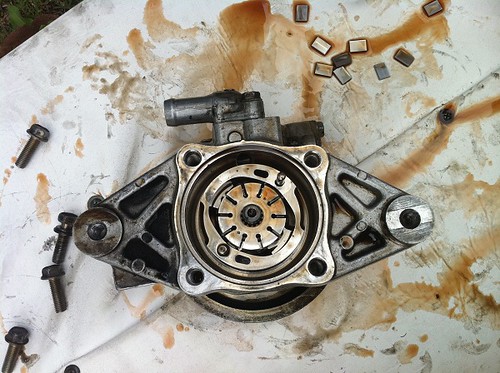
16- Put the slines in. Make sure the rounded edges are facing out.
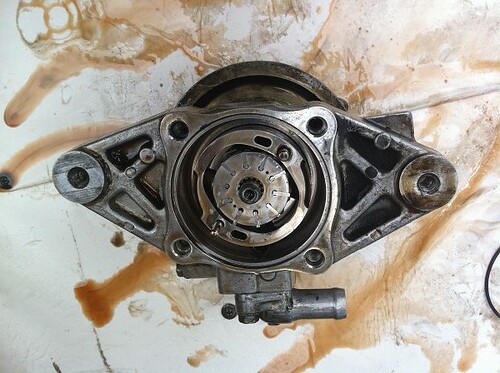
17- Now install the large o-ring to the cover, place it back on and tighten the 4 12mm bolts. If everything is lined up properly inside, the cover should slip straight onto the gear on the shaft.
18- Place the pump back on the bracket, do the 12mm bracket bolts by hand and put the belt back on. Now put the tensioner back in and tighten untill the belt is tight. When the belt is tensioned right, tighten the 2 12mm bracket bolts. Make sure the belt is placed right on the harmonica balancer aswell.
19 - Now replace the o-ring on the high pressure hose. Connect it back to the pump and tighten the 2 10mm bolts. Also connect the other hose up and place the clamp into place.
20- Make sure everything is back into place. Top your P/S resevoir with Honda P/S fluid. Replace your resevoir cap and clean.
21- After everything is clean, lock the steering wheel from right to left several times. This will bleed the P/S. Top up P/S fluid if needed.
22- Get a mate to hold the steering wheel in a full lock position and go inspect if there is still leaks on the P/S pump.
easy as that !!!
Other comments
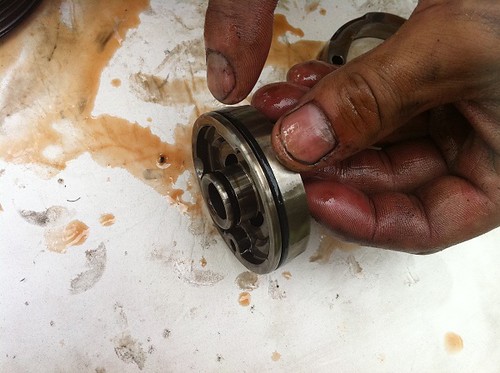
If you want to change the bearing aswell, you need a 14mm inpact gun to remove the pulley. Then get curclip pliers to remove the clip, remove bearing and washer. Replace with new washer and bearing and put back together.
If I done anything wrong, let me know so I can fix it up. Enjoy.


 Reply With Quote
Bookmarks