Results 1 to 10 of 10
  1. #1

    Em1 Seats into ED6 Civic Hatch

    Hi Everyone,

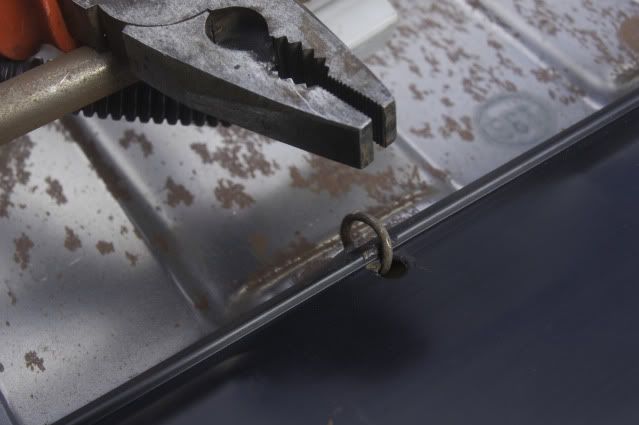
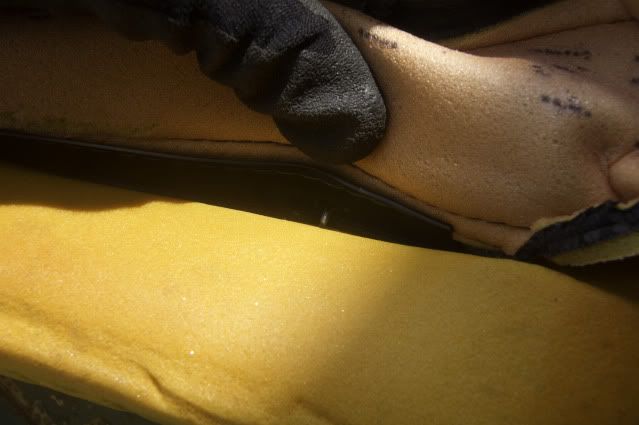
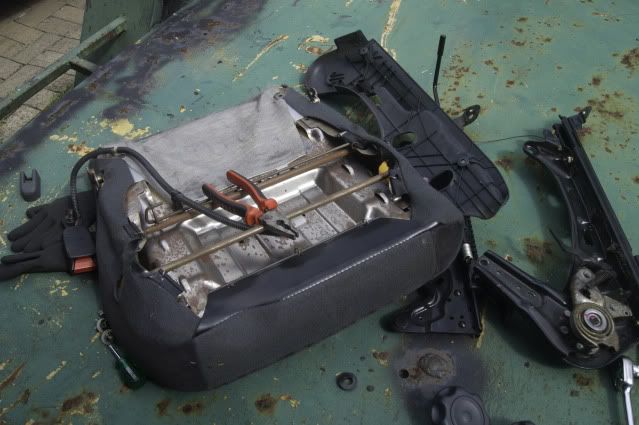
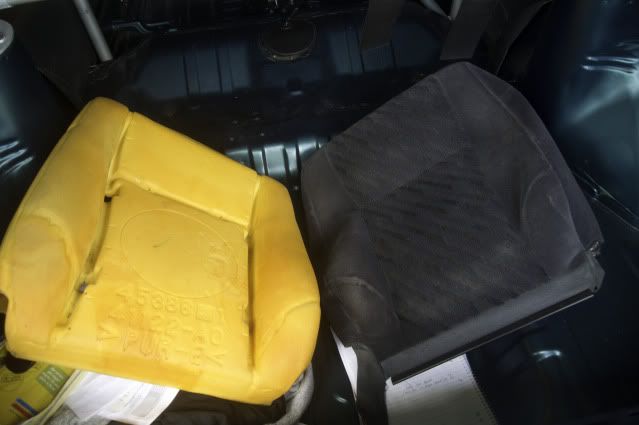
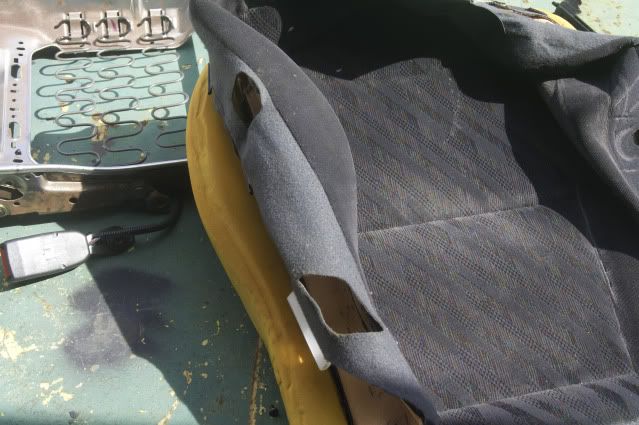
    I've just reached the half way point with my seat upgrade. I started off with a pair of EM1 00' Civic Coupe seats purchased to replace the tired looking stock seats in my 89 ED6 civic hatch. Basically what I've done is disassemble both the stock seats and EM1's down to the frames. Reused the foam base, seat base, sliders and back frame. Matched them to the EM1 back foam, and upper and lower material seat coverings. Here is the passenger seat I just completed (which took 3 about hours). I just have an after picture as I wasn't sure this would work. But as it happens it did, so is there anyone interested in a more detailed DIY when I find the time to do the drivers side??
    Attached Thumbnails Attached Thumbnails Click image for larger version. 

Name:	_DSC0626.jpg 
Views:	1053 
Size:	104.3 KB 
ID:	20824   Click image for larger version. 

Name:	_DSC0625.jpg 
Views:	399 
Size:	116.9 KB 
ID:	20823   Click image for larger version. 

Name:	_DSC0623.jpg 
Views:	487 
Size:	112.6 KB 
ID:	20822  

  2. #2
    Member Array
    Join Date
    Mar 2009
    Location
    Liverpool
    Car:
    EM1>Crx Delsol
    Im pretty interested but looking into doing it with WRX seats into my EM1. Guessing it should be something similar as youre using the same rails.

  3. #3
    Member Array
    Join Date
    Apr 2009
    Location
    QLD
    Car:
    ED Sedan
    yep for the drivers seat show the steps, would be interested too

  4. #4
    Quote Originally Posted by shake View Post
    so is there anyone interested in a more detailed DIY when I find the time to do the drivers side??
    make the DIY, people will read it and appreciate it.

    so far this is not a DIY.

    made me get exited for no reason.

  5. #5
    Well I have already completed the drivers side. However I did take a couple of pictures just incase someone took some interest. So I'll start typing and add the pics in when I pull them off my SD card.

    1. Unbolt the seats from the car. 4 x 12mm bolts on each, which secure the rails to the floor pan of the ED6.

    2. Seperate the back rest from the seat cushion. 1 x 6mm allen head bolt and 2 x 14mm bollts

    3. Remove the seat rails from the seat base. Again more 12mm bolts and a 10mm for the tilt mech on the side of the base. This needs to be done remove the cushion material and fabric from the steel seat base.

    4. Removing the fabric and foam cushion. There are steel hoops securing the fabric to the steel base, they need to be cut (with some heavy duty side cutters) or bent/opened up with some pliers as I did. Once the edges are done peal back the fabric to reveal the metal rods woven into the fabric to maintain its shape. They are also secured with the steel hoops, down the sides, front and back of the seat foam.


    5. Now that the original seat bases are down to the frame, repeat the process for the EM1 seats (or whichever seat you have chosen).


    6. Take the fabric off the EM1 seat and proceed to fit it onto the ED6 foam seat cushion. The metal shaping rods in the fabric will need to be zip tied into place in order to get the fabric to cling tight to the seat base.


    7. Fit the foam seat base (now with EM1 fabric secured) to the metal seat base plate.

    8. Zip tie the lower sections of the fabric to the seat base.

    9. Now for the seat backs, depress the small buttom that controls the headrest height adjustment. Remove the head rest.

    10. With a flat blade screw driver gently remove the small buttom from underneath levering it up.

    11. Once removed a phillips head screw should be exposed. Unscrew it.

    12. From inside the seat (use gloves or cut up your hands, which ever suits) depress the plastic head rest prongs by squeezing them by hand. The plastic bracket will come away from the top of the seat with some manipluation.

    13. Next the fabric shaping springs on the inside of the seat need to be unhooked to remove the fabric from the foam.

    14. Remove fabric and foam from the frame.


    15. Duplicate 8-14 with the EM1 seats

    16. Fit the EM1 fabric and back rest foam over the ED6 back rest seat frames. Maniplate the fabric into the right position.

    17. Insert the head rest plastic prong. Secure it by screwing down the phillips screw. Fit either head rest as they are interchangable.

    18. Reattach the seat shaping spring hooks to the inside of the seats

    19. You will need to make a cut in the seat base fabric and back rest fabric for the two to rejoin where the 6mm allen head bolt was attached.

    20. Bolt back rest and seat base back together and re-attach seat rails.

    21. Marvel at your briallance and bolt your retrimmed ED6 seats into place.

    Please ask if you need more help, or there are some finer detail your missing.
    Last edited by shake; 05-01-2012 at 05:15 PM. Reason: adding info

  6. #6
    you're lucky the ed6 seat foams are still decent.

    I did this with ed9 crx seats a few years back and the foams were cactus.

  7. #7
    I could have used the EM1 seat base foams as well as the EM1 back foams. But I would have had to shape and cut it to suit the metal ed6 seat base.

  8. #8
    Member Array
    Join Date
    Apr 2009
    Location
    QLD
    Car:
    ED Sedan
    nice.

    so you are really re-trimming the ED seats in EM1 seat fabric? No part of the EM1 seat is installed in the ED? how is the fit? is there much slack or loose fabric anywhere on the seat?

  9. #9
    Yeah, but you do use the EM1 back foam on the ed6 frame. The fit is quite good on the base with the ed6 foam, you just have to pull it tight when using the cable ties. My brother and his gf borrowed the car (i needed his ute) last night and they both commented on how well the seats turned out.

  10. #10
    Member Array
    Join Date
    Feb 2010
    Location
    SYDNEY
    Car:
    GD3/ED6
    can you put different rear seats in the back of an ed6? dc2r rear seats, maybe?

Posting Permissions

  • You may not post new threads
  • You may not post replies
  • You may not post attachments
  • You may not edit your posts
  •  
Powered by vBadvanced CMPS v4.1.3


Terms and Conditions
Ozhonda.com is in no way affiliated with the Honda motor company or Honda Australia in anyway whatsoever.