|
-
xCarlink DIY Tutorial
Hi Guys, few people have inboxed me about a DIY guide for an XCarlink Install and I'm sure there's plenty out there but I'll had my one in just for some more help. If people get stuck feel free to let me know and I'll try update the thread with more photos or any other type of help.
First off, what you need.
-Xcarlink Unit
-Panel removal tool (http://www.etoolcart.com/ProductImag...ols/ST9007.jpg) < This set is available from SuperCheap Auto for $19.98 or from Autobarn for $45. If you're patient you can try eBay for around $10-20.
-Drill with phillips head and also drillbit of 15mm or higher.
-Phillips Screwdriver.
*NOTE* You do not need to remove to unplug the car battery.
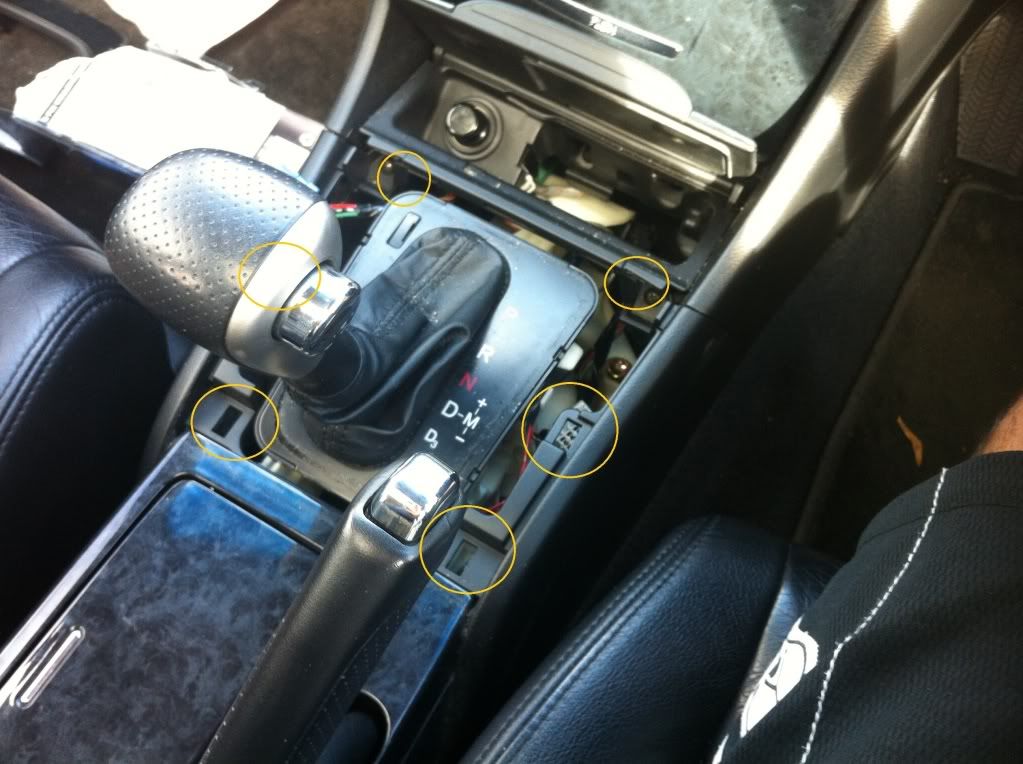
Step 1: Move your shifter into D3 (If you have auto)
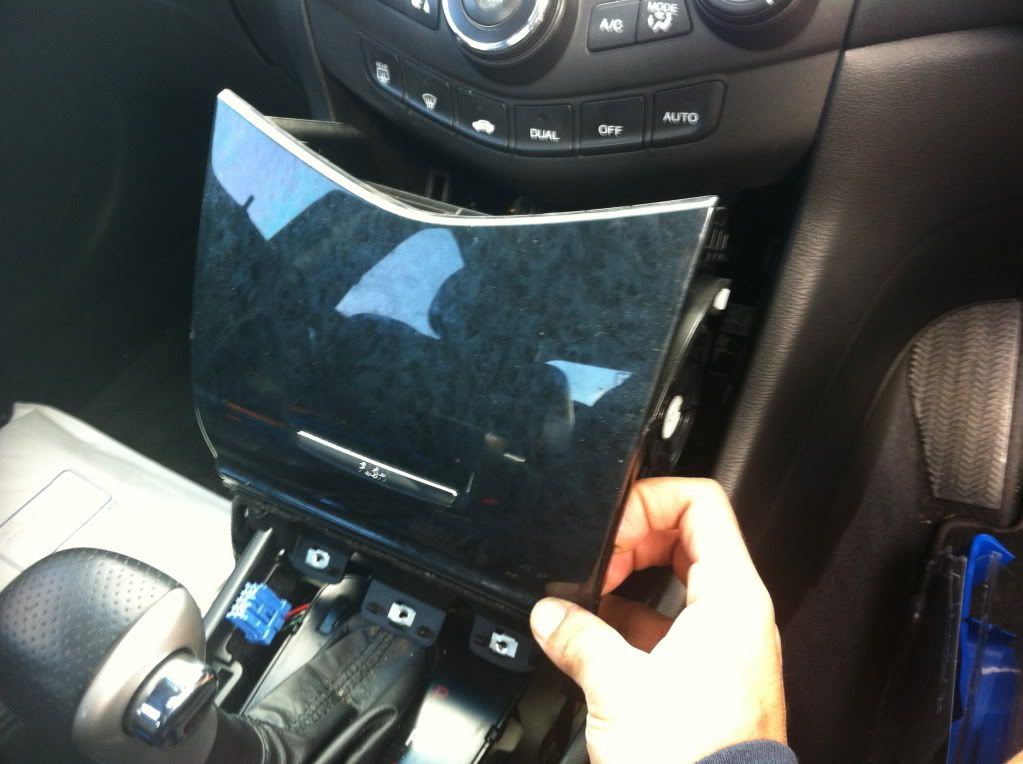
Open the cigarette lighter/ash tray bay lid. From here, gently lift the top of the SHIFTER panel to release the TWO top clips (Your hands will suffice here). Once those are out, use your panel removal tool and again, carefully use the correct leverage to release the 4 remaining larger clips (marked in photo). It takes some effort but be gentle and patient and it'll pop. Once that's done, removal the shifter panel and if you have seat warmers unplug the cables from the bottom by simply pressing and pulling on the release and set aside the panel somewhere. We have now exposed 2 screws required for removal.
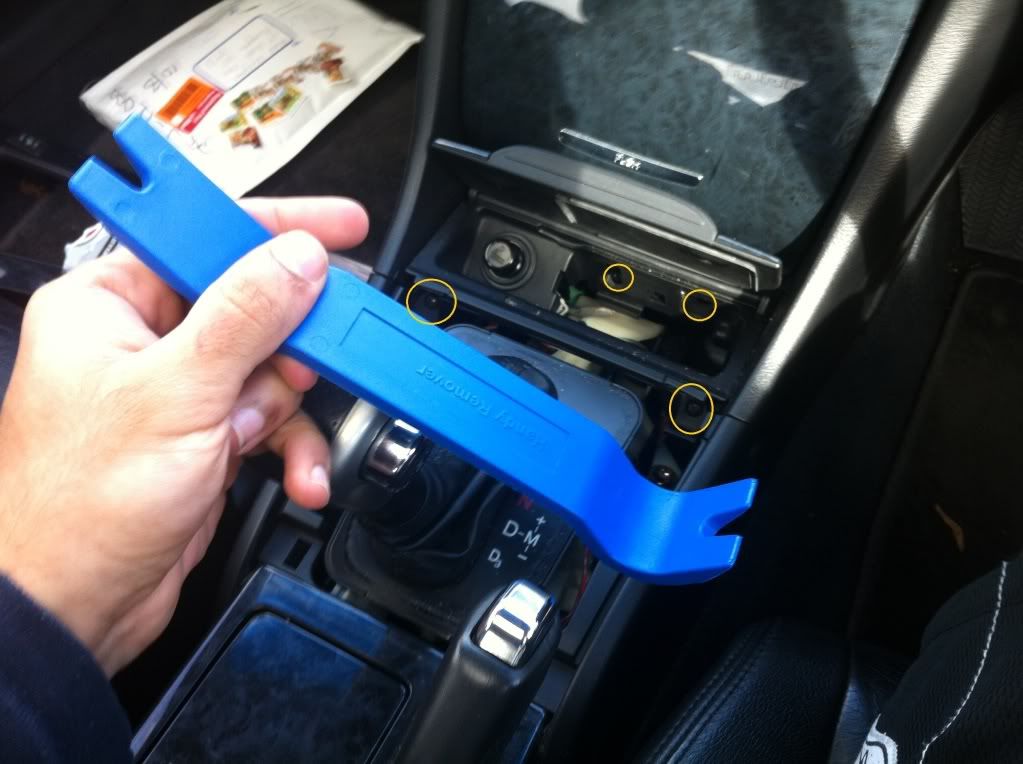
Step 2: *NOTE* The Panel removal tool I used is as shown.
As marked in the photo, gently remove the ash tray exposing 2 more clips alongside the 2 screws we previously uncovered. Using the Phillips screwdriver, remove these screws (marked on photo) and be careful not to lose these screws in the space below (If you have a magnet tool you don't need to worry) *NOTE* You can use a drill, as long as you can make it fit to remove the screws. Then gently, unclip the cigarette lighter bay (2 clips located right where the first set of screws are revealed)
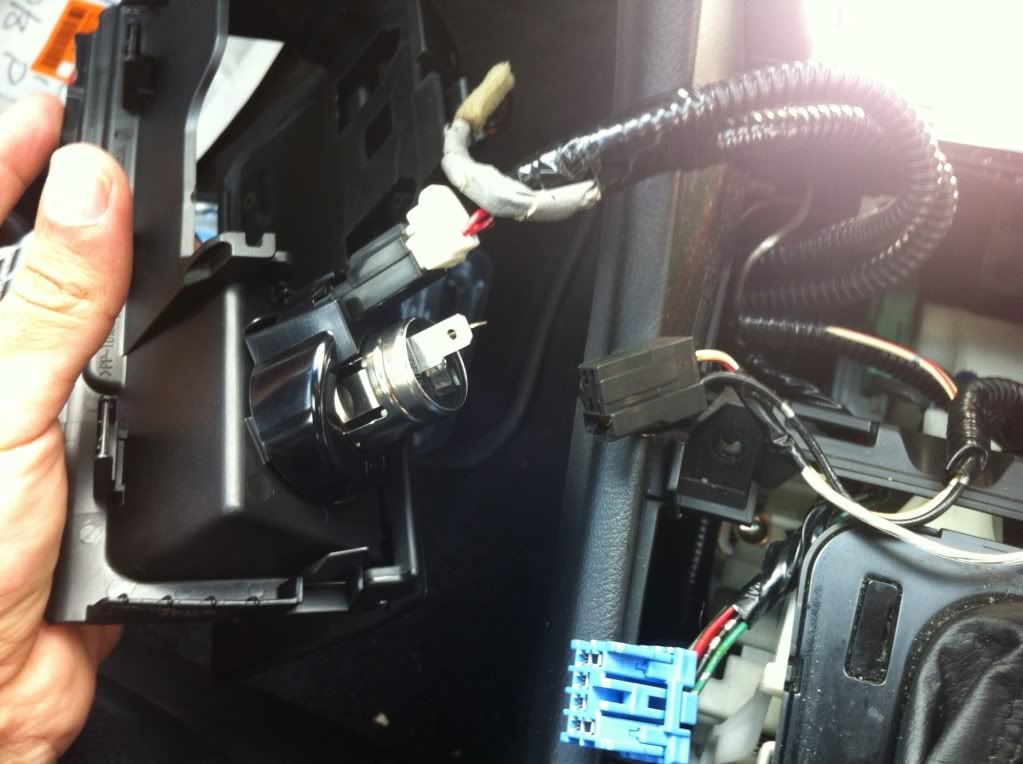
Step 3: You'll need to unclip the cigarette lighter from the unit, I was able to remove the black piece but the white plug I had trouble with so I left it and just set the unit to the passenger side *NOTE* The blue plug is from the seat warmer.
Step 4: *NOTE* Cigarette lighter bay to the left. Now you need to remove the cubby. The EASIEST way to do this is open the cubby door and from the places marked on the photo, gently pull towards you and you'll hear the pop. Once you do, close the cubby and then pull the whole unit out slowly. If accidently you pulled too hard and now you're struggling to close the cubby, be patient and don't freak, you can push the cubby back to its spot to close it and then remove (As it can't be removed with door open). *NOTE* The bottom of the cubby (3 silver holes) might get caught on the clip hold of the cigarette lighter, this plastic is flexible so gently push/pull so you can remove the cubby.
This next image shows how to take the cubby out
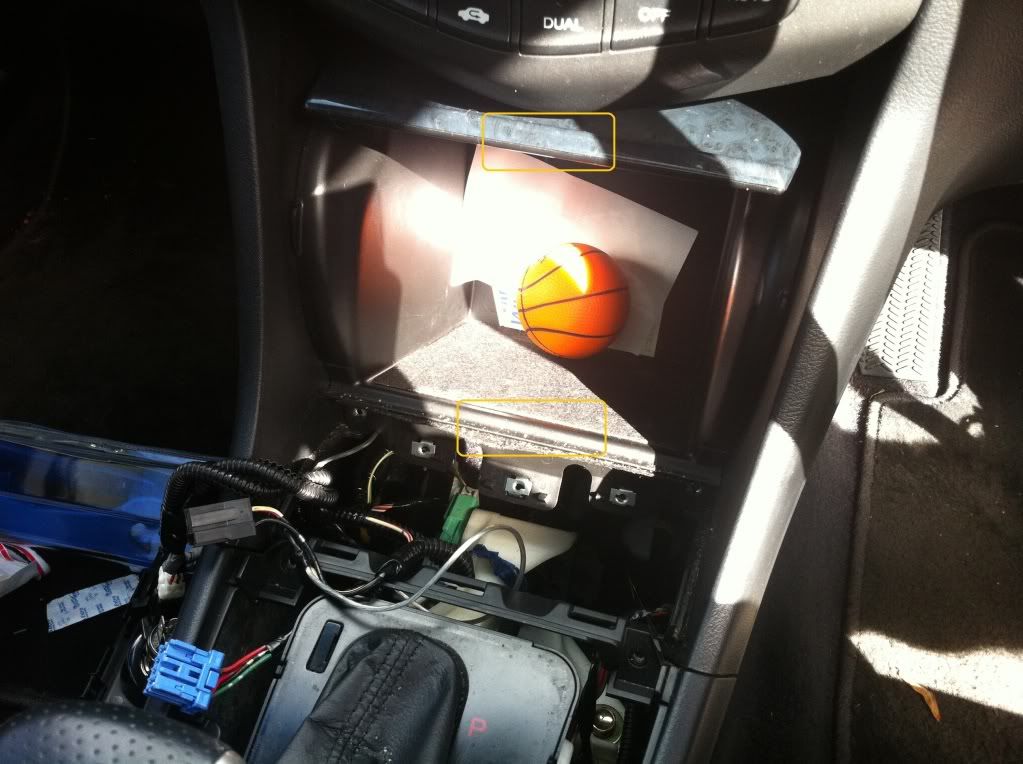
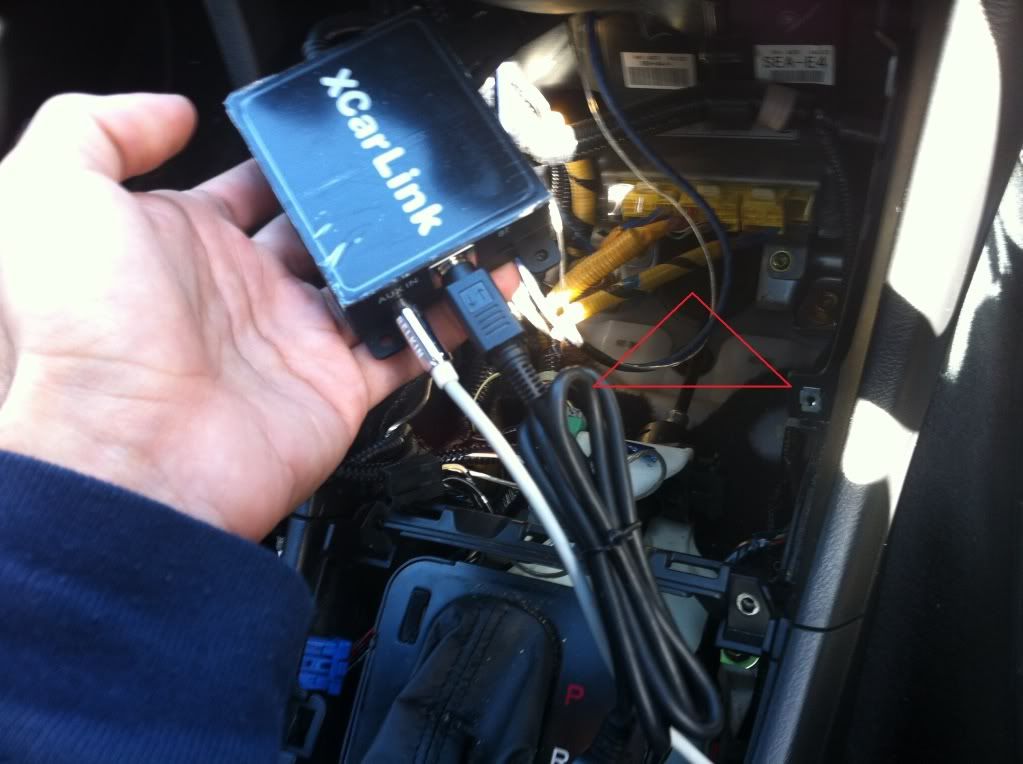
Step 5: Look inside the exposed space and up into the headunit. You'll notice an exposed slot to insert the Xcarlink plug (white). Plug it in and push to ensure it's secure (You may or may not hear a 'click') Give a tug on the wire to ensure it's secure. Attach the Xcarlink with desired plugs and connect your audio device to it and give it a test to ensure it works (You'll need to press CD/AUX to get to the new CDC option on the headunit). As you can see in the photo, there's plenty of room as I originally feared it would be cramped, there's plenty of space. The red triangle shows where mine was 'dumped' lol. It just sits there, no REAL need to drill screws in or cable tie stuff but feel free if you like.
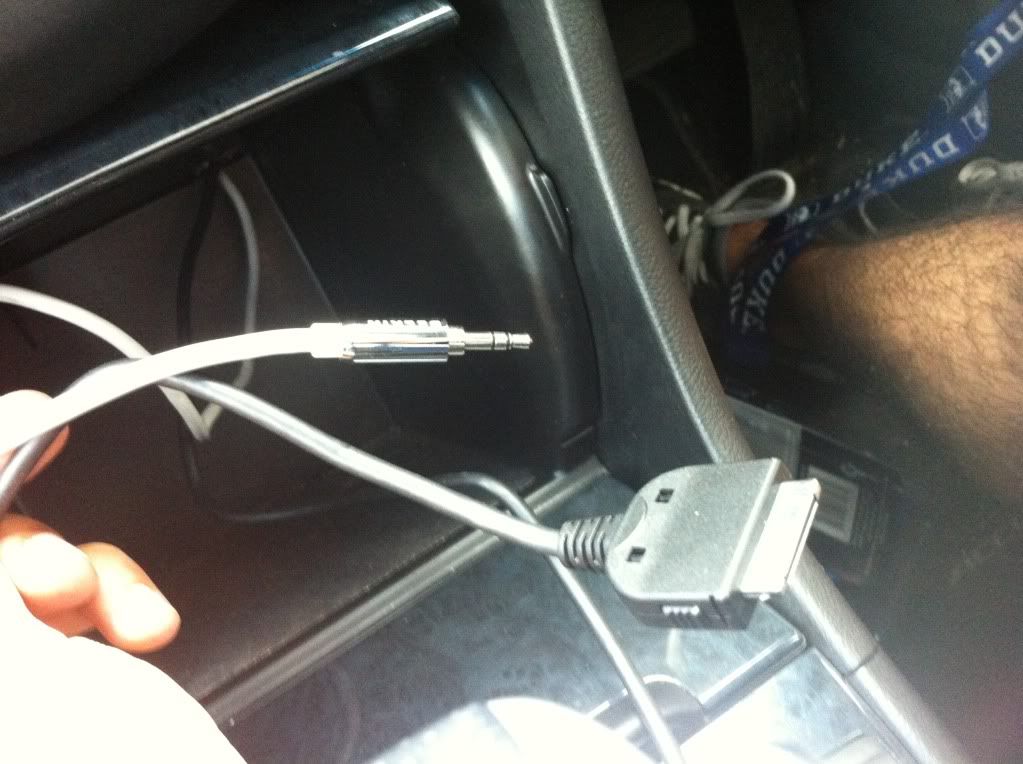
Ensure you give yourself generous amount of cable length. Now depending on whether you want your cable to run through the glove box or through cubby decides what you do next. The glove box is simple, but bit more annoying cos of the long cable. If you want it stored in the cubby (like I have), use the drill and the 15mm drill piece or larger and in the top right corner towards the back of the cubby drill a hole. Feed the cables through and reattach to xCarlink (wher ever it's stored)
As shown in this photo, mine was fed through like this >>
Step 6: Putting everything back together. Start with the cubby (It's held by 2 clips at the top, and the way to line up those clips is with the 2 silver screws at the back of the exposed space behind it. Line it up, and push back into place, it may take some force. Also, the bottom 'tri-silver circle panel' underneath it might have trouble going back in, Ensure the door is closed and again push/pull on the cigarette bay clip panel to fit it in.
Step 7: Once that's in, you will need to reconnect the cigarette lighter/ash tray bay and then put back in the 2 screws located behind the ash tray and then ensure it 'reclips' on the bottom again. Put the ash tray back in it's spot.
Step 8: Reattach the 2 bottom screws that were originally exposed after Step 1.
Step 9: Reattach the seat warmer plugs (If applicable) and then just reattach the shifter panel by just pressing gently and making sure all 6 clips 'pop'.
Step 10: Pump up the tunes! 
This is how mine looks > 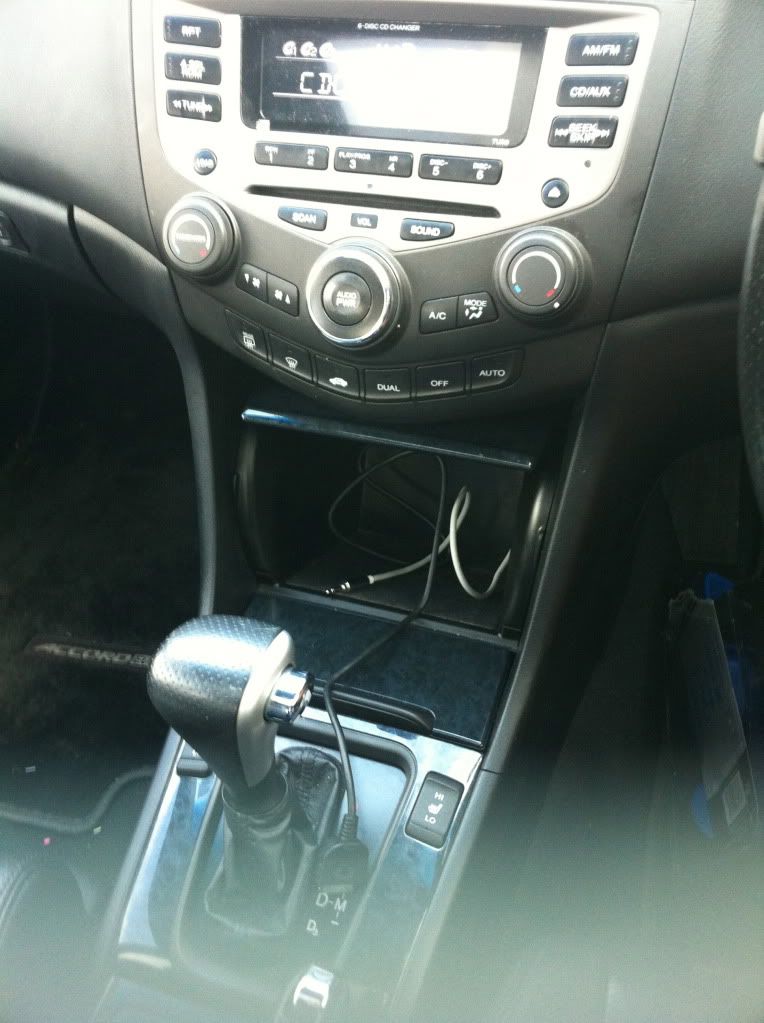
If you get really, really, really stuck I found these videos pretty helpful > http://www.youtube.com/watch?v=1xm8b4WXCmQ
www.youtube.com/watch?v=MDi4HuR3sf0
Good luck! 
Last edited by afgmoh; 12-08-2012 at 09:09 PM.
Reason: Forgot photo.
Tags for this Thread
 Posting Permissions
- You may not post new threads
- You may not post replies
- You may not post attachments
- You may not edit your posts
-
Forum Rules
|


 Reply With Quote
Bookmarks