Page 1 of 3 123 LastLast
Results 1 to 12 of 35

Hybrid View

  1. #1
    Member Array
    Join Date
    Apr 2005
    Location
    Newcastle
    Car:
    Civic EG Si

    Kappa1st's Sweatshop: Installing EG Sedan Access Visor Kits

    Disclaimer: The following is provided as a GUIDE ONLY, and neither myself nor Ozhonda take any responsibility for the outcomes of someone else doing the following. You follow these steps at your own risk!


    Aim: To install EG Sedan Access Visor Kits (JDM Visor kits with clips, not stick-on style). NOTE: this the visor style with the clips ALREADY attached to the plastic visor

    Required: One flat bladed screw driver, decent lighting, flat bladed scraper (see pics) + elbow grease

    Steps:

    1.) Here is the door frame prior to commencement. Wind your windows down before starting to give you access to the door rubbers.


    2.) Start by inserting a flat blade screwdriver inbetween the door seal and rubber. Wiggle as necessary until you see the door metal behind the rubber. Grab the rubber seal with your fingers and pry the rubber away from the door frame.


    3.) Pull the rubber until you approach the mirror but remember to STOP at the point marked in yellow so you don't pull the rubber off completely


    4.) At the top of the door frame, also stop at the point marked in yellow


    5.) Also pry away the rubber from the side of the door frame near the upper corner. Remember to also stop pulling the rubber at the point marked in yellow


    6.) Insert the side clip (attached to visor) into the door frame behind the rubber and push back the rubber to cover this clip.


    7.) Now concentrate on the top clips. Insert all of them into the metal rim of the door frame. So insert bottom of clips (red) into the door frame section (yellow)


    8.) Push each of the clips into the door frame, using the screwdriver, until the clip section (marked in yellow) audibly ‘clicks’ into the door frame


    9.) Each clip should look as such when properly ‘clicked’ in. Note that most of the clip body (marked in red) must be touching the door frame, not just the ‘clicked’ section (marked in yellow)


    10.) Proceed to replace your rubbers by pushing in with your fingers. I found that fingers were more useful as you could ‘feel’ if the rubber had fitted back in the door frame properly. Push the section of rubber (marked in yellow) back into the section of the door frame (marked in red)


    11.) As a finishing touch, use a thin scraper (or blade) to make sure the exterior rubber on the window visor is straight and hasn’t bunched up.


    12.) Finished!

  2. #2
    Green block gangster Array
    Join Date
    May 2004
    Car:
    twin GX160's
    good work dude

  3. #3
    Member Array
    Join Date
    Apr 2005
    Location
    Newcastle
    Car:
    Civic EG Si
    Quote Originally Posted by ECU-MAN
    good work dude
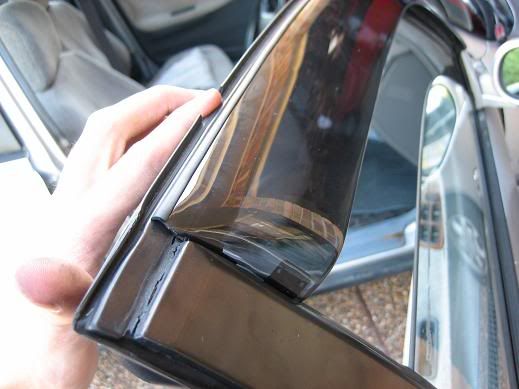
    Thanks man. As a side note, the job took about 15 minutes per door, very quick and easy after the first door was done and the technique was obtained.

    -Kappa

  4. #4
    very informative and great use of colours. awesome stuff

  5. #5
    Member Array
    Join Date
    Jul 2005
    Location
    Western Sydney
    Car:
    94 EG, 11 Maloo
    dude i love you! hahaha i got these and have no idea on how to put em on
    Power Of Dreams...
    VTECN

  6. #6
    Member Array
    Join Date
    Feb 2006
    Location
    in a tree
    Car:
    Civic
    bump! gonna need these tmrw! muahahaha

  7. #7
    Member Array
    Join Date
    Dec 2004
    Location
    syd
    Car:
    94 integra VTiR on bags
    hey mate i bought some for my dc2 and there are 2 small clips and 2 big clips that need to be screwed onto the visor and i cant figure out how they go??? any ideas???

  8. #8
    Member Array
    Join Date
    Apr 2005
    Location
    perth
    Car:
    EK4 / EVO TME 6.5
    shud be the same for ek too rite?

  9. #9
    Member Array
    Join Date
    Feb 2006
    Location
    in a tree
    Car:
    Civic
    pretty much the same method for EK

  10. #10
    Member Array
    Join Date
    Apr 2006
    Location
    I'm here right now
    Car:
    JDM K20A
    EK got 4 different kinds of clips *DOH!*

  11. #11
    Member Array
    Join Date
    Jul 2007
    Location
    Brisbane
    Car:
    2000 Civic EK
    Just consolidating some information for the next person-
    http://www.honda-tech.com/zerothread?id=774737 (link courtesy of pchio)

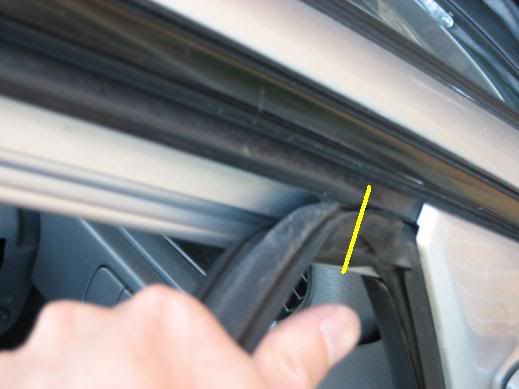
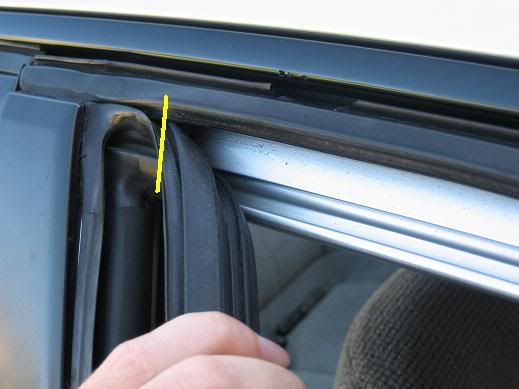
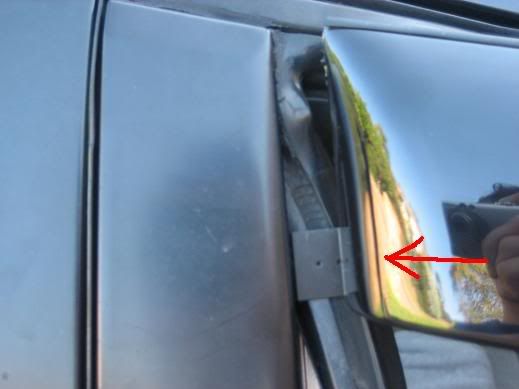
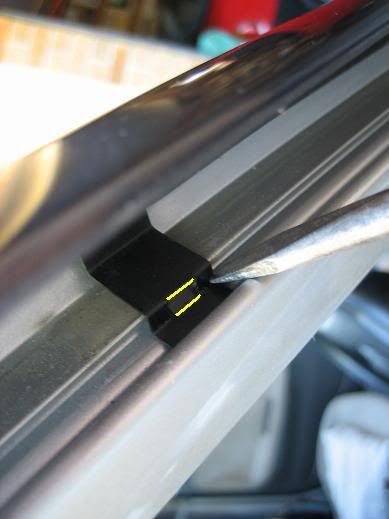
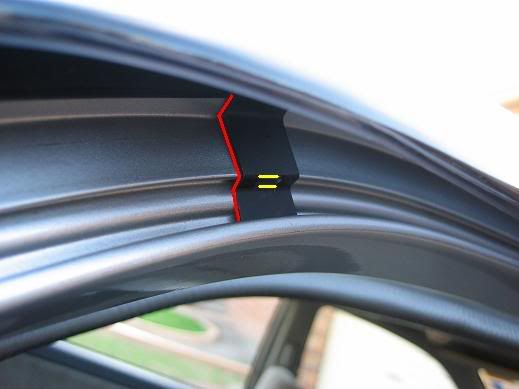
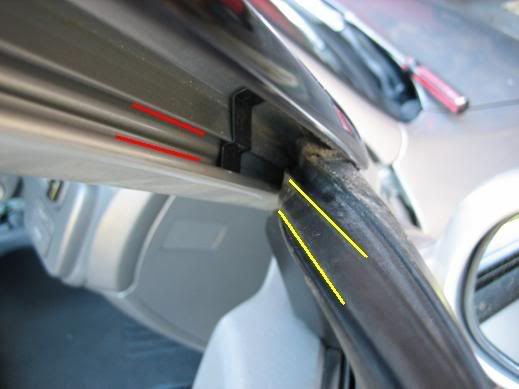
    Most of the pics are gone, but this info may be useful. The first and last one are B's, these screw into the door frame. Screw goes into the door, and catches the B clip on the other side. Took me a while to figure out.

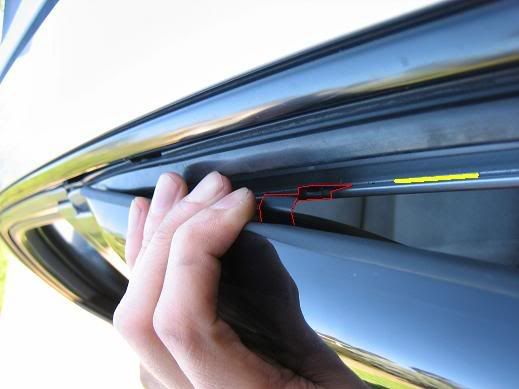
    After that you've got H, F and D, in between all the B's as per:


    where H is next to the higher B, F is the middle one, and D is the one next to the lower B.

    *Of course, you're prolly looking up at the picture going 'duh mate'- but yeah.. putting it in text in case the picture hosting dies, like for the subsequent pictures in in that link.

    Have fun!
    Last edited by Ry_; 14-08-2007 at 12:42 PM.

  12. #12
    Member Array
    Join Date
    Apr 2006
    Location
    I'm here right now
    Car:
    JDM K20A
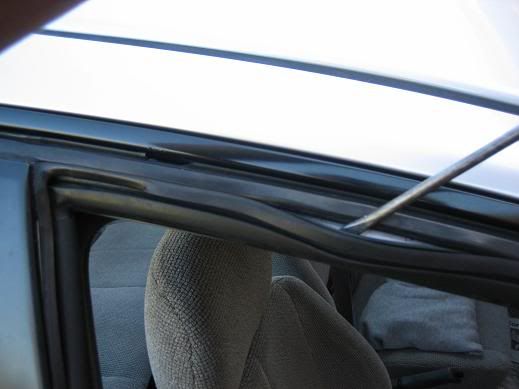
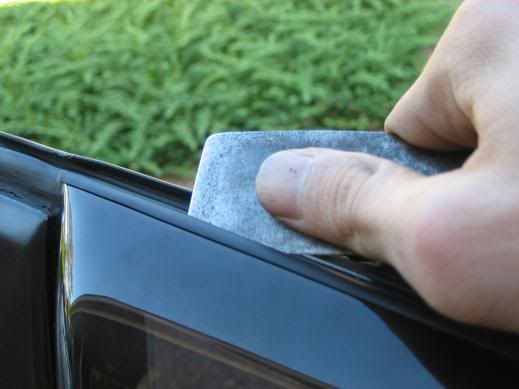
    yeah, finally figured it out after prying the weatherseal

    anyway, +1 rep for the info!

Tags for this Thread

Posting Permissions

  • You may not post new threads
  • You may not post replies
  • You may not post attachments
  • You may not edit your posts
  •  
Powered by vBadvanced CMPS v4.1.3


Terms and Conditions
Ozhonda.com is in no way affiliated with the Honda motor company or Honda Australia in anyway whatsoever.