|
-
Audio control button civic FD VTI model + audio info
Disclaimer: The following is provided as a GUIDE ONLY, and neither myself nor Ozhonda take any responsibility for the outcomes of someone else doing the following. You follow these steps at your own risk!
Original source : 8th gen civic forum
Additional source : civic FD thailand forum
Special thanks : Samuel337 for some advise
This is my first DIY a while ago.
DIY between 25-26 Aug 2007
Succesfully installed and tested on AUDM civic FD VTI on 26 Aug 2007
I miss some of steps in photos.
STAGE I
INSTALLING AUDIO CONTROL BUTTON
1. Disconnect negative batteray first (remember u need to remove airbag, so this is for precaution)
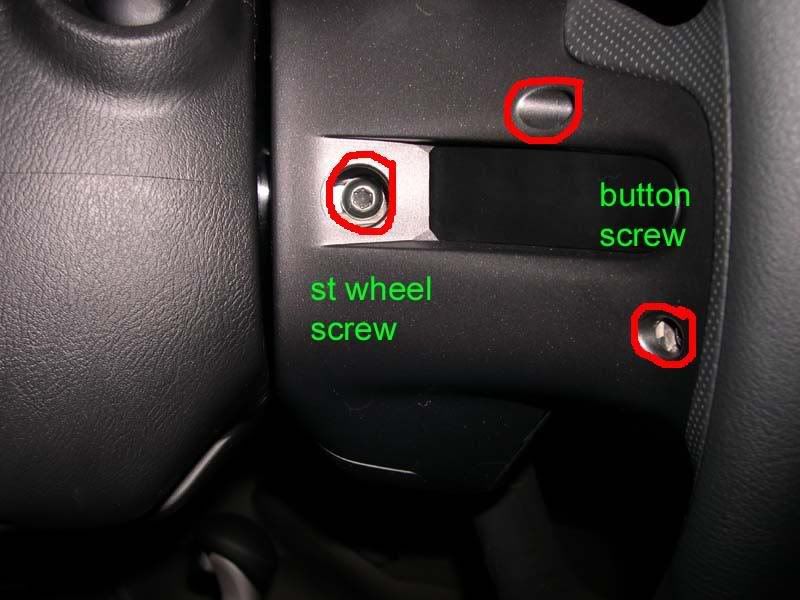
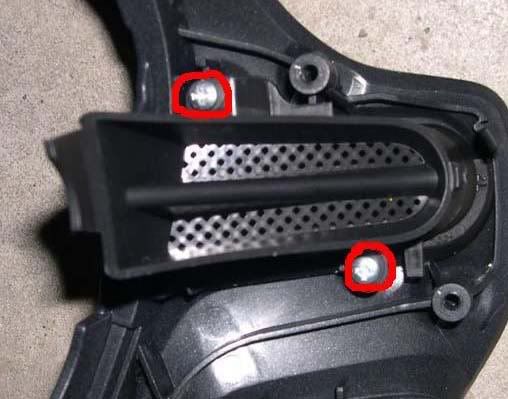
2. each side of steering wheel, remove 3 screws (1 torx screw securing streering wheel and 2 philip screw holding audio/cruise button)
note : it will much easier if turn your steering wheel, makes screws on top position
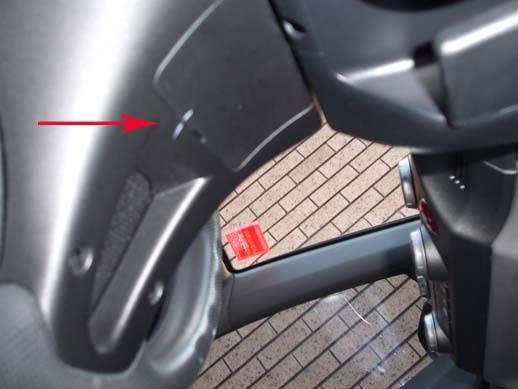
3. under steering wheel, pry panel to exposed the airbag/electrical harness
4. unlock these two connectors (look out for locking pin/button)
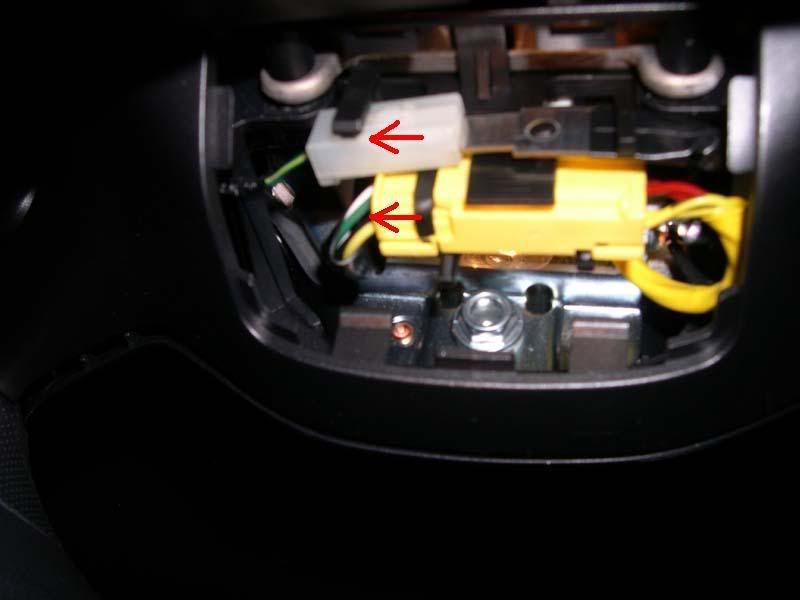
5. Pull out the airbag. carefully ! the metal piece behind the airbag might scratch your dash/steering wheel
6. remove again 4 screws which hold steering trim and also disconnect main connector.
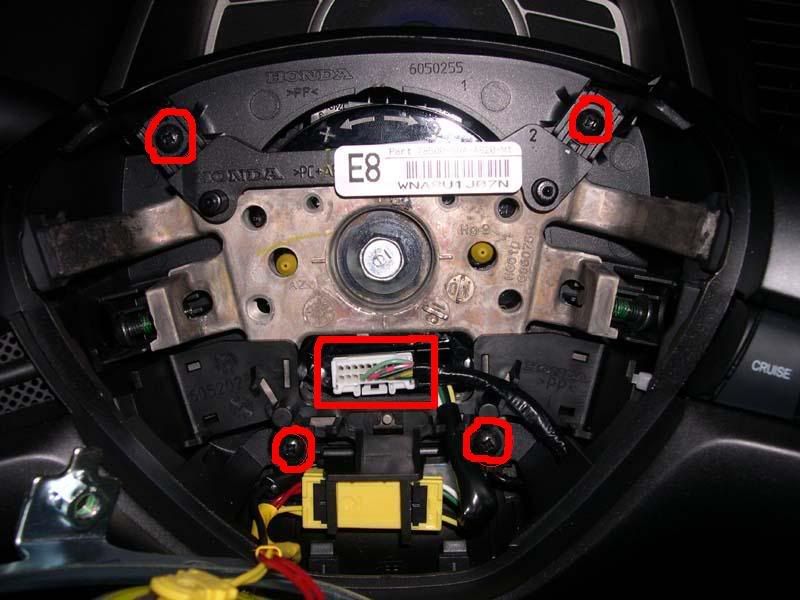
7. your steering trim now can be removed
8. remove stock cruise control button - right side (auto only) and blank space - left side (and right side for manual)
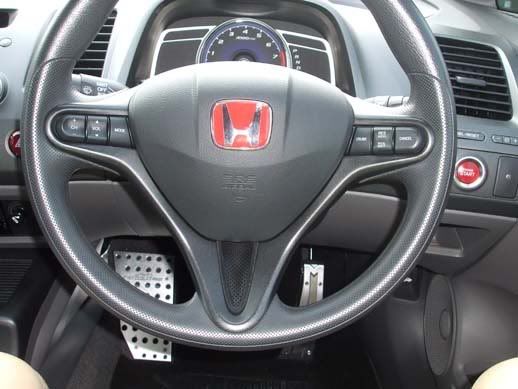
9. install new audio and cruise control button
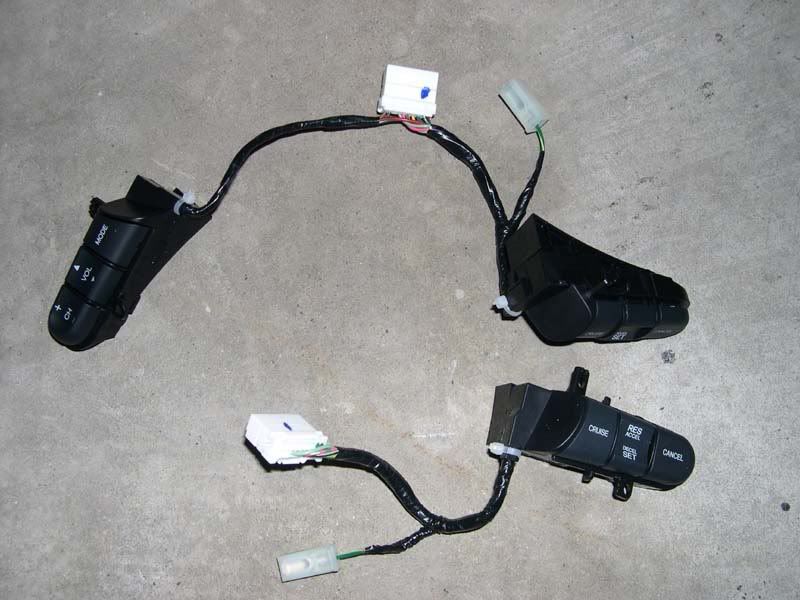
pic: top is new button (audio and cruise), bottom is stock button (cruise only)
10. reverse step 7 to step 1.
11. now you can go to sleep or continue stage 2
STAGE II
INSTALLING 2 EXTRA CABLES AT STREERING WHEEL
1. we need to run 2 extra wire from steering wheel to audio unit. means we need 4 pins and about 1.5 m cables.
2. take off 4 pins from stock cruise control button, but if u car is manual, i reckon u have to get these from computer pins.
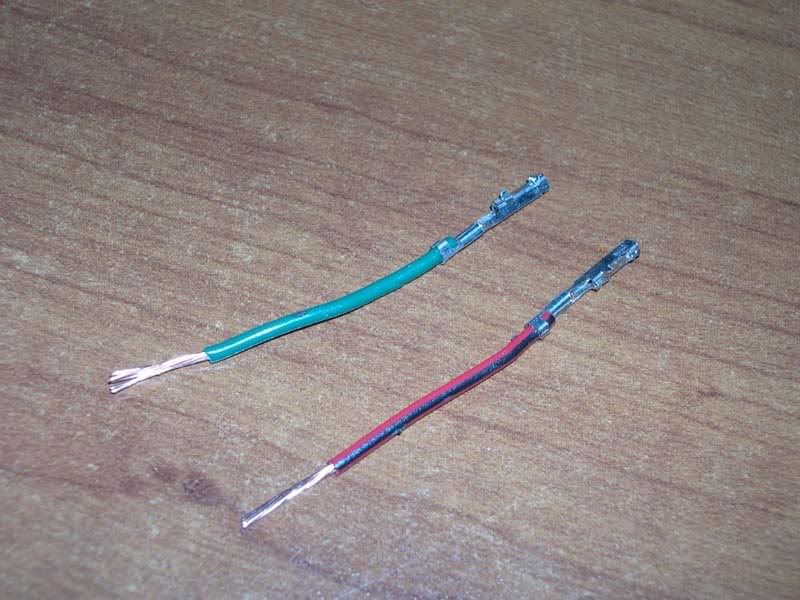
3. assemble 2 pins at one side and 2 pins at other side with cable running between them about 1 - 1.5 m length.
4. don't forget to put some codes/label on them
5. Disconnect negative battery
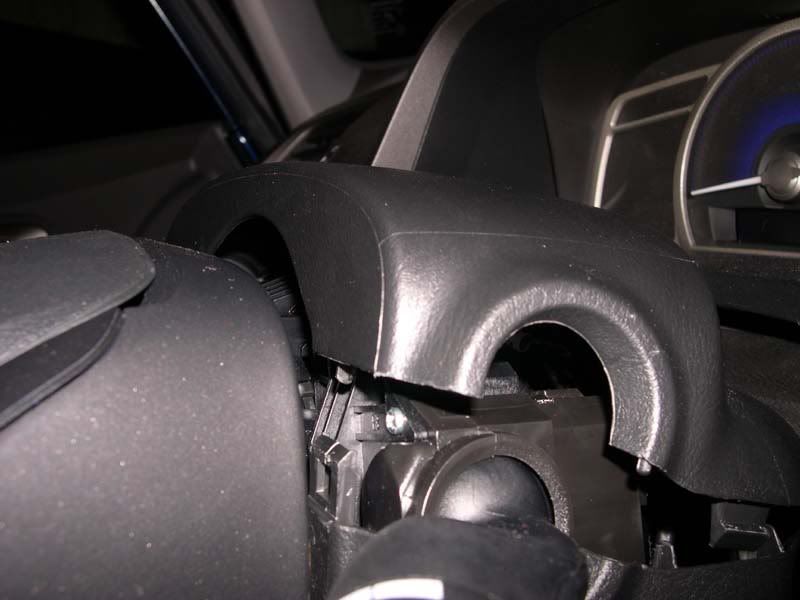
6. Adjust your steering wheel position to the lowest, and remove top section of steering wheel colum by push at each side and gently pull up.

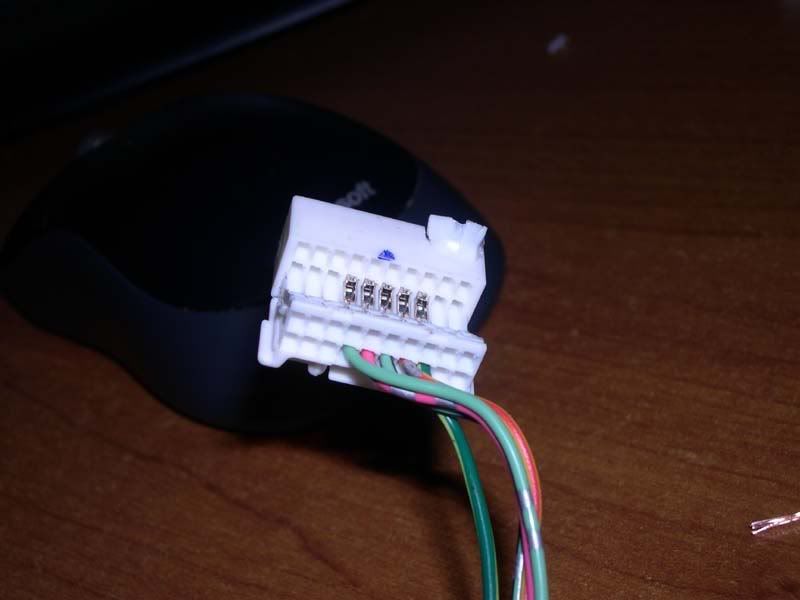
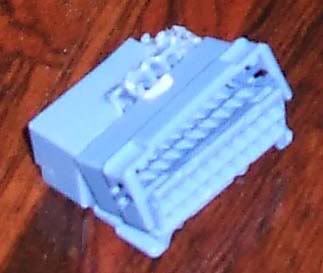
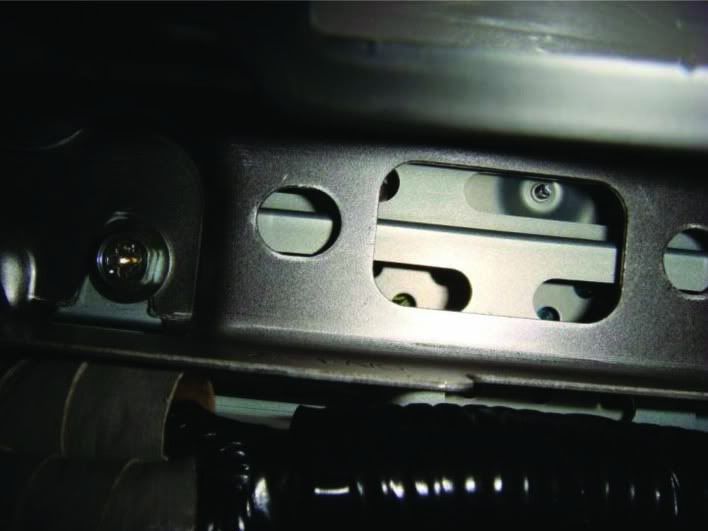
7. unplug main connector and on the top of the connector fry up the tap, it would only half open. half open like this pic.
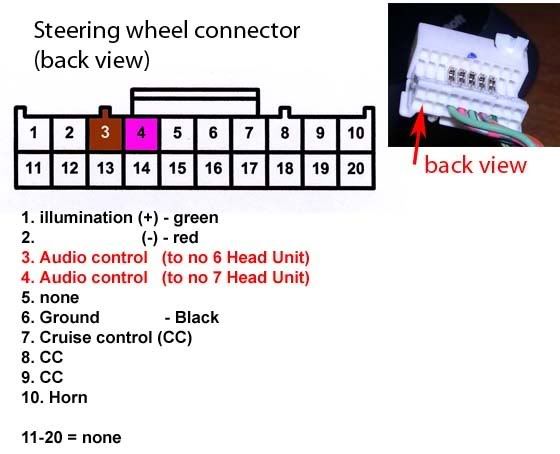
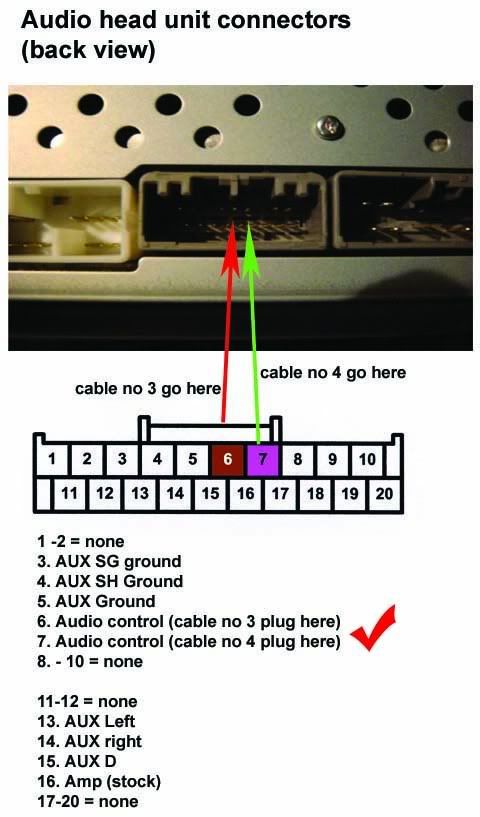
8. refer to the diagram to insert your new 2 extra pins/cables in. be carefull, once the pins go in, they can't go out again
*** make sure the pins go to right position and which side up ***
9. run the new cable to under the dash toward to audio head unit section
10. reverse step 7 to step 5
11. now you can go to sleep or continue stage 3
Last edited by dmx; 28-02-2008 at 09:07 PM.
-
STAGE III
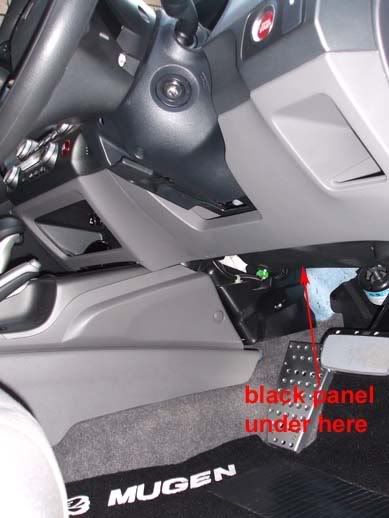
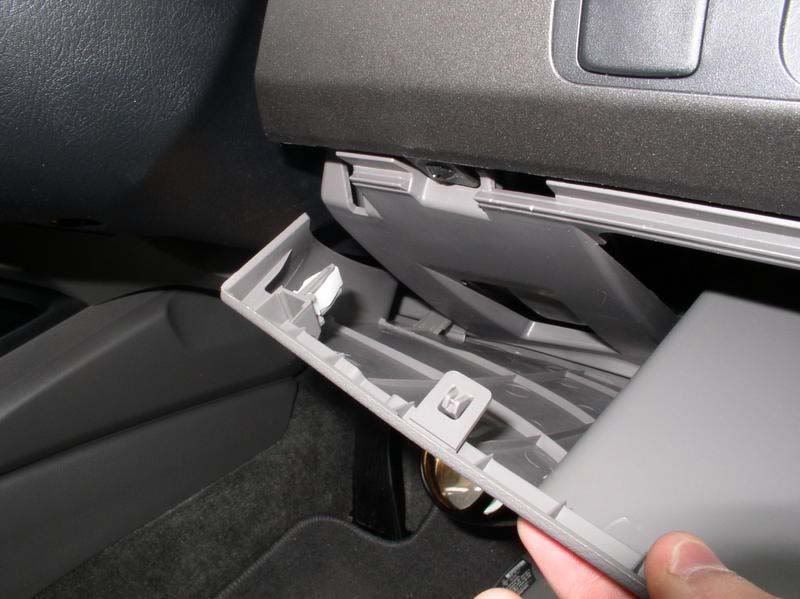
1. Remove the black bottom panel first (turn center lock, and pull the clip from each side)
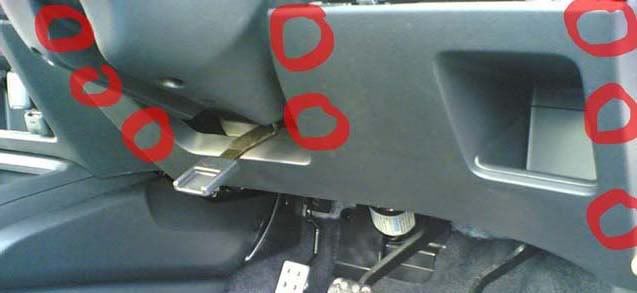
2. Remove under steering wheel panel, start from bottom right corner (use pocket holder to pull off the panel),
once u get this clip off, the rest will also off
total 8 clips (3 left - 3 right - 2 center)
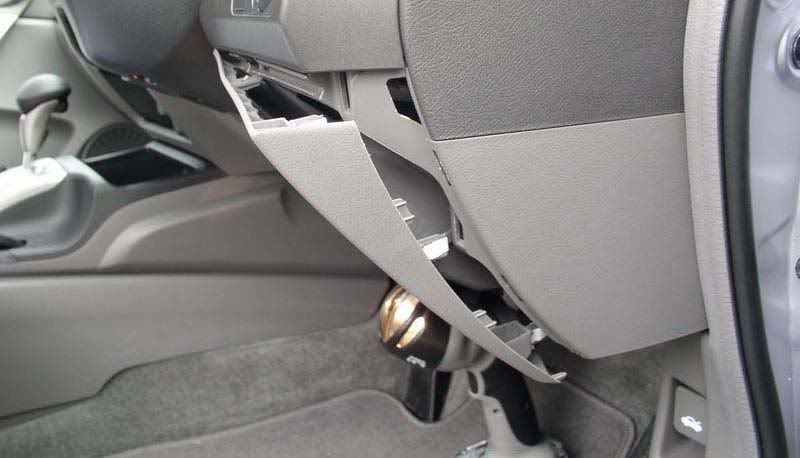
3. pry the panel under the stock audio unit near the gear knob (at top of space next to cigaarette lighter)
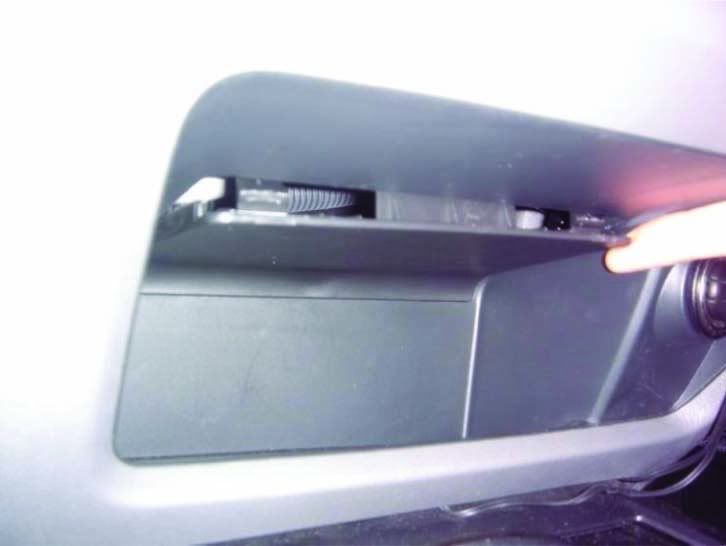
4. remove 2 screw from inside that panel.use 9mm socket or 5/16 socket
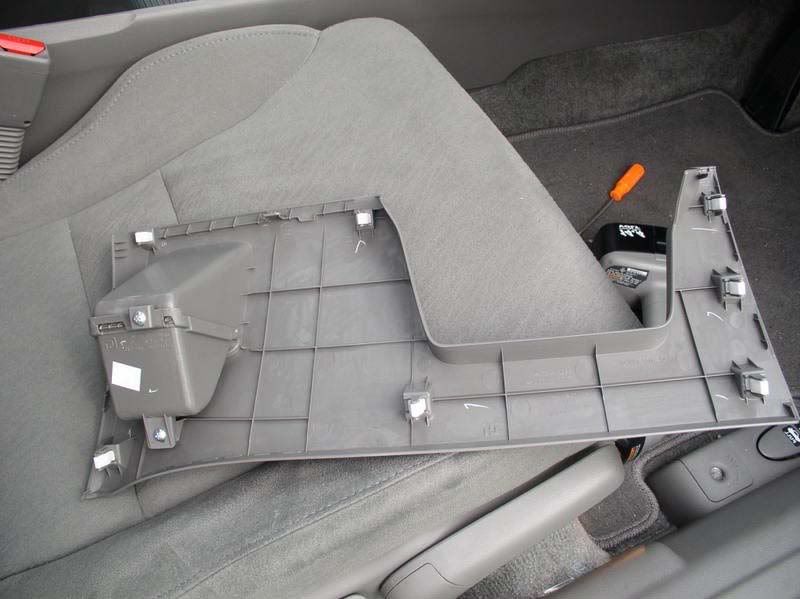
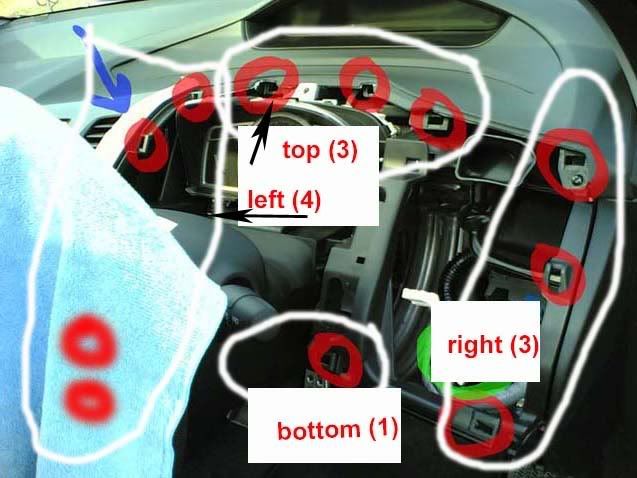
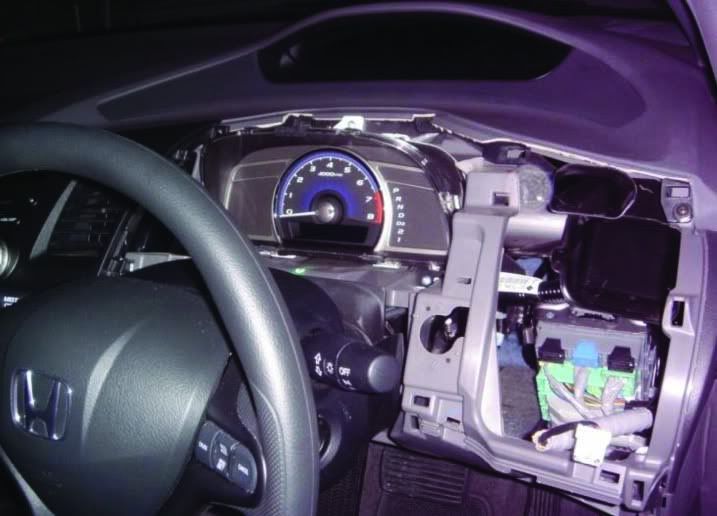
5. Remove driver dash panel(revs dash panel). remove 1 screw at the bottom and 11 clips (3 right - 4 left - 3 top - 1 bottom).
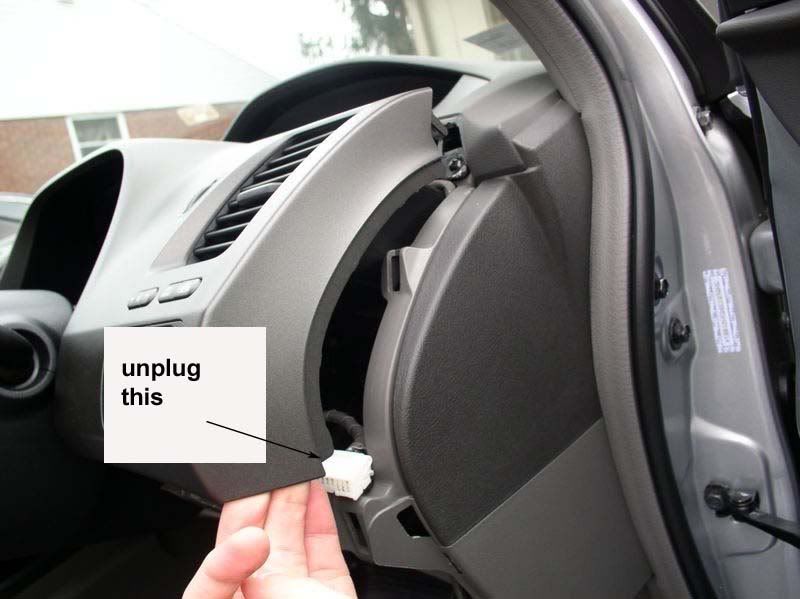
(hint. start from bottom right side first, when it' start off, unplug the cable - select/reset button and continue remove the dash)
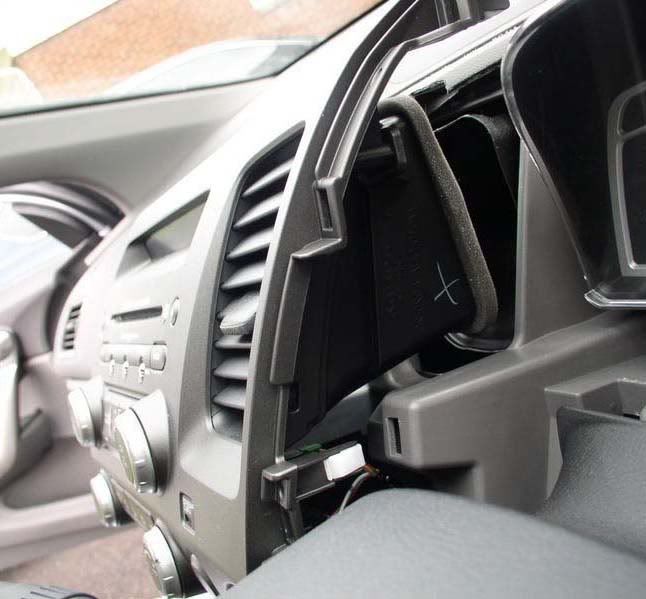
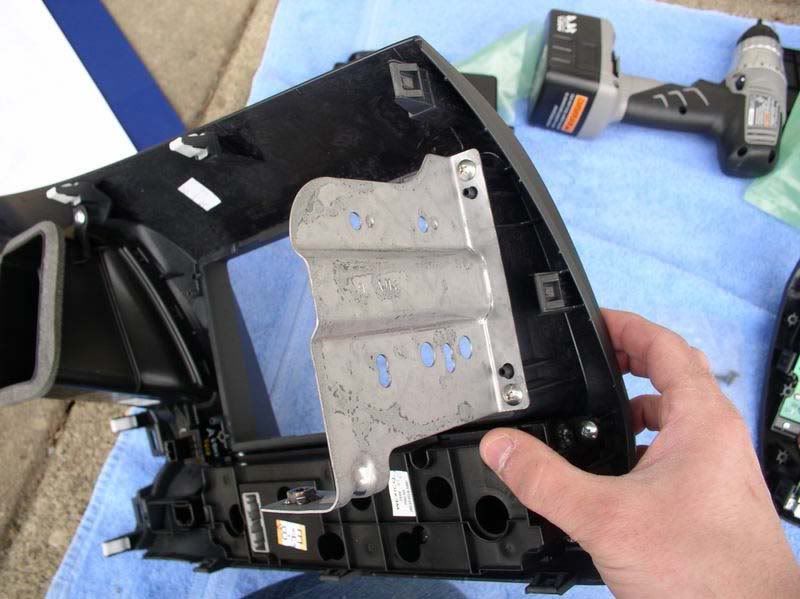
6. Cover up ur steering wheel with cloth, passenger side dash with sticky tape/paper to prevent any scratch from the metal bracket behind audio unit panel
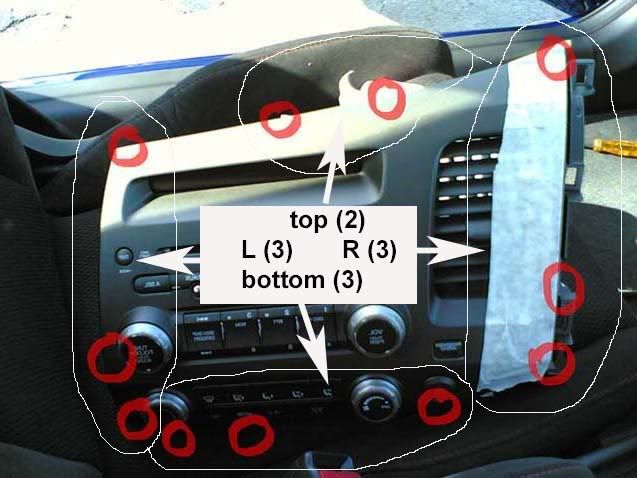
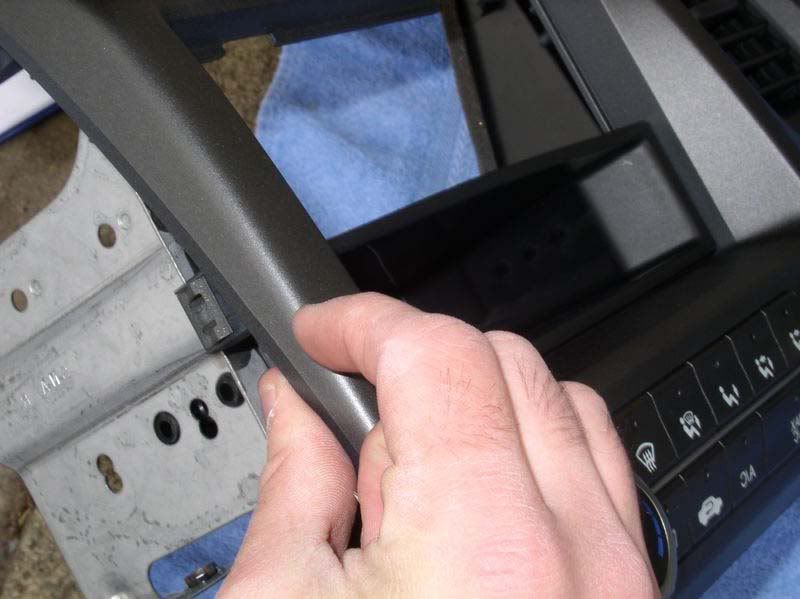
7. remove the audio panel, all clips, start from right side first, pull gentle, and force to hard.
total 11 clips (3 left - 3 right - 3 bottom - 2 top)
note : when you pull out the dash, the clips will drop somewhere, so make sure you know where they dropped
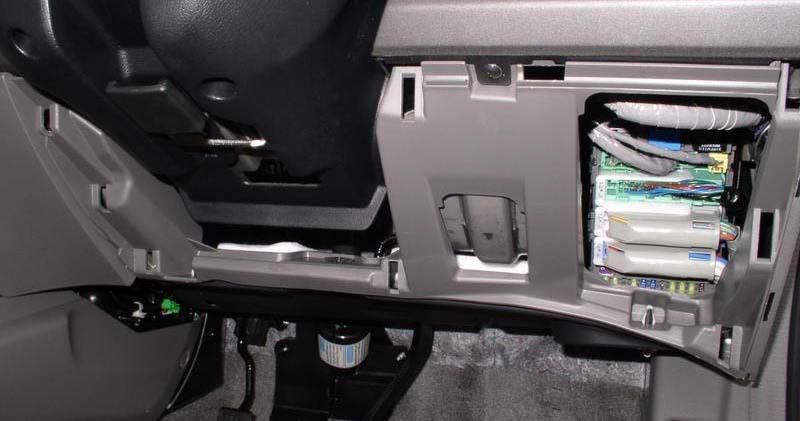
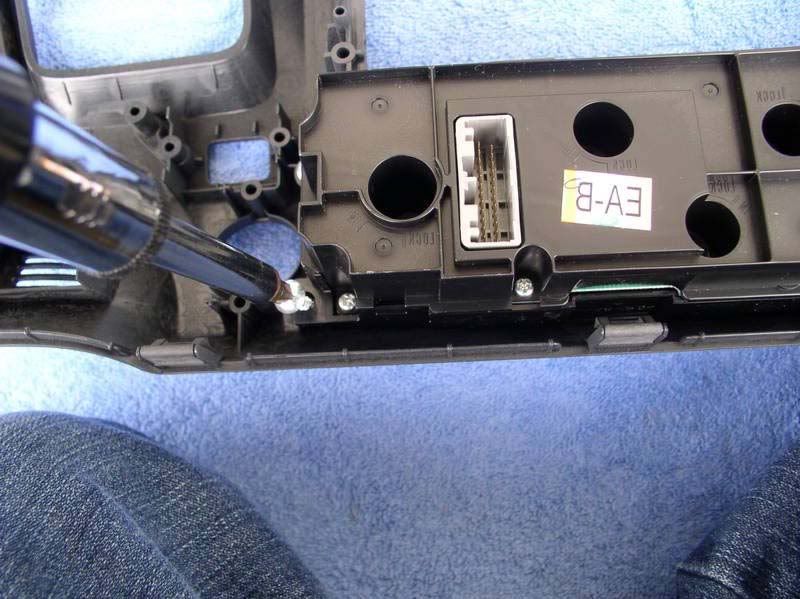
8. disconnect audio unit, radio, aircon and other connector.
9. VTI model only have 1 main audio harness which connect to audio unit, we don't worry about this harness and its plug
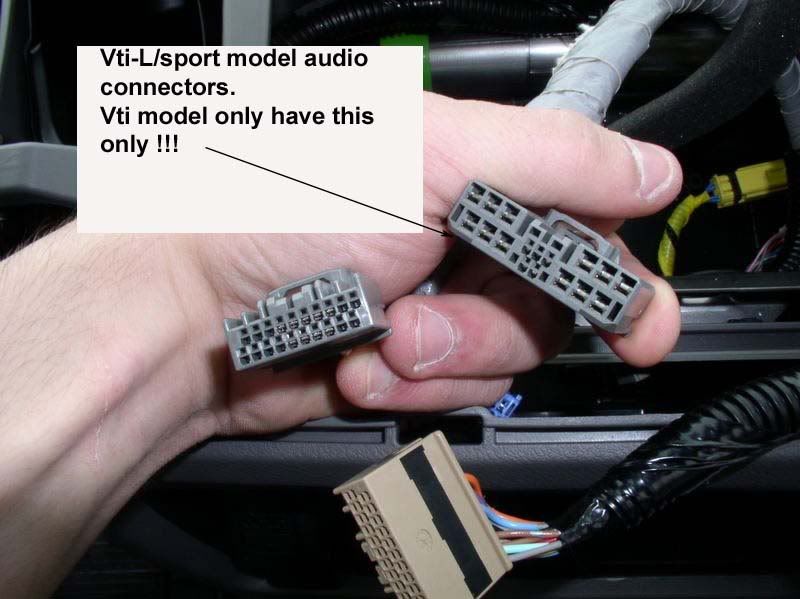
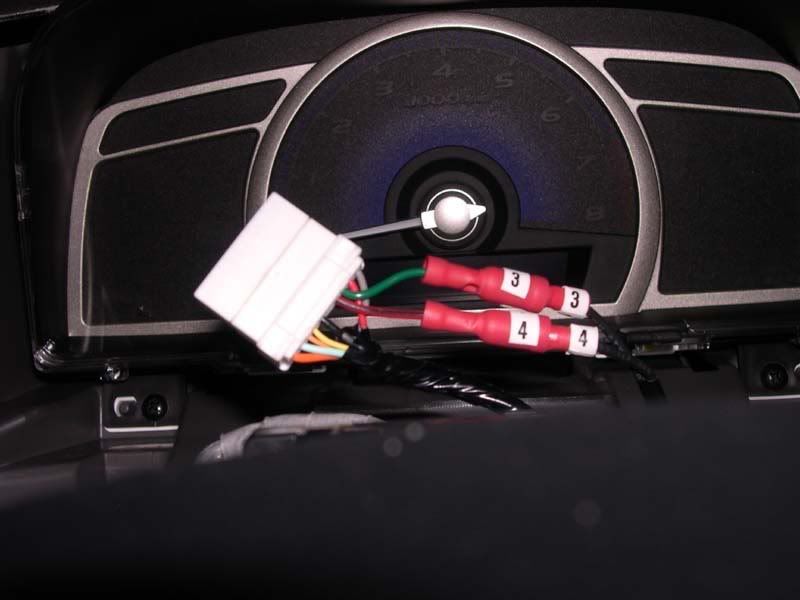
10. just see the other pins beside that main audio pins
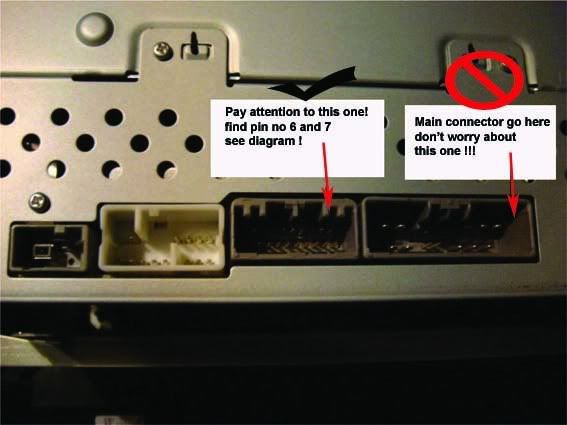
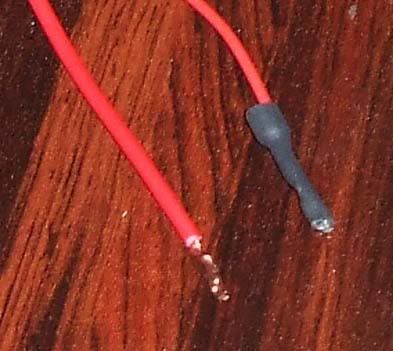
11. get ur new 2 extra cable run to here. Now u can either plug/insert the pins directly to head unit or u can use 20 pins computer socket as a connector. if u choose to insert the pins directly, like i did, meake sure the pin sealed with heated tube or sticky tape. after all, insert them to pins according to diagram. make sure it hold tightly
12. connect your audio main harness and try first your audio control button.
13. reverse step 9 to step 1
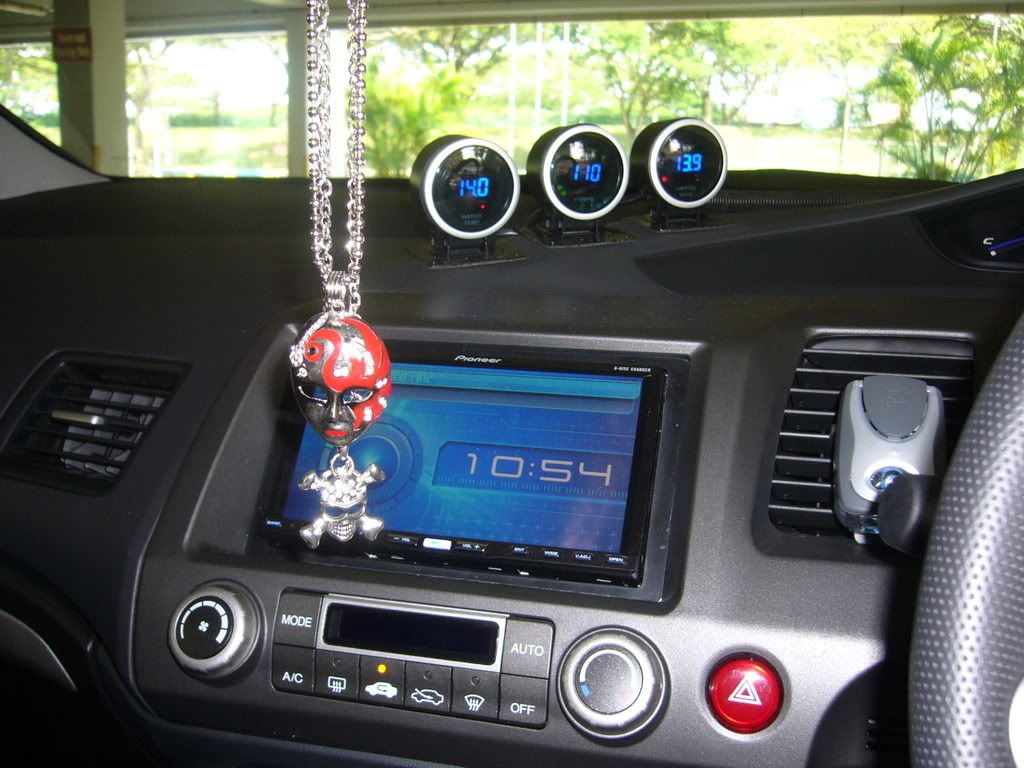
now you enjoy you audio control button !!!

http://www.youtube.com/watch?v=VKhY7GTyW5U
(proudly brought to you by Jay Chow)
Last edited by dmx; 28-02-2008 at 09:10 PM.
-
AUX connection
and while you open the this head unit dash, u can also add AUX connection for you Ipod/MP3.
but please note, the pins for AUX and audio control button are side by side. I think you need a proper connector to put all cables in.
check this DIY for AUX connection, courtesy by samual337
http://www.ozhonda.com/forum/showthread.php?t=70416
Last edited by dmx; 28-02-2008 at 08:52 PM.
-
Last edited by dmx; 29-02-2008 at 08:26 PM.
-
-
Last edited by dmx; 28-02-2008 at 09:13 PM.
-
thats a lot of effort...well done.
If you stand for nothing, you will fall for anything.
-
with the 2 din head unit, do u have to remove the cover behind the steering wheel, or can u just remove the actual fascia itself, secondly if i get the 2 din unit does it come with the digital display the goes underneath the 2 din hole? and how does that all work???
-
 Originally Posted by sam.

with the 2 din head unit, do u have to remove the cover behind the steering wheel, or can u just remove the actual fascia itself, secondly if i get the 2 din unit does it come with the digital display the goes underneath the 2 din hole? and how does that all work???
firstly, no, u can't just remove the audio dash straight away.
u have to remove the cover behind the steering wheel first, because right side of the audio dash has been "lock" under this cover.
short word, u have to follow stage III, step 1 to release "step 2".
and step 2 have to be done to expose the screw and to take off "step 5"
and step 5 need to be done first before u can take off audio dash.
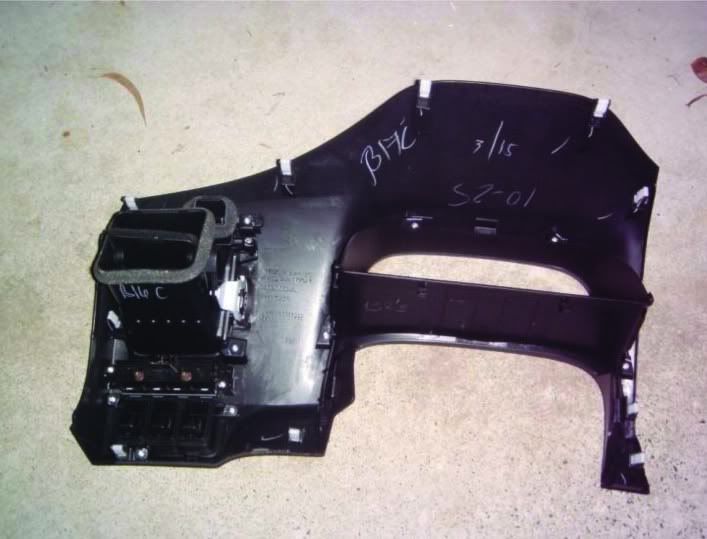
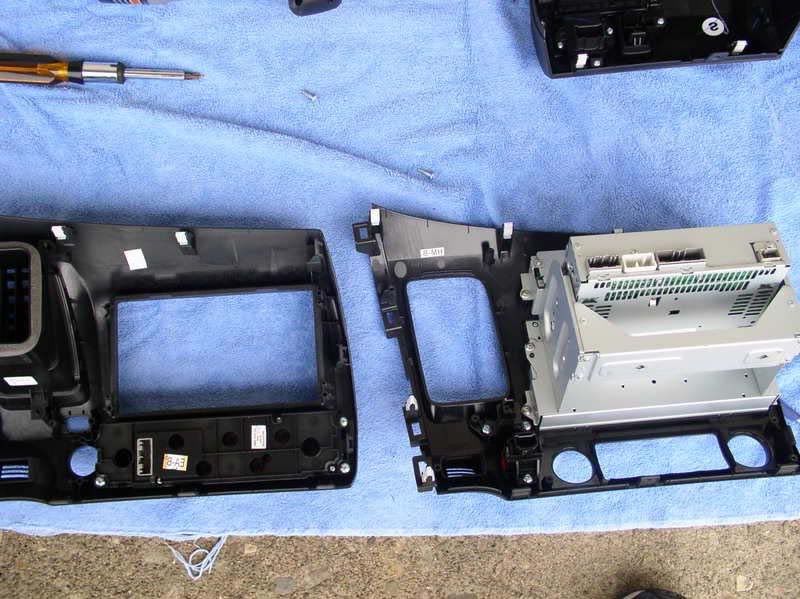
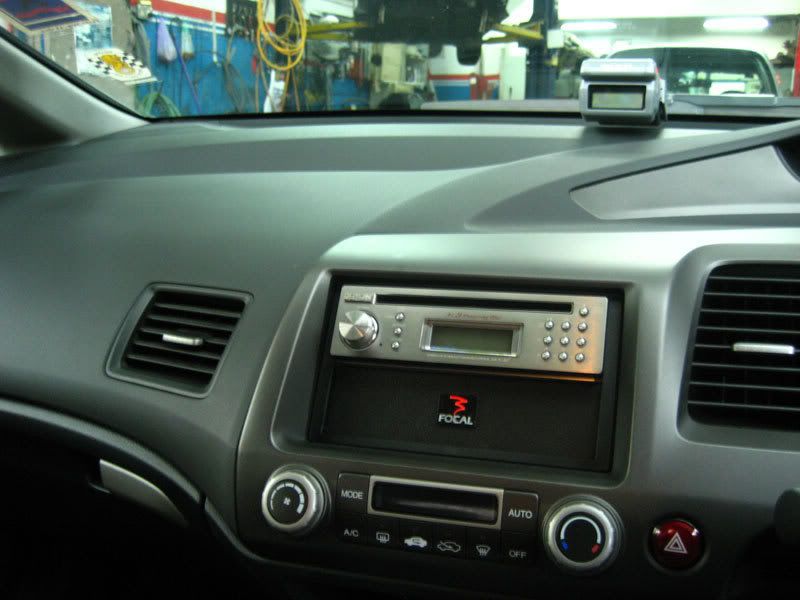
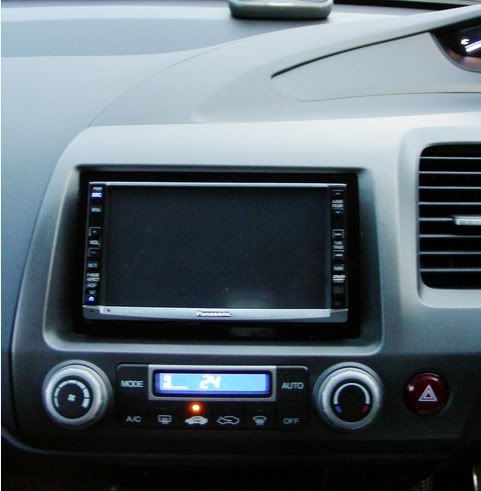
secondly, nope. u just get 2din dash like this.
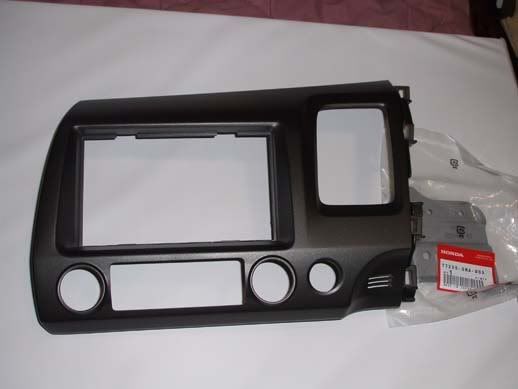
and just "transfer" ur existing A/c button to this 2din dash facia.
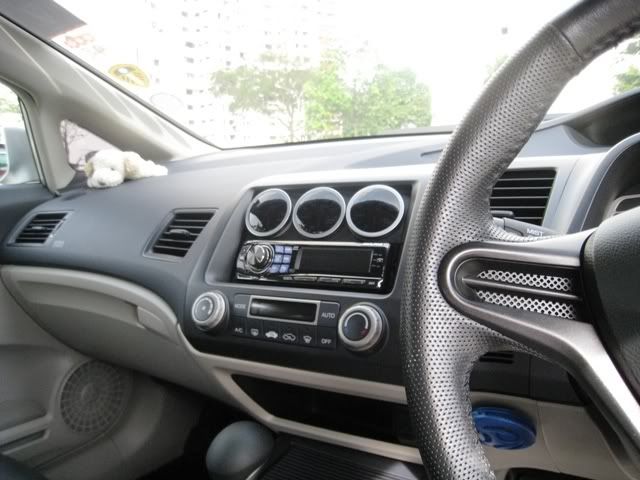
don't be confused with my pics (before and after changing), it's just a sample pics mate.
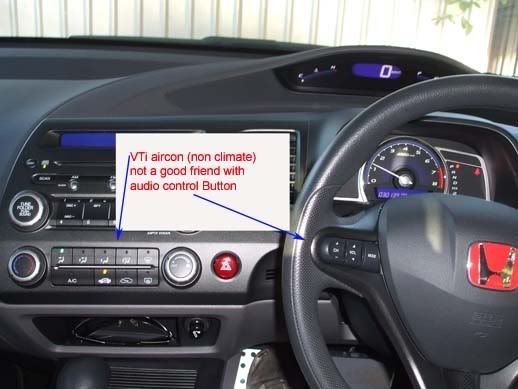
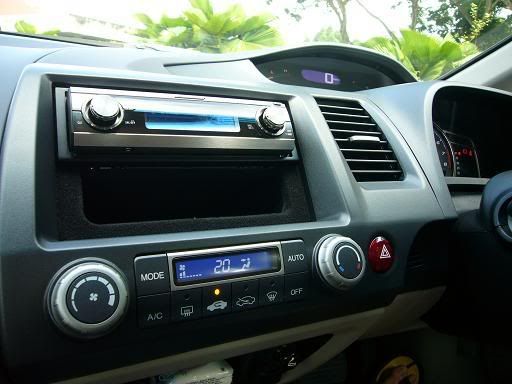
if ur car VTI, no LCD display just a/c buttons, means would be no LCD on ur new 2din dash (coz ur stock car only have the buttons ) )
if ur VTI-L/sport, with climate control a/c (LCD), means u still get that LCD 
-
ahh, ok so where do i get this 2 din dash kit from and is there any in bris that could fit it for me?
-
Originally Posted by sam.
ahh, ok so where do i get this 2 din dash kit from and is there any in bris that could fit it for me?
every audio installer can fit it for you.
-
Would someone be able to inform me as to where i can get the audio control buttons for installation?
 Posting Permissions
- You may not post new threads
- You may not post replies
- You may not post attachments
- You may not edit your posts
-
Forum Rules
|


 Reply With Quote
Bookmarks