

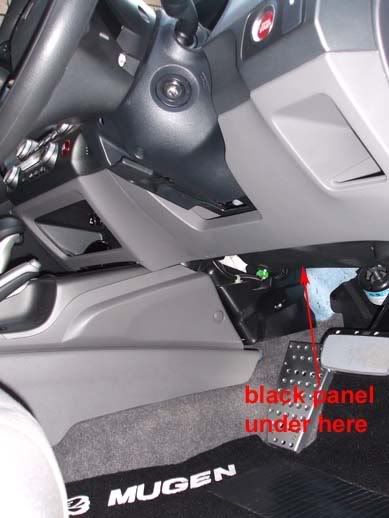
STAGE III
1. Remove the black bottom panel first (turn center lock, and pull the clip from each side)
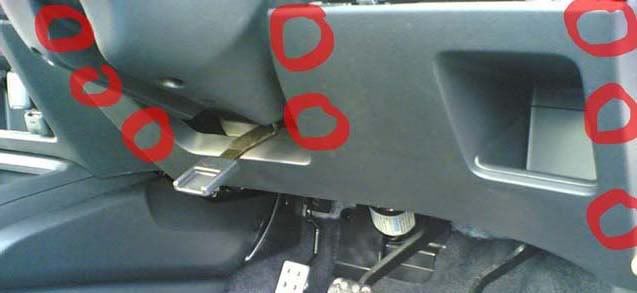
2. Remove under steering wheel panel, start from bottom right corner (use pocket holder to pull off the panel),
once u get this clip off, the rest will also off
total 8 clips (3 left - 3 right - 2 center)
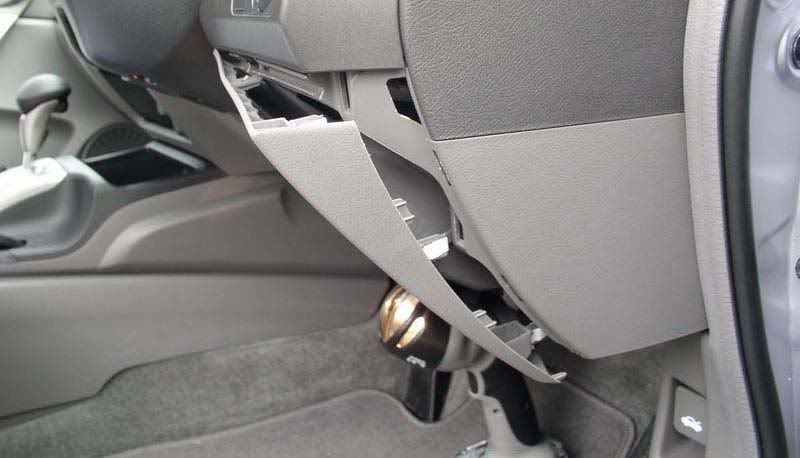
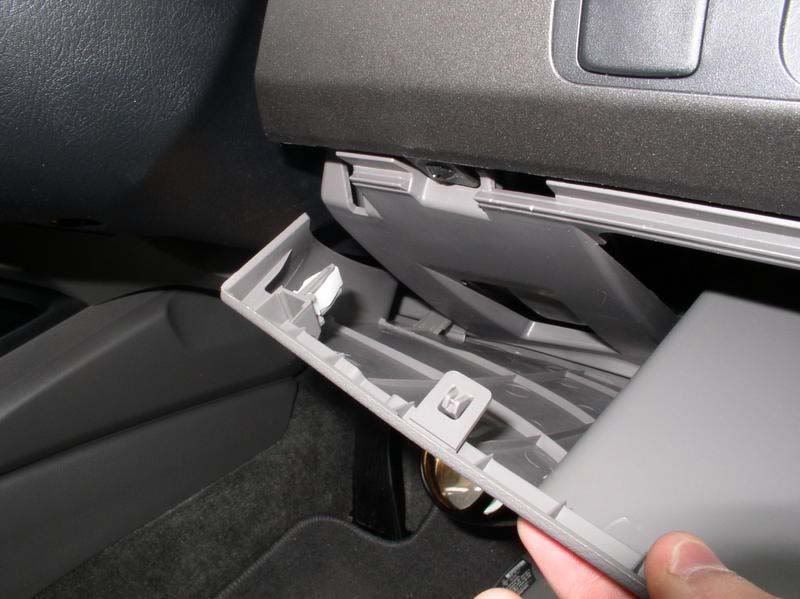
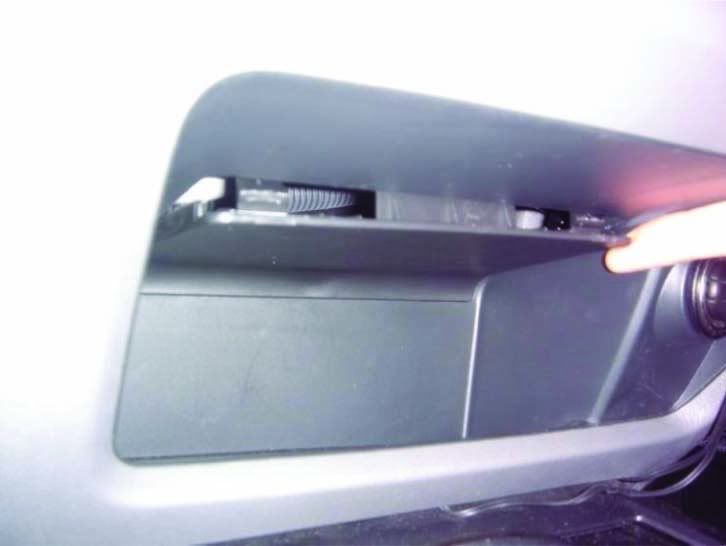
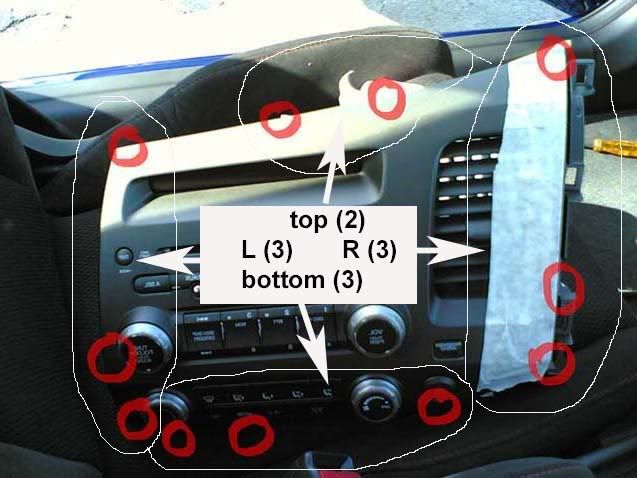
3. pry the panel under the stock audio unit near the gear knob (at top of space next to cigaarette lighter)
4. remove 2 screw from inside that panel.use 9mm socket or 5/16 socket
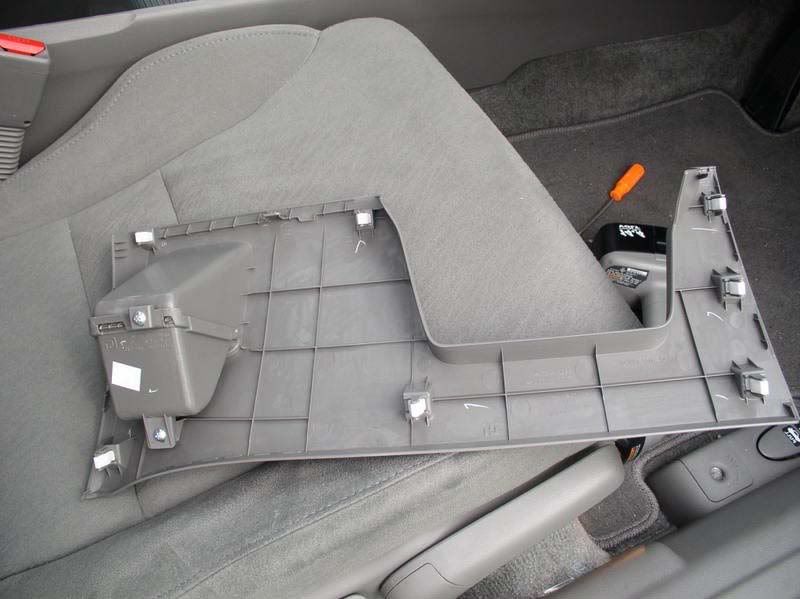
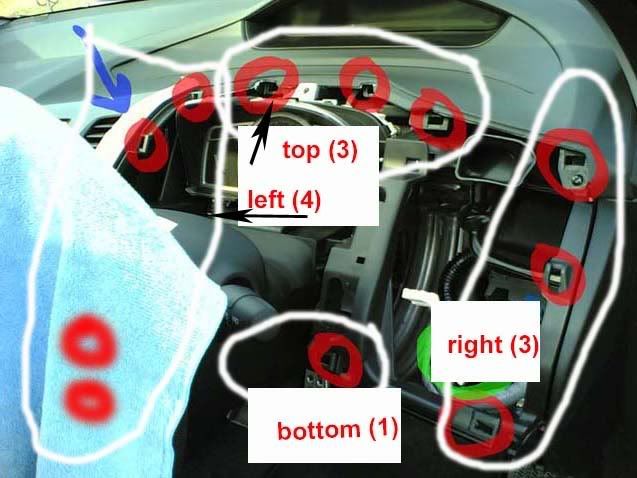
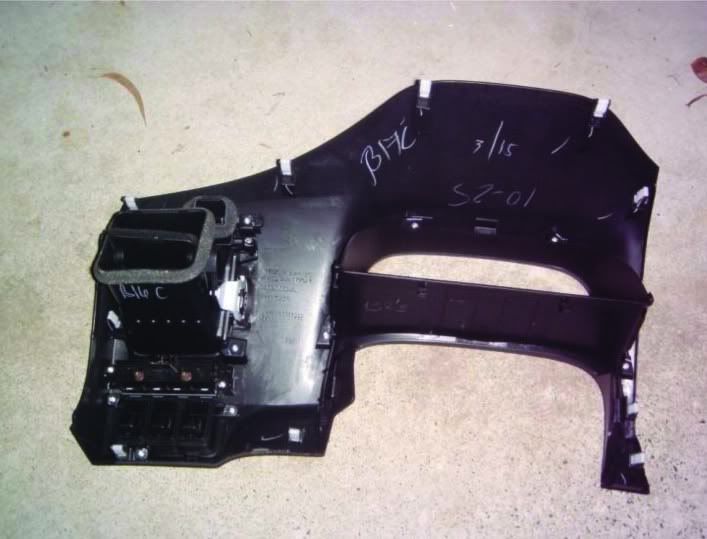
5. Remove driver dash panel(revs dash panel). remove 1 screw at the bottom and 11 clips (3 right - 4 left - 3 top - 1 bottom).
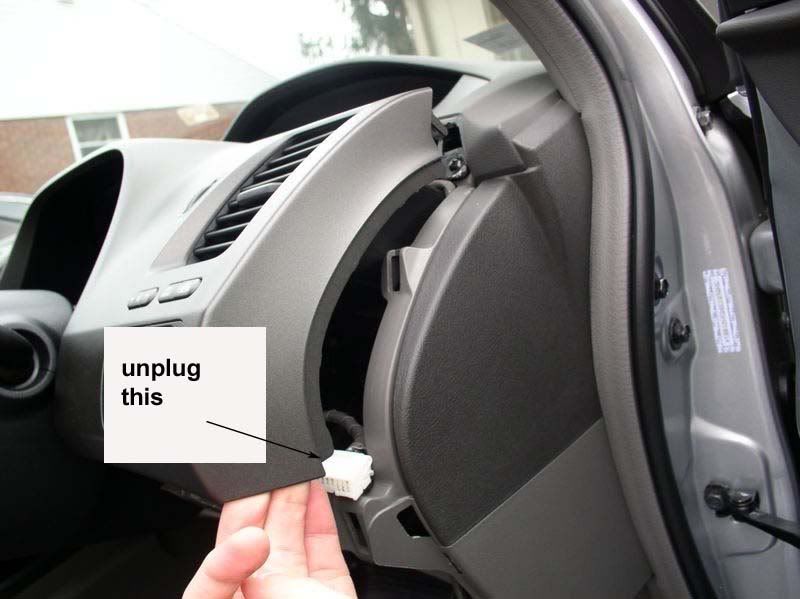
(hint. start from bottom right side first, when it' start off, unplug the cable - select/reset button and continue remove the dash)
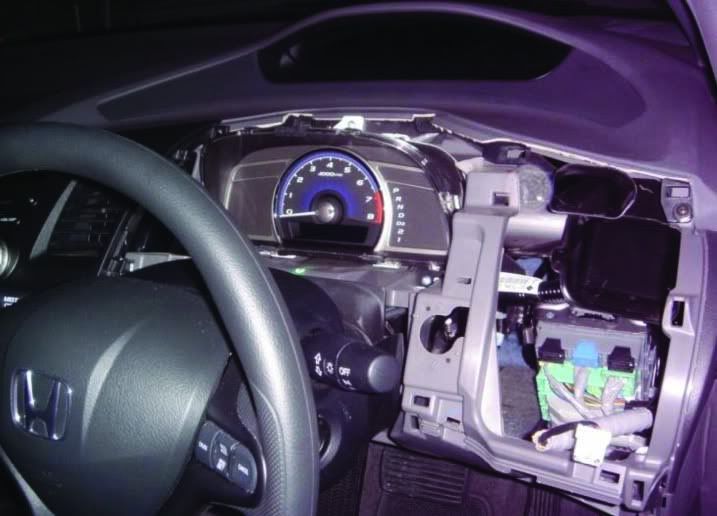
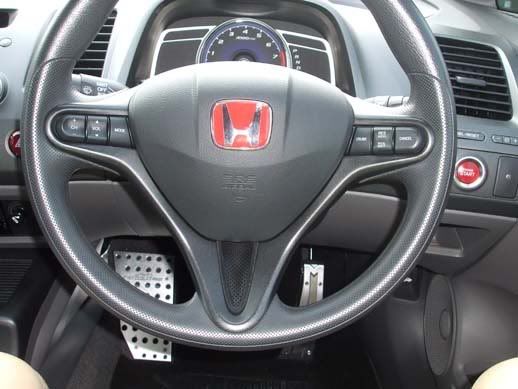
6. Cover up ur steering wheel with cloth, passenger side dash with sticky tape/paper to prevent any scratch from the metal bracket behind audio unit panel
7. remove the audio panel, all clips, start from right side first, pull gentle, and force to hard.
total 11 clips (3 left - 3 right - 3 bottom - 2 top)
note : when you pull out the dash, the clips will drop somewhere, so make sure you know where they dropped
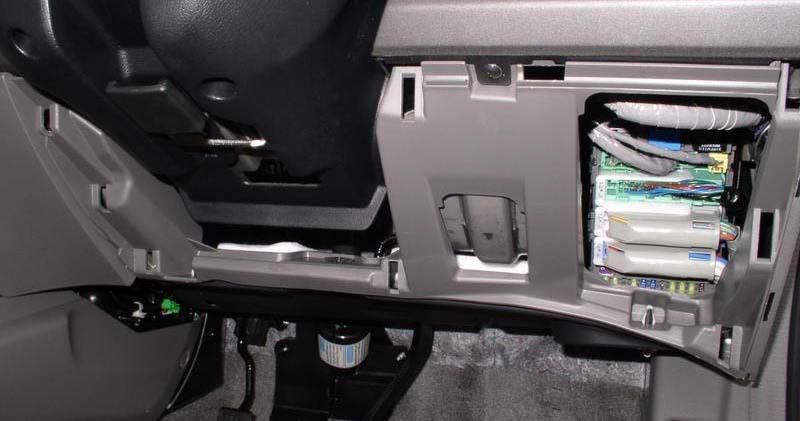
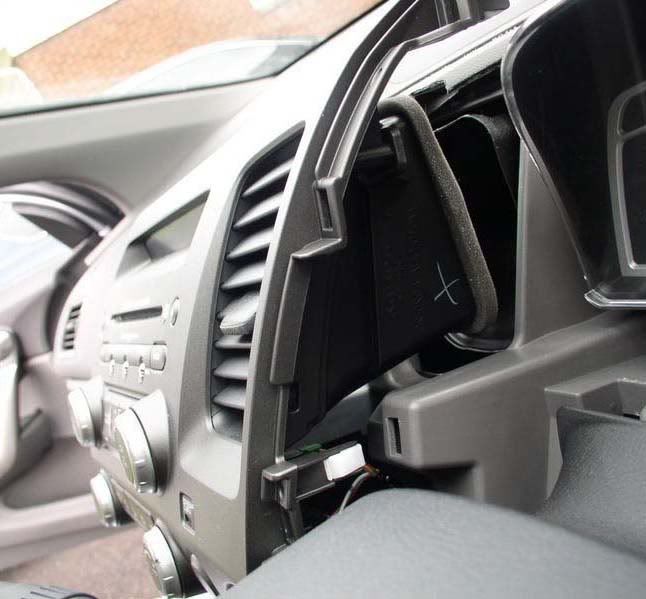
8. disconnect audio unit, radio, aircon and other connector.
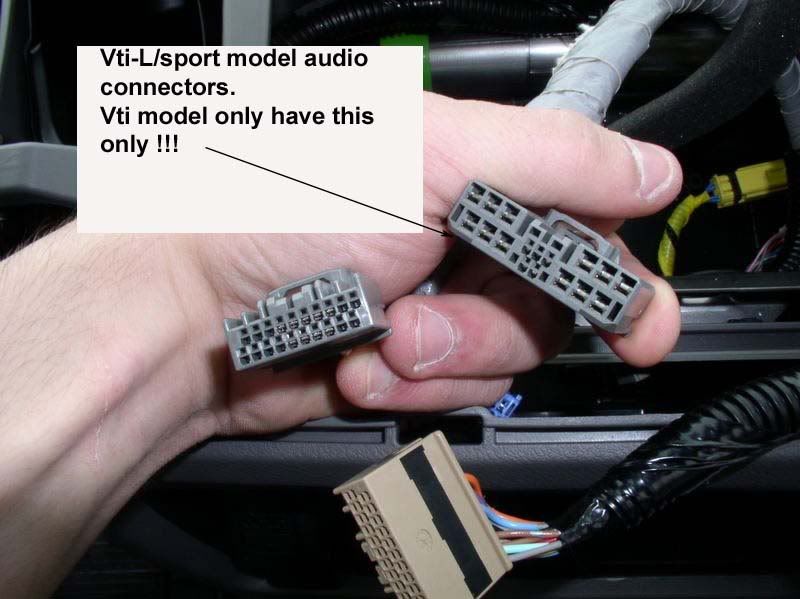
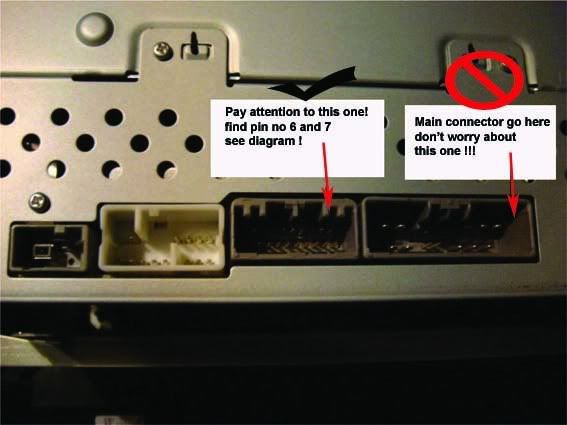
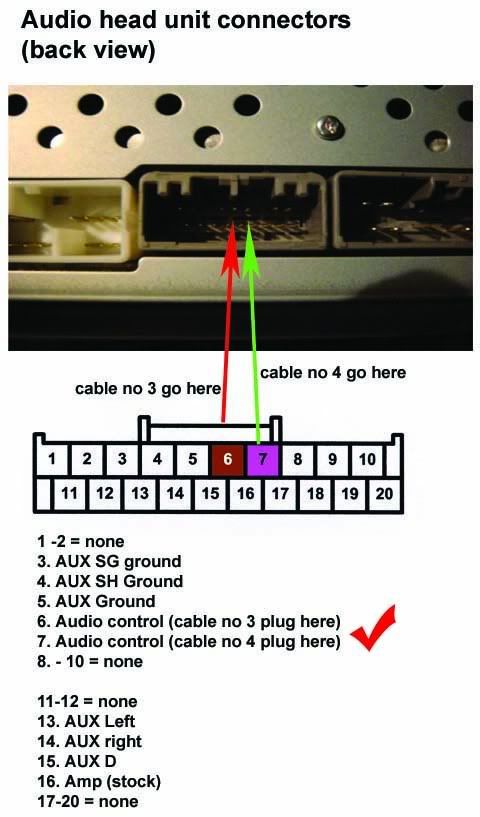
9. VTI model only have 1 main audio harness which connect to audio unit, we don't worry about this harness and its plug
10. just see the other pins beside that main audio pins
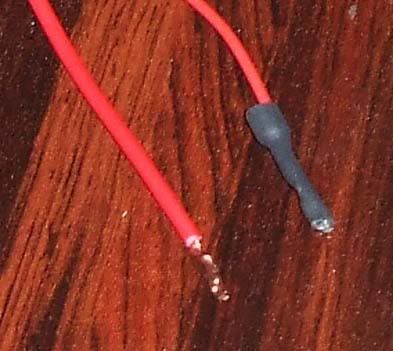
11. get ur new 2 extra cable run to here. Now u can either plug/insert the pins directly to head unit or u can use 20 pins computer socket as a connector. if u choose to insert the pins directly, like i did, meake sure the pin sealed with heated tube or sticky tape. after all, insert them to pins according to diagram. make sure it hold tightly
12. connect your audio main harness and try first your audio control button.
13. reverse step 9 to step 1
now you enjoy you audio control button !!!
http://www.youtube.com/watch?v=VKhY7GTyW5U
(proudly brought to you by Jay Chow)


 Reply With Quote
Bookmarks