

[DIY] DC5 Front Brake Caliper Rebuild
Disclaimer: The following is provided as a GUIDE ONLY, and neither myself nor Ozhonda take any responsibility for the outcomes of someone else doing the following. You follow these steps at your own risk!
I recently rebuilt my front pair of calipers on my DC5R so I thought I would share the general process I went through. The process should be very similar for most Honda single piston slider calipers as fitted to nearly every modern Honda car. The only front calipers that would be significantly dissimilar are anything Brembo, like JDM DC5R, and some NSX and Legend calipers. DISCLAIMER: I take no responsibility for any misadventures that may befall you if you attempt this DIY. Please only proceed if you have adequate mechanical knowledge.
The better later pics are thanks to Mugsee.
Aim: To rebuild a single piston slider caliper
Stuff you will need:
Caliper rebuild kit (Part No. 01463-S2A-000. Suitable for EP3R front, AUDM DC5R front and S2K front calipers. 1 per caliper)
Scissors
Gloves
Assorted screwdrivers
Brake fluid
An old aerosol can cap
Brake clean
12mm spanner
19mm spanner
Stuff you will also need if you are removing the caliper from the car or installing it after rebuild:
Jack
Jack Stands
17mm socket
19mm socket
14mm socket/spanner
Breaker bar
Brake fluid
Torque Wrench
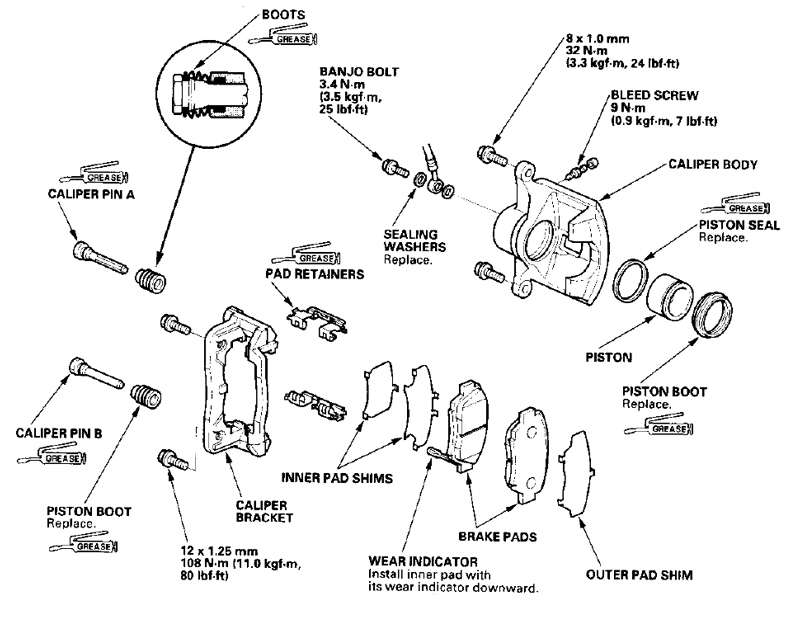
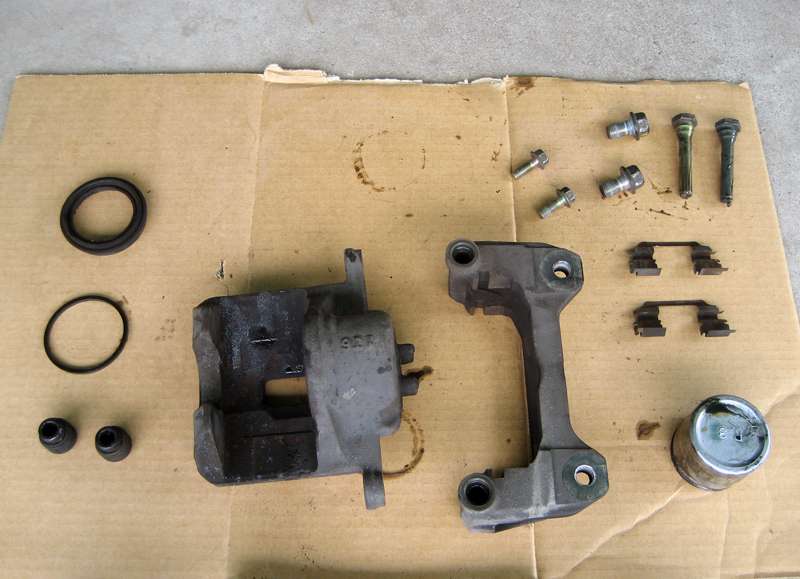
Figure 1: Caliper exploded view
Step 1: Removing the caliper from the car
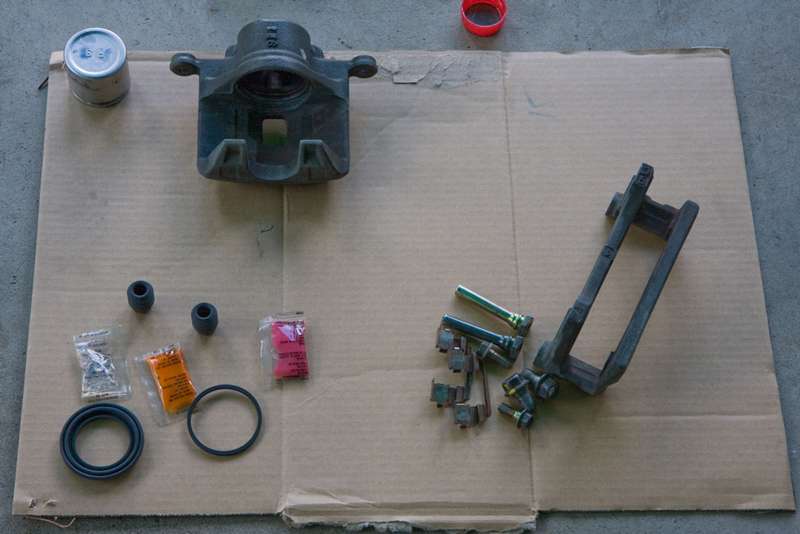
I have no pictures of this part because I rebuilt spare calipers that I had lying around thanks to air23box, however it is pretty simple. To remove the caliper from the car first raise the front of the car on to jack stands after loosening the wheel nuts. Remove the wheel. The caliper is held on to the knuckle by two 17mm head bolts on the inner side, and the brake line is fixed to the caliper by a 14mm head banjo bolt. Remove these and wrap the dangling brake line in something to prevent the brake fluid going everywhere. Alternatively you can use a suitably sized nut and bolt with the sealing washers to seal up the banjo fitting or a commercially available brake line clamp (thanks ecu-man). You should now have in your hot little hands a fairly dirty and beaten up caliper that looks something like this:
Figure 2: Caliper
Step 2: Disassembly and cleaning
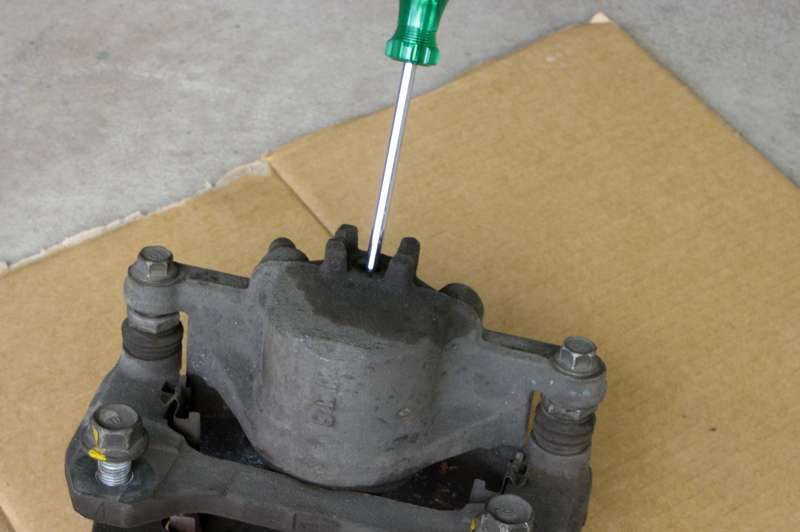
The first step I did was to remove the piston from the caliper. I did this by pushing on the back of the piston with a medium sized philips head screwdriver as in figure 3. It took quite a bit of force, and be careful where you place the end of the screwdriver so as to not score the inner bore of the caliper or damage the threads where the brake line attaches. An alternative method to remove the piston is to use a compressor to spray compressed air through the back of the caliper to force it out. I don't have a compressor.
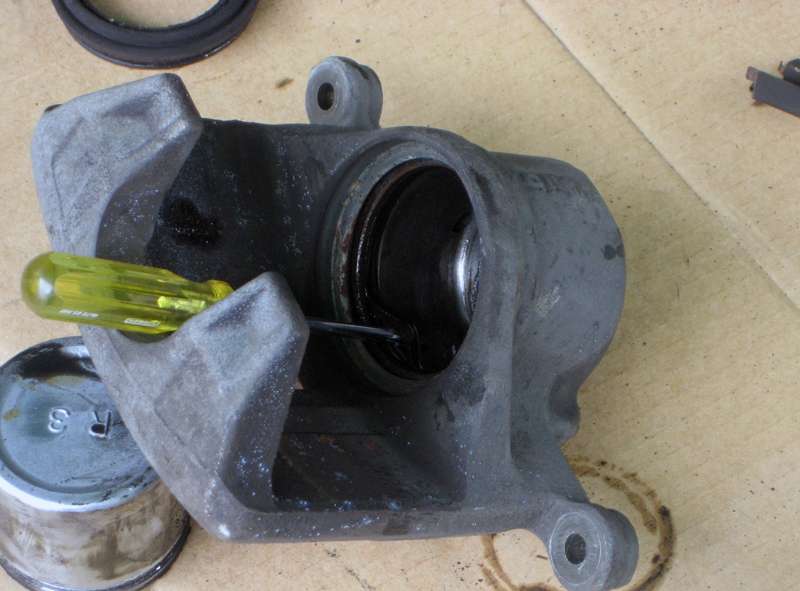
Once the piston is removed the old dust seal can be removed and the piston seal can be gently pried out with a small flat head screwdriver pictured in figure 4 taking care not to score or damage the bore of the caliper. One can then remove the caliper body from the bracket by sliding it the pins out of the bracket and removing the old slider boots. At this stage you should inspect the bore of the caliper for rust or scoring that may make it unusable. The pins can be removed from the caliper body by undoing the 12mm head bolts whilst holding the pins stationary with the 19mm spanner.
Once the caliper was completely disassembled I cleaned it with a combination of aerosol brake clean, strong solution of Simple Green all purpose cleaner and a stiff brush. I then sat it in the sun to dry.
Figure 3: Removing the piston
Figure 4: Removing the piston seal
Figure 5: Caliper completely disassembled
Figure 6: Caliper cleaned and ready for reassembly


 Reply With Quote
Bookmarks