

hi all.
Disclaimer: The following is provided as a GUIDE ONLY, and neither myself nor Ozhonda take any responsibility for the outcomes of someone else doing the following. You follow these steps at your own risk!
Aim: To change the thermostat on a EG/EK/DC/ED honda.This DIY is accomplished on a EG5 Si , d16a8. IT should be a very similar process on all metioned - if not all Hondas !
Required: 1 x new HONDA thermostat , 1 x phillips head screwdriver , 1 x pair of pliers , 1 x 10mm ratchet piece . 1 x ratchet with extension ( atleast 3inch + ) 1 x 10mm spanner . . . .
Steps:
WARNING ! READ !
Attempt this DIY , ONLY when engine is cool and coolant hoses are under no pressure...BEST if coolant is drained via radiator first too !
HOT coolant can scald (sp?) people !
1.
Open bonnet , locate intake arm , locate the connection to the throttle body - there will be a small phillips head screw - undo this screw to loosen the intake arm.
2.
Next , undo the following.
1. Unclip the MAP sensor
2. Unclip the PCV inlet with pliers and move aside
3. Unclip the charcol breather pipe with pliers, move aside.
Now the inlet pipe should be free to move.
3.
Pull the intake arm off the throttle body - then *TWIST* the intake arm off the airbox. Remove from engine bay.
4.
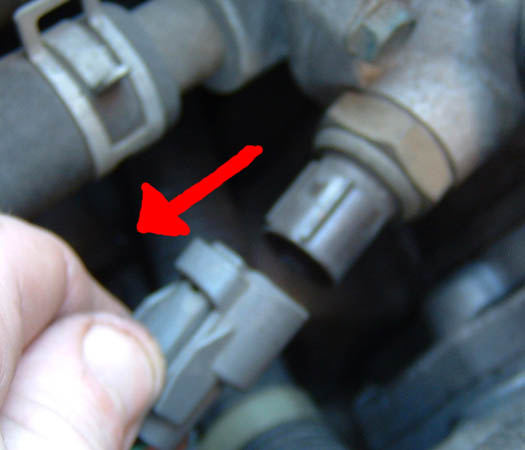
Locate the thermostat housing - it will be located pretty much directly below the LHS of the inlet manifold.
Note , location of 1 sensor , 1 earth wire and 3 x 10mm bolts.
5.
Remove the collant temp sensor by unclipping.
6.
Undo the ground wire 10mm bolt - loosen finally with fingers as to NOT lose the bolt
7.
Remove the second 10mm housing bolt.
8.
Access the third and final 10mm bolt - with the aid of a extension this should be a problem. Apply pressure and keep it intact !
9.
Crack open the thermo housing - an amount of coolant will splash out - nothing too much to worry about.
10.
Pull up the thermo housing + hose to horizontal like so. Observe thermo position, crustyness...and non-OEM thermostat ! NO !
11.
Slowly shimmy off old thermo - the rubber grommet maybe alittle hard to remove - if so , shimmy off with a flathead screwdriver.
NOTE location of thermostat relative to the housing.
12.
Grab your new OEM thermostat - slide on rubber grommet in correct way.
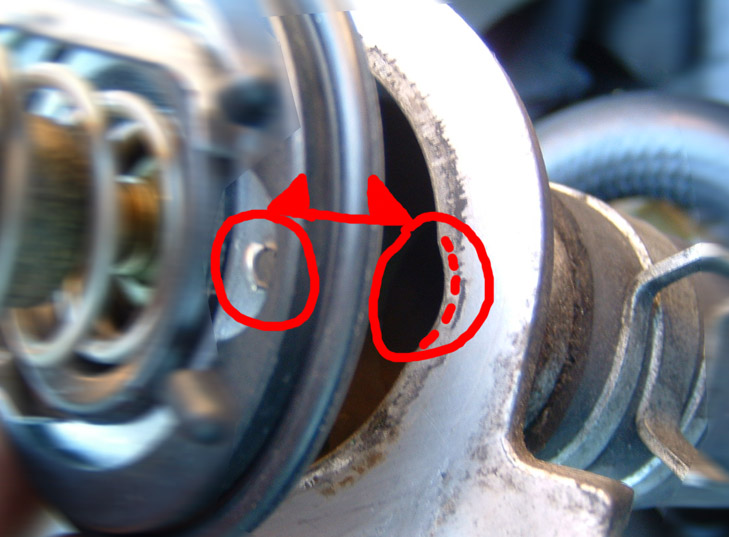
13.
Place new thermo in exact position - following the slight groove in the housing with the bypass on the thermo.
14.
Well , Thats it !
Reinstall in opposite order...and top up coolant as per needed.
Enjoy proper cooling efficiency !


 Reply With Quote
Bookmarks