|
-
DIY: Custom LED Foglights
Hey all, Im not all that well known here (usually on PreludeAustralia.com) but I thought I might share with the  family anyways family anyways  . Also I want to start posting here more anyways. . Also I want to start posting here more anyways.
About 2 months ago I underwent a mission to create some crazy custom foglights. I think the main inscentive for this mod was to have something different, as well as pure interest as to how good the latest technology in LED (light emmitting diodes :blink: ) is. By no means was this mod an attempt to save money on buying JDM fogs, cuz believe me, it wasnt  . .
Everything has been purchused from my good buddy's at Taren Point Jaycar (who should friggen sponser my car or something by now!!), except for the stock moulds of which comes with the prelude.
First up was to build three Drivers, to power a total of six 3 watt Luxeon Star Module LED's (4 white, and 2 blue).


Getting there:.......


Final Product of Driver #1:

...yes even the inductor is hand wound.

Thank god upon testing they all worked fine.
Stage 2 involved powering up the LED's for an extended period of time to see how hot they got..
Stage 3 comprised of a trip to Jaycar to get a biggg heatsink, as the small heat sinks used previously were nowhere near enough to handle the heat that is produced from the LED's.
note: Luxeon Star Modules have an optical efficiency of at least 85% (when optic lenses are used), and a power efficiency of around 90-95% when appropriate heat sinks are used. The larger heat sink that I have used allowed the small amount of heat to be dissipated over the whole unit, rather than focussed on the LED itself.
BIG MOFO HEATSINK:

Stage 4:
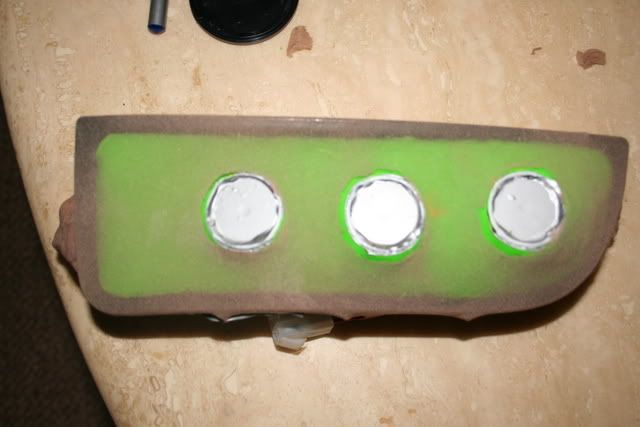
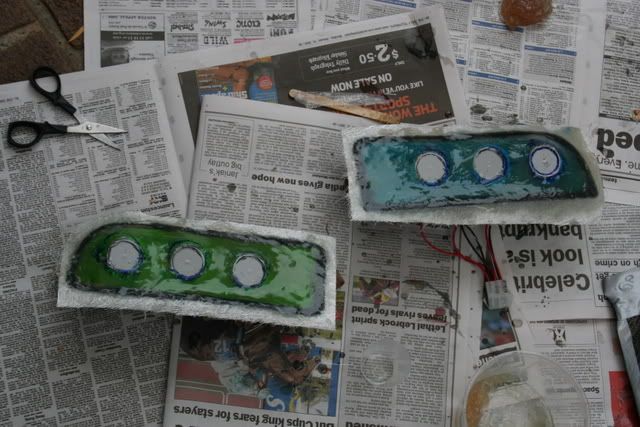
I had to cut the heat sink in half so that it could be fitted in both moulds. Then I went ahead with a small angle grinder and hacked out the moulds and fitted the heatsinks in. Next step was mounting the actual LEDs themselves and the collimators (or lenses..) over the top.

Shrouds were made to hide the sides of the collimators.

LED's were wired and harnesses made.

Then a whole heap of wiring to the glovebox (LED drivers mounted at top of glovebox *hidden*). So far its been roughly, 45 metres of wiring
Wiring setup:
The LED's are wired through a relay on ignition, with a paralleled switch so that for show and meets I dont have to have the key in ignition just to have fogs going. I have wired up two 3way switches so that outer, middle, and centre LED's can be run individually, or two at a time, or all together.
...and just going through that makes me realise I should have really found something else to do to pass time....:teef:
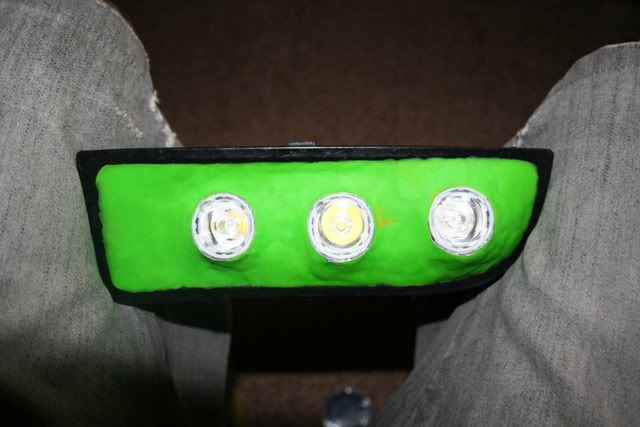
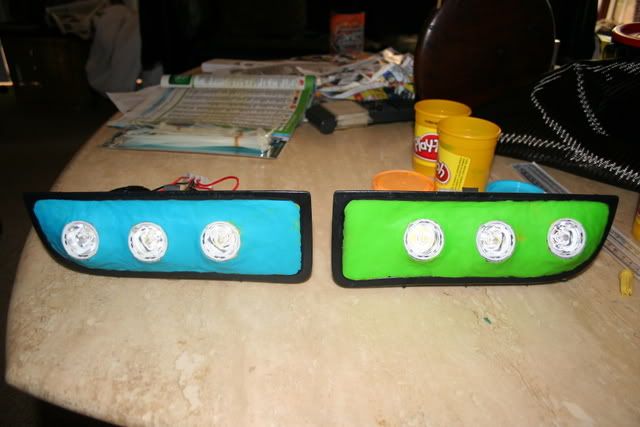
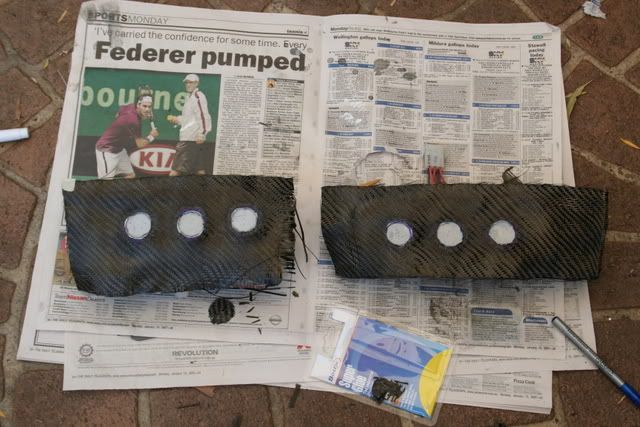
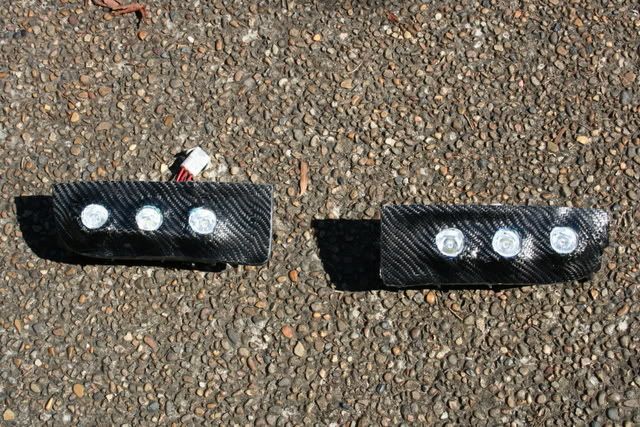
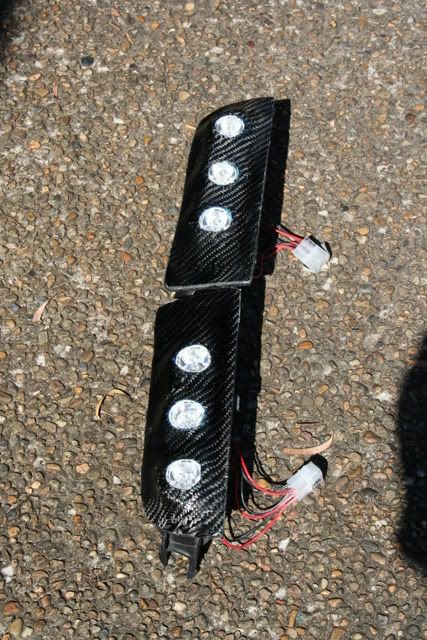
The Final Result:
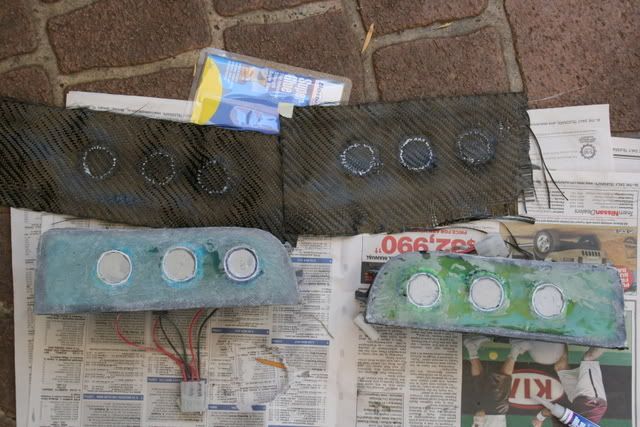
well I say final because they are up and running, but Im actually intending to Fibreglass the lenses in so that they are completely waterproof, and Mega professional looking.
(and please give me feedback as to whether you like it or not)


Just with the 2x blue LED's on:


4x white switched on:

I know the blue LED's are illegal for use on the road, that is why they are switched individually. For driving purposes, using only the 2x white centre LED's provide more than enough light for use, but 4x white definitely has a mega sexy factor..
Thanks for looking, and for those that read it all! wow
Last edited by 5thGen; 21-02-2007 at 10:36 PM.
-Keegz
BB6 Squad
-
nice work =) but yea i'd hate to be caught with blue leds
IJOEYI
0o0 whats that... a b20 aye?
-
Top work mate very tempted to attempt this.
-
Well done... Now can you please do one for me  .... ....
146.8Kws @ Wheels Diesel CL9 Euro (SOLD), 2009 Honda VT Shadow, NC PRHT Mazda MX-5, Boxing SG Forester, Honda Civic Sport RenaultSport RS265 Trophy+
Team Yum Cha Daily - The Dim Sum Revolution
OzHonda's Public Relations Guru
-
Nice DIY
Great lights, but majority of people aren't THAT electronically minded. ;P
-
i like
www.lozzz.com - car spotting, food and other random crap from Japan
-
sweet
what about approx cost?
-
hey looks great, is there any chance of you posting the part numbers you used from jaycar?
thanks
-
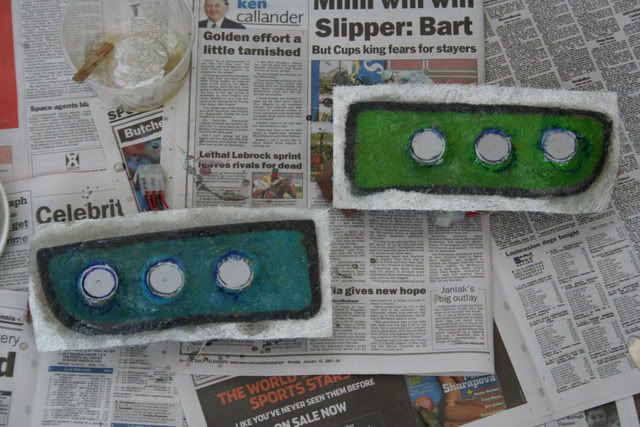
Hey thanks for the comments, I'll post up some more pictures because I have done a fair bit more since. Umm approximate cost ended up being ~$400 but thats because if you see my updates I've moulded them in with Fibreglass and Carbon Fibre.. So, I think it was about $320 for all the parts from Jaycar. I will list the catalogue numbers tonight when I have the book on me. The most expensive parts are the actual LED Star Modules, at $30 a pop, so I used six, thats $180 just for LED's. There are definitely other cheaper LED's that can be used from Jaycar though, including ones where you dont need to use the Power Packs that I have above.
-
-
-
 Originally Posted by Encor3

nice work =) but yea i'd hate to be caught with blue leds
Yeh the blue LEDs are just for show, I have them wired separately so they dont come on unless I want them to for photoshoots or whatever.
Ive been driving around pretty much all the time with the centre LEDs turned on and had no troubles from the cops at all. I even had a cop look specifically at the LEDs while on and tell me I could go.. I would debate that they are just driving lights, but I think it would only really be a concern if all 4 white LEDs were on.
 Posting Permissions
- You may not post new threads
- You may not post replies
- You may not post attachments
- You may not edit your posts
-
Forum Rules
|


 Reply With Quote


Bookmarks