|
-
DIY Upper head gaskets replacement/reseal. (non-vtec DOHC engines)
HI guys. Car loosing oil....from an unknown place ? Dirty crap all over your upper block ? Engine more than 100,000kms old ?
Chances are , one or more of your upper gaskets is old / cracked / silly and leaking amounts of your precious HONDA's lifeblood.
Perhaps one of the most common problems on honda engines, the dreaded cam plug/rubber cap/cam seal is actually very easy to replace.
Disclaimer: The following is provided as a GUIDE ONLY, and neither myself nor Ozhonda take any responsibility for the outcomes of someone else doing the following. You follow these steps at your own risk!
Aim: To replace / reseal each upper O-ring/gasket to prevent further oil loss. Apparently , in soem cases a leaky cam plug seal can contribute to major oil loss over a period of time. Best to have it all sealed and tight 
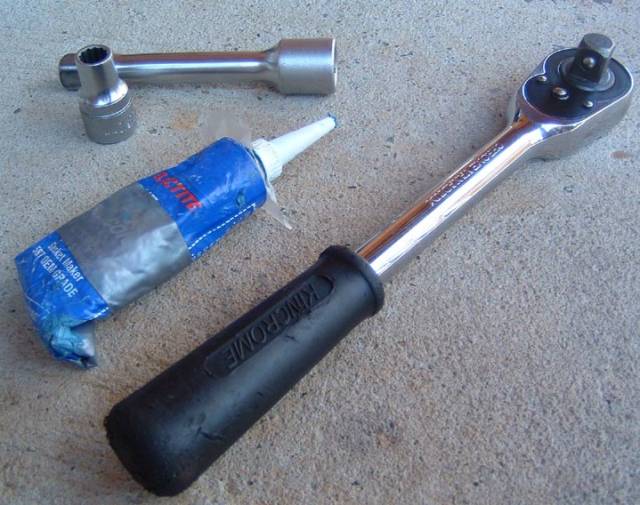
Required: Car. Pliers , Flathead screwdriver ( 1 smallish , one large ) , satchet of loctite or hondabond etc , ratchet with 10mm piece + extension.
Steps:
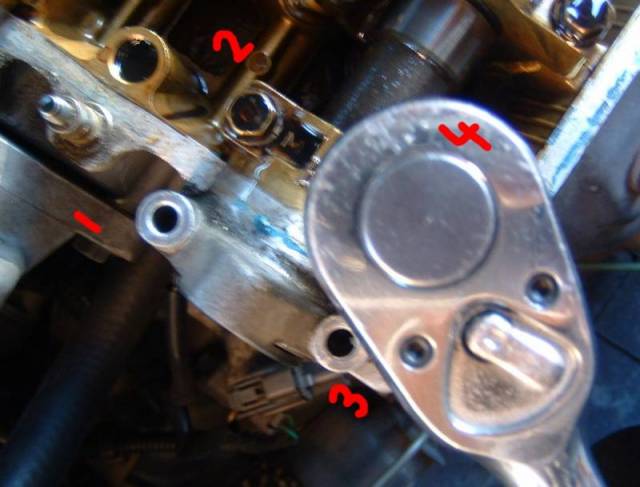
1.
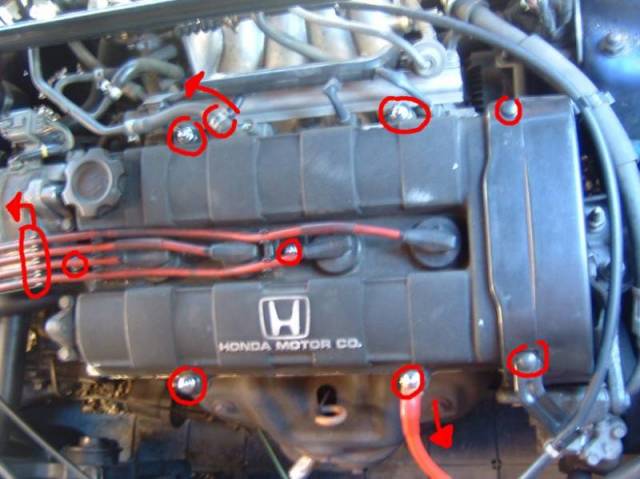
Locate your engine bay. Firstly look at the cam cover to locate each indiviual 10 stud nut. For example , on my d16a8 engine there is a total of 10 studs to remove.
2.
Begin by removing each spark plug lead and leave to the side.
Remove the upper vaccuum hose into the cam cover, by first loosening the clip and pull it further up the pipe - then apply a pair of pliers and slowly and carefully shimmy the pipe off the inlet pipe.

3.
Remove each 10mm nut , and once loose remove last few turns by hand.
4.
Remove the 2 10mm bolts holding the timing belt cover.
Then remove the timing cover.

5.
Remove the 2 final 10mm studs located just next to the timing belt.
Once all 10-ish studs are removed , place in a container as to NOT loose them !
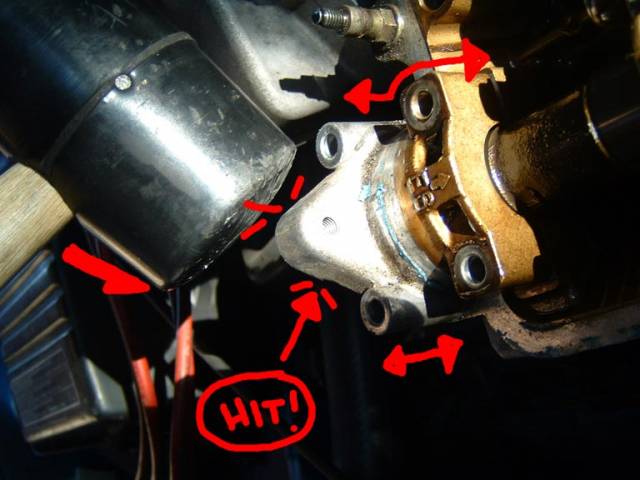
6.
Apply a large wedge or flathead screwdriver to the gap inbetween the cam cover and head. Shimmy at different places to loosen the head and remove.
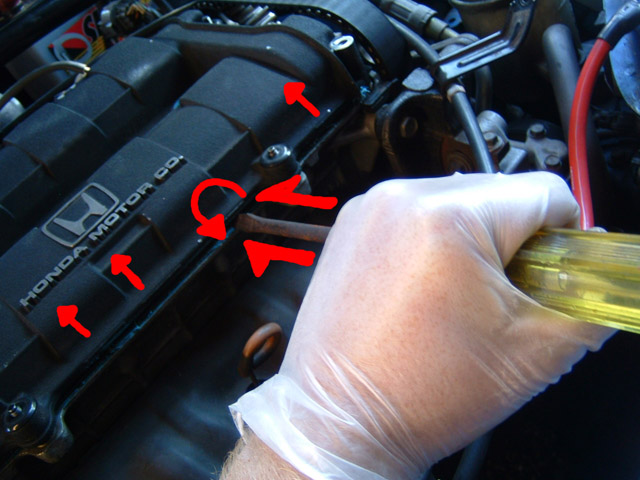
7.
Remove cam cover slowly to avoid loosing the O-rings and upper gasket.
Place seperately .
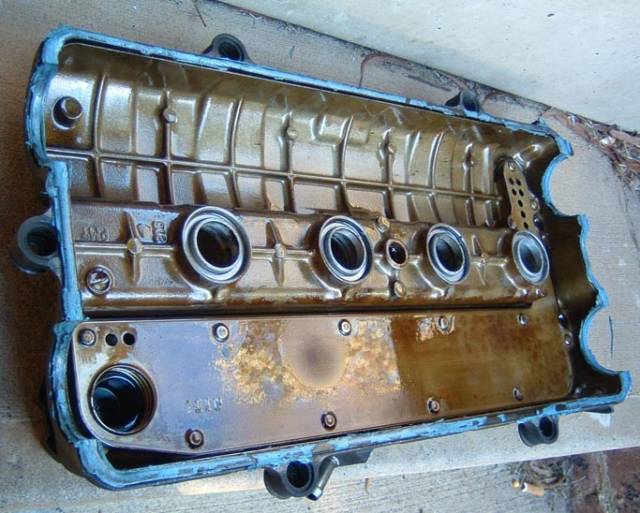
8.
Observer the old gasket and upper head - remove any excess old sealant with a fine blade , then use a clean rag to clean any excess oil and sealant from around the outer edges.
9.
Next , remove the 4 x 10mm bolts from the left hand side guide on the exhaust camshaft. ( located at the extreme lower left hand side )
Each bolt will need to removed in 2 stages - an initial "pop" , the undo and remove after by hand.
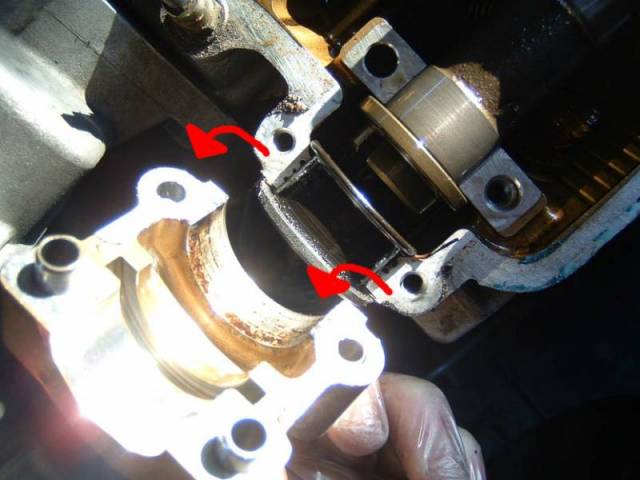
10.
Grab a medium sized rubber or wood ( IE soft) mallet - and lightly tap the camshaft guide on either sides to loosen it off the head. DO NOT hit "hard".
11.
After the cam holder has become loose enough to remove - do so .
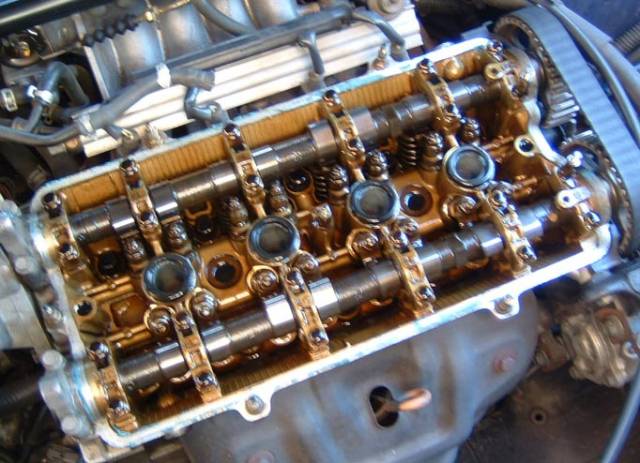
Ease off the oil guides and make sure to be careful not to scratch dent any part.
Observe the yuckiness within 
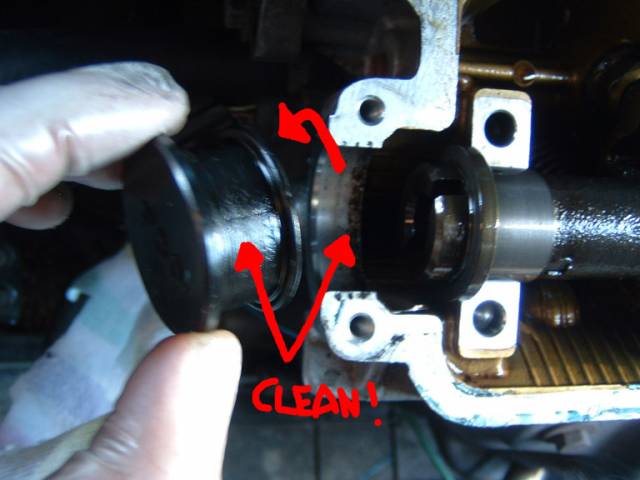
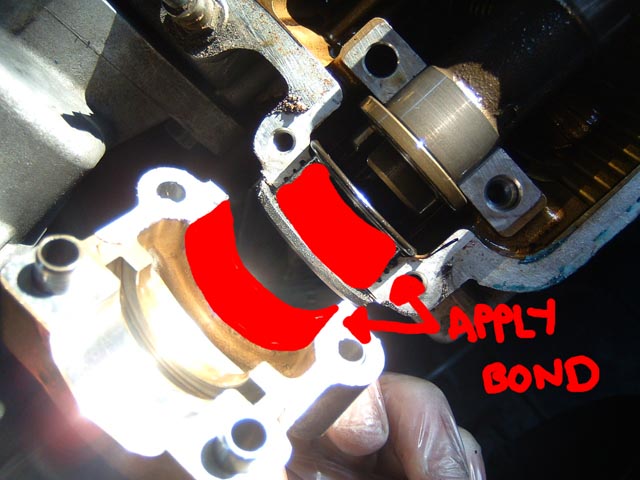
12.
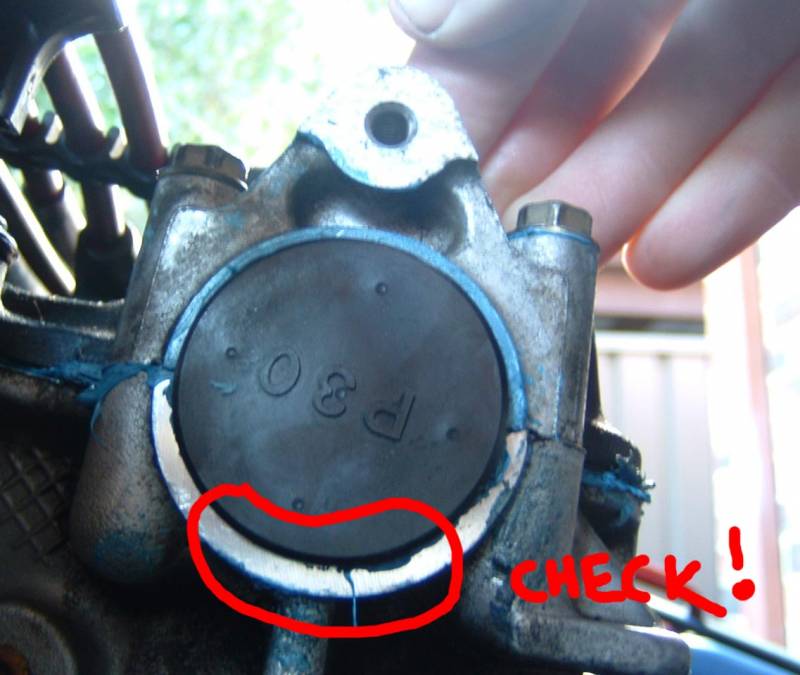
Pull out the cam plug/seal , and either replace with a new item or clean the old one of excess oil and gunk with a fresh rag. Clean the lower part of the cam holder too.
Check the bottom of the cam holder for irregular wear. If you see a lot of scratches and marks on it, you may want to inspect all of your cam holders (keep them in order if you do!!). They may not have been torqued down properly, or you may have a more serious problem regarding your cams themselves.
13.
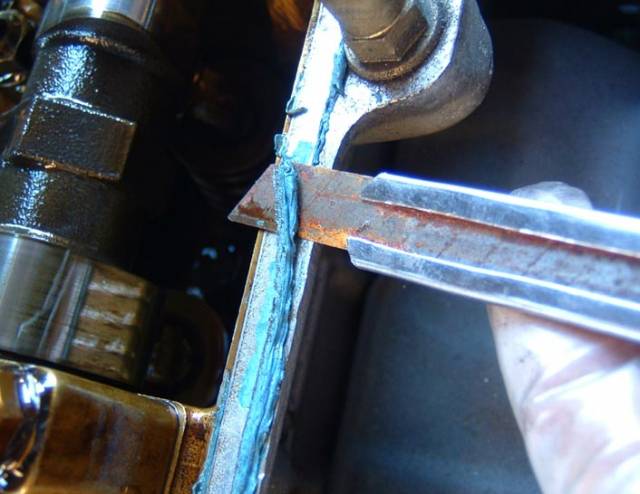
Before replacing it with the new/reused seal, put some hondabond/loctite on the cam seal and the cam holder to insure a good seal.
Make sure it is applied to both sides of the metal surface that touches the cam plug.
When placing the cam holder back on the head and cam, make sure the seal is still good. If not, re-do the process—no one wants more leaks!
Once the bond is appled , place the cam holder back onto the head in the correct fashion , and lightly tap with your mallet to guide onto the head.
Tap until it is firmly onto the head ( alittle sealant or oil may squeeze out of the sides)
14.
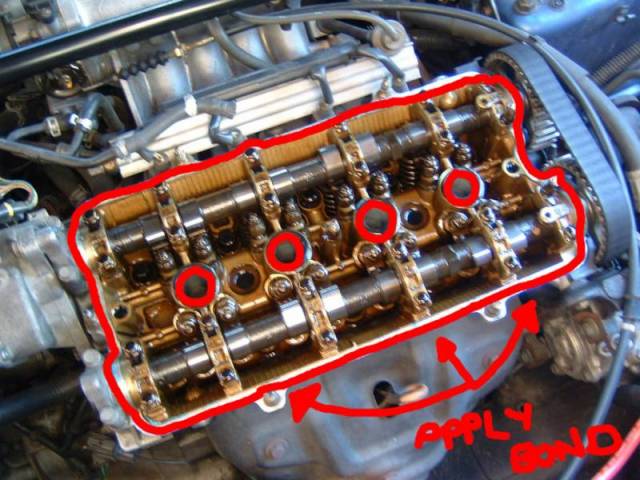
Now , time to apply the bond to the rest of the head. As shown below , apply a liberal amount of sealant to the edges of the head - all which has contact with the upper gasket.
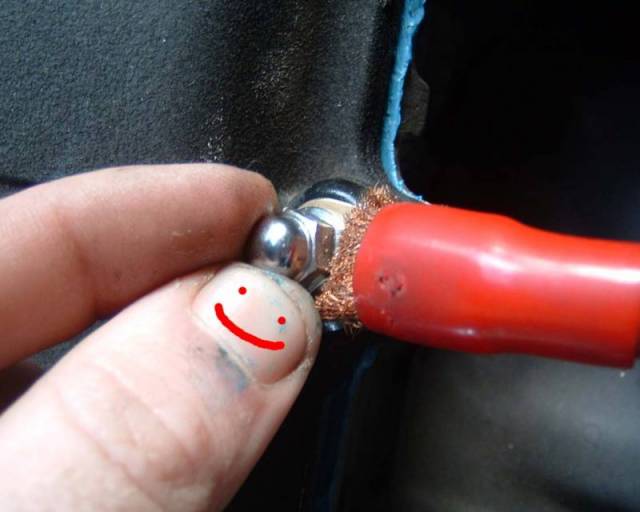
Also , replace or reuse sparkplug O-rings , and apply sealant to the metal surface below and place the O-rings ontop.
15.
Before putting the cover back on - place the 4 10mm bolts back into the cam holder. Finger tighten until "tight" then apply a torque wrench or guesstimate them to 7.2 lbf-ft (9.8NM) in a criss-cross pattern and a two-step sequence to tighten them to prevent any kind of warpage.
16.
Grab the Cam cover...run your finger along the upper gasket so that it is held in the cam cover - then place the cover back down onto the head.
Lightly tap the cover in a criss-cross pattern to place the cover firm and even onto the head.
17.
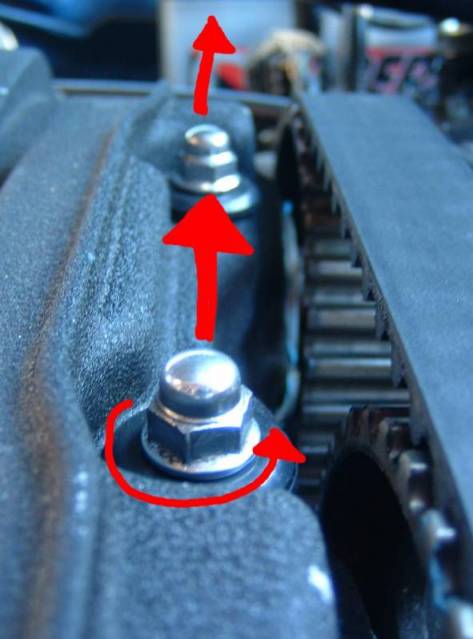
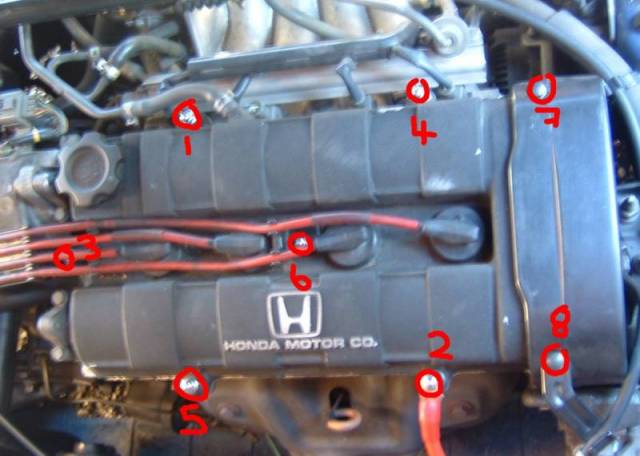
Once flat , tighten up first the 2 studs right next to the timing belt ( that are underneath the timing belt cover)When installing the valve cover, torque the bolts down to 7.2 lb/ft /9.8NM .
Reinstall the timing belt cover , finger tighten the 2 10mm bolts ( dont forget the throttle cable ) Reinstall the 2 spark-lead guides -
then finger tighten all 10ish studs.
Apply your torque wrench or sense of style and tighten each stuff + bolts to 7.2 lb/ft / 9.8NM.
18.
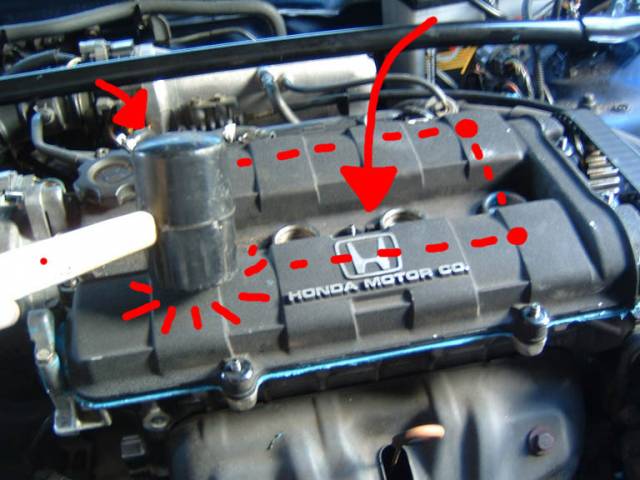
Reinstall the spark leads - into the correct spark holes and grab a rag , dampen the end and run it around the edge of the gasket to remove any excess sealant/oil.Reattach the vaccuum pipe to the top of the cam cover.
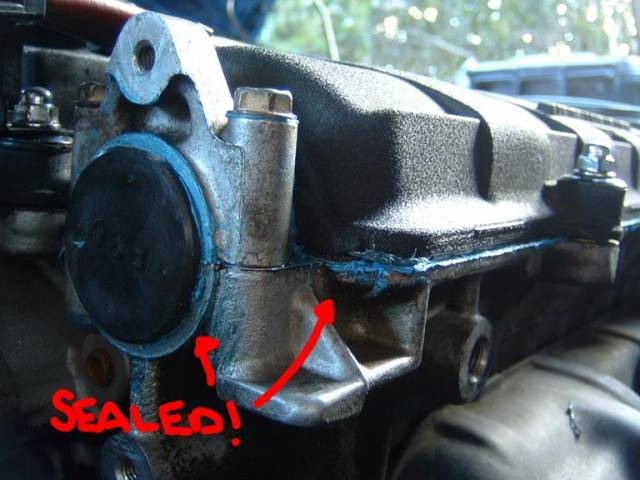
19.
Have a look at your handy work ! Sealed ! Woot.

20.
As a final step , observe the camplug end over the next few days of normal engine running. If there is a slight leak , you can run abit of sealant around the end to seal it up. Otherwise do this DIY again and get it right
Thats it ! Wow.
Other comments.
Best be sure to attempt when the engine is cold - preferably over night.
enjoy
Last edited by wynode; 21-01-2007 at 01:05 AM.
-
Guys n girls - this write up is ATM for only DOHC non-vtec engines ( d16a8 / b18a/b18b etc) - but is highly relevant to other DOHC engines.
Vtec heads are 95% same process , except at stage 9 - you must remove the rail above the camshafts ( a few more 10mm nuts)

After this is removed- continue on as shown in this guide.
-
 Originally Posted by z3lda
ey, was drivin a honda city before...
felt like the biggest poofter in the world..LOL
-
Ahh.....nice work Ben. BTW It's a rocker cover gasket....not upper head gasket 
-
step 1- where do i locate the engine bay!! hehe. Nice write up...lucky i dont have any leaks....yet!
-
nice write up man
-
nice work ben, lucky me, no leaks so far :-)
-
Hey Ben, is there a possiblity to fix those photos up? I'm thinking of doing this soon...!!!
-
none of the pics work  i took my spark plug lead thing out and notice it has oil on it will this fix it? i took my spark plug lead thing out and notice it has oil on it will this fix it?
if not u no what it could be..any chance of seing the pics.. thanks.
-
pics dont work
-
yeh, any chance of reposting pics???
-
ben: pics arent showing the DIY
any chance of getting this fixed?
 Posting Permissions
- You may not post new threads
- You may not post replies
- You may not post attachments
- You may not edit your posts
-
Forum Rules
|


 Reply With Quote
Bookmarks