|
-
INSTALL IGNITION BOOSTER/STABILIZER (Razin & T1R) (ALL K-SERIES HONDA)
Disclaimer: The following is provided as a GUIDE ONLY, and neither myself nor Ozhonda take any responsibility for the outcomes of someone else doing the following. You follow these steps at your own risk!
This thread will explain how to install the Japanese designed ignition boosters for pretty much all K-series Honda's made up till 2008, not sure about post 2008 thats your 7th gen accords both euro and widebody, 2nd gen CRV's, RB odysseys etc.
Background:
Most people knows a thing or 2 about ignition voltage boosters. they're claimed to improve performance, so im not going to go into that here.
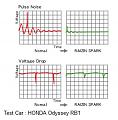
But I will say this... Raizin rarely sells a dud product.. and this ignition product was actually DEVELOPED and TESTED ON A JDM K-series:
Now, there are TWO designs covered here in the DIY
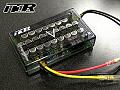
T1R V2 Plus Ignition Booster
and
RAIZIN SPARK TypeS
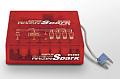
THEY ARE THE SAME THING UNDERNEATH
T1R is made in Japan and so is Raizin.
It is most likely T1R product is made by Raizin in Japan
The RAIZIN SPARK TypeS had been out of production in japan for a few years now, but you can still buy them on ebay, they are Chinese copies, not saying it doesnt work, but if you want the real made in Japan product... Buy T1R (which ironically is Canadian brand)
EDIT: well they're both out of production, but there are still T1R's around in stock at places
How to install:
Step 1, assemble the bits, just connect the red wires together (the wire with a "fuse" looking thing on the end) and tape up the yellow wire (make sure it's fully taped so it wont short out anywhere):
this step is same for both Raizin and T1R, even their wire colours are identical...
[IMG]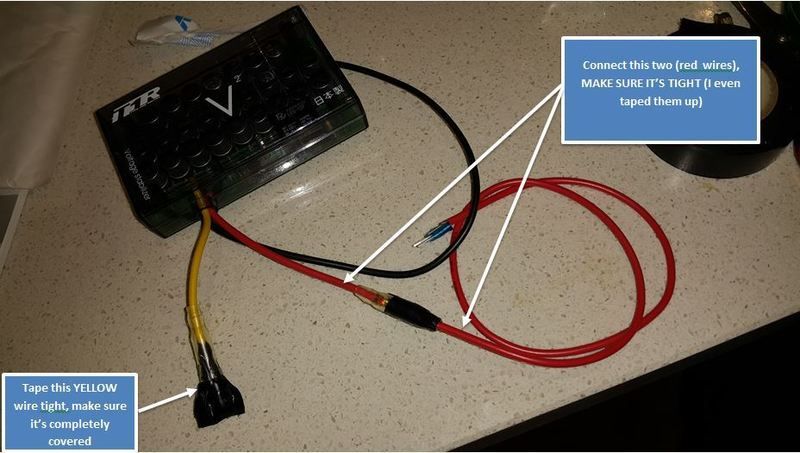 [/IMG] [/IMG]
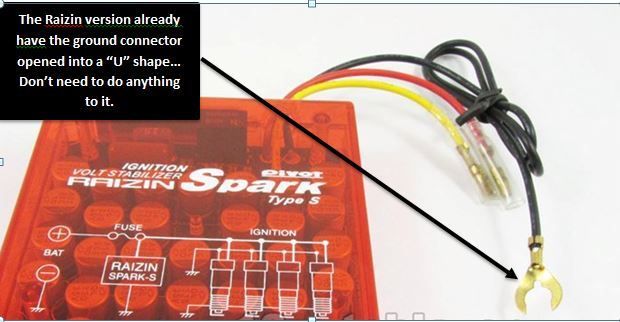
Step 2, prepare the grounding wire connector
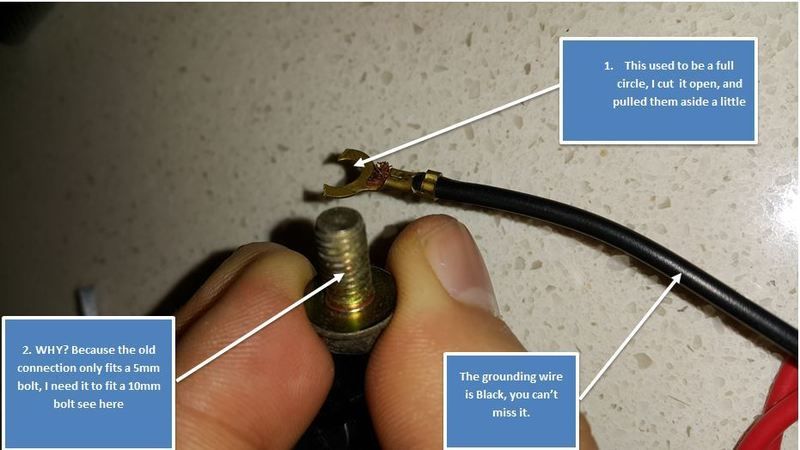
THIS STEP IS FOR T1R ONLY, the Raizin one already has a better connector (U shape instead of O shape) so no preparation necessary:
Step 3, locate and expose the fusebox.
NOT in the engine bay, for honda's, we're putting it in the interior
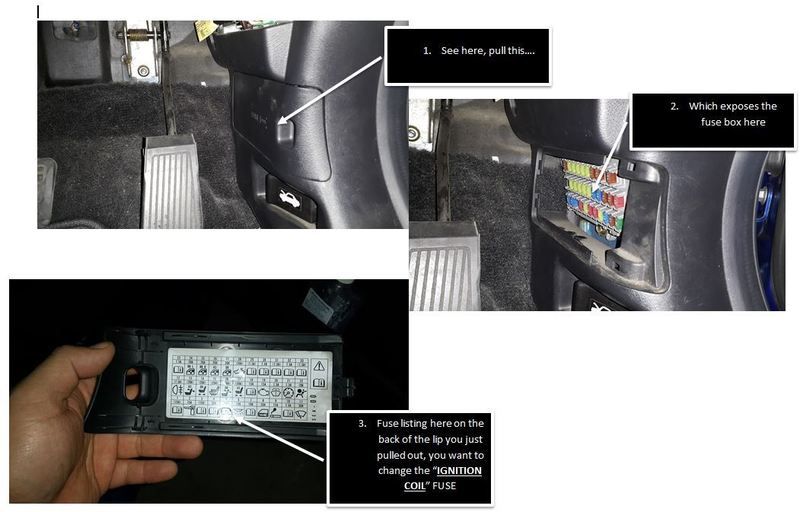
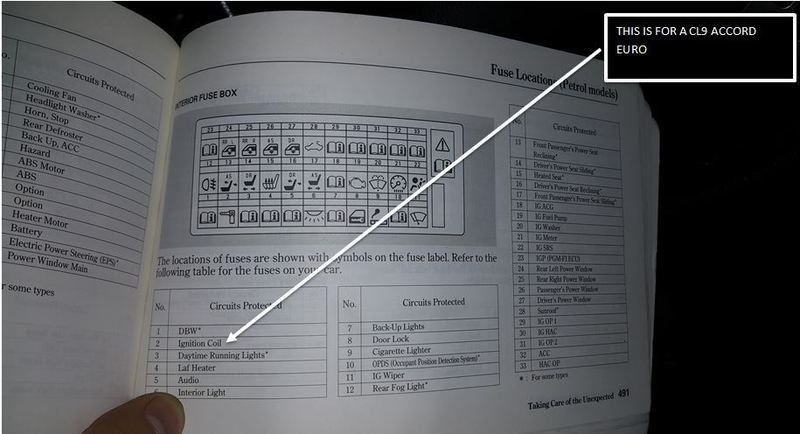
Step 3a, know which fuse you'll be replacing
!!!REFER TO OWNERS MANUAL FOR YOUR APPLICATION!!!
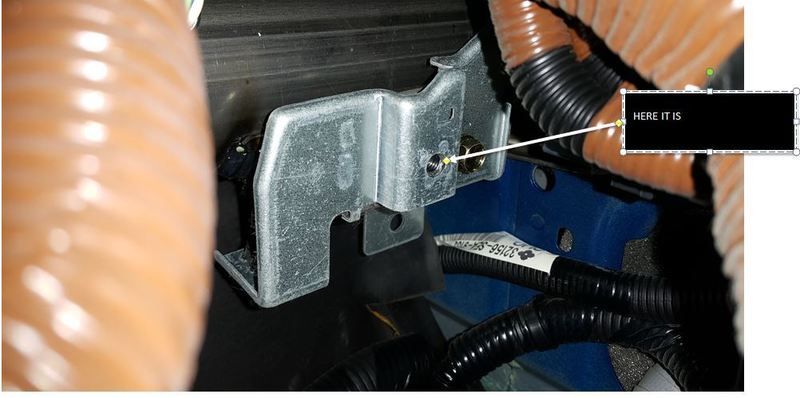
Step 4, connect the ground, by sticking your head UNDER the dash, look above the OBD2 Port and the Main relays, you'll see an exposed hole where you can screw in a 10mm bolt

Step 5, replace the "Ignition Coil" fuse" with the red wire (with a fuse looking thing in the end)

Step 6, replace the fuse box lid, and secure the ignition booster with double sided tape

DONE....
2003 CL9 5AT *ECU REFLASHED*
CT-E Icebox|Ralco RZ pulleys|K&N filter|DC Header|250cell Cat|Cusco Tower & H Brace| H.Drive Coilovers | Rays RE30 18x8.5 | S/S Brakelines | Rigid Collars
-
Nice work,
Did you feel/notice any difference?
FYI Raizin is actually Pivot...
Last edited by DreadAngel; 27-06-2015 at 12:15 AM.
Toda Racing AU | Shen * Speed Works | Jesse Streeter
-
idle is a bit smoother, and the mid and top end is also smoother, it's more willing to rev.
then again i've got an 11 year old car so the OEM electronics would've not been in the best condition.
there's a lot of variables in the electrical system so adding some capacitors (which is what this is) removes some of those variables.
2003 CL9 5AT *ECU REFLASHED*
CT-E Icebox|Ralco RZ pulleys|K&N filter|DC Header|250cell Cat|Cusco Tower & H Brace| H.Drive Coilovers | Rays RE30 18x8.5 | S/S Brakelines | Rigid Collars
Tags for this Thread
 Posting Permissions
- You may not post new threads
- You may not post replies
- You may not post attachments
- You may not edit your posts
-
Forum Rules
|


 Reply With Quote
Bookmarks