|
-
FYI a few pictures to give an idea of how the SP2 mounts and the removal process.
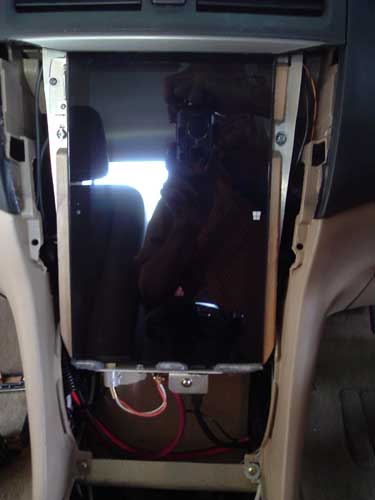
First a picture of the Tablet sitting on the Docking Cradle plate without the Dash Cover plate. The Dash cover plate will be fixed in place and fills and follows the shape of the existing dash.
The Docking slide is at the bottom of the Tablet, the opening below is part of the aluminium frame I have built that follows the inside cavity from top to bottom, it bolts in place using the existing bolt holes and attachment points as the OEM lower Pocket and upper Radio/CD/HVAC control unit. Behind the Tablet Cradle is a shelf that holds the 10 port USB2/3 HUB and at the top of the frame behind the top part of the tablet is the Charger/supply for the SP2.
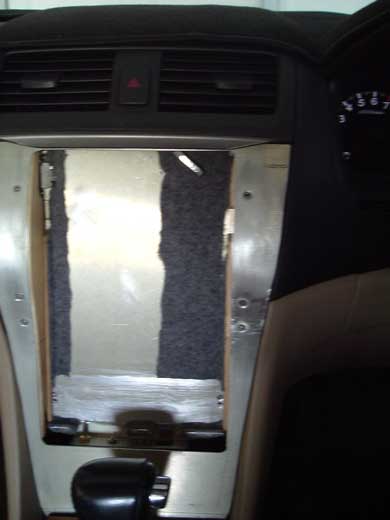
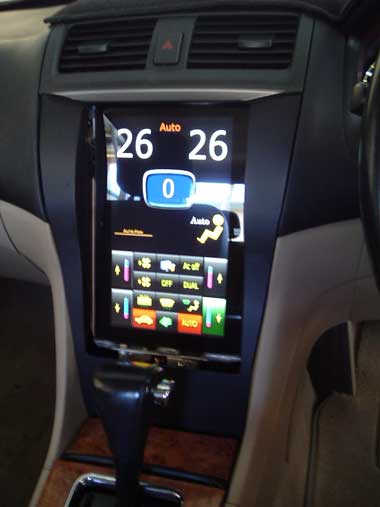
Now a view of the SP2 sitting in the Cradle with the outer fixed Dash cover plate installed. At the bottom of the opening is the Docking slide that holds the USB plug and the Audio Line out plug.
I haven't made the cover trim insert as yet, it will sit over the outer fixed Dash cover plate and will clip in and hold the tablet against the Cradle plate and basically lock it in position.
When installing the Tablet, it is held by the lower edge and placed into the cradle, top first, and raised slightly, the tablet is then placed flat in the cradle and sits on the lower pedestal, it can't move as it's held in a frame, there is plenty of room to raise the docking slide with one finger and the tablet is ready to go. Place the (unmade) cover trim into the opening and the tablet is locked in place.
Removal is the opposite, remove cover trim, lower the slide (it can only move an inch) and lift the tablet out through the opening. This is a 5 second task.

Below is the Tablet removed from the docking Cradle, the Docking slide is slightly out of view.
All of this has to cleaned up and parts of it redone, these were the prototypes to get everything fitted correctly, It all comes out like removing the OEM Radio/CD/HVAC unit and lower pocket, only a lot easier. I'd estimate a 5 minute job to remove it all.
Now on to the fun part - making everything look nice.
I've been doing a bit of driving with it and so far everything has been working perfectly.
-
-
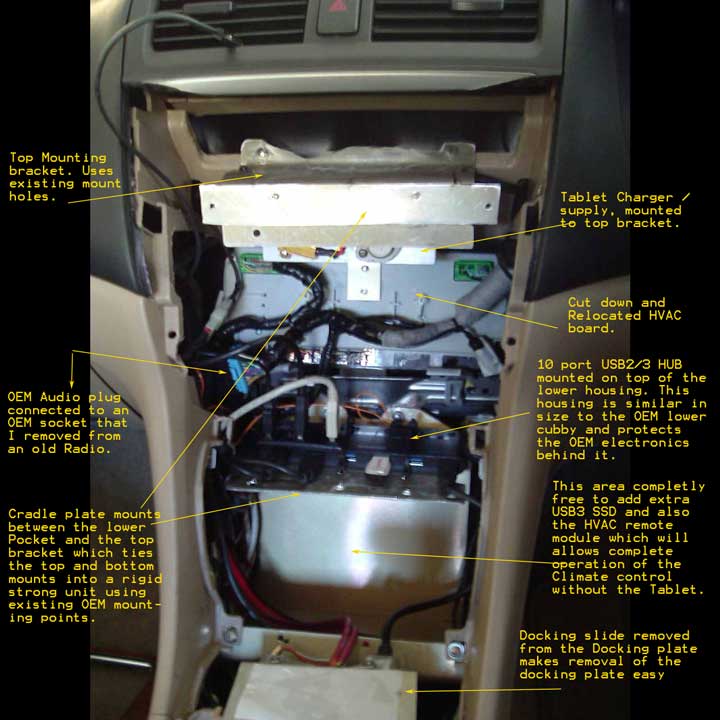
Thought I'd post a view of the centre console cavity of the Honda. Now I know the metal work may not look pretty but I'm limited to the tools I have - a drill, a bench vice and a few hammers, and the metal work has gone through a few alterations as I trialled the best way to get the tablet mounted.
As indicated in the text on the picture, all this installs and removes similar to the OEM Head unit and lower pocket. I have made this from aluminium - fairly thick for rigidity. The lower opening is filled with a large "C" section shaped aluminium frame, mounted on top is the 10 port USB HUB. Behind the "C" shaped enclosure/bracket are the SRS computer and various cables. The "C" section leaves over an inch space between it and the Vehicle cables and controllers behind it. There is plenty of room for other devices in this "C" shaped enclosure. When the SP2 Cradle mounting plate is installed it mounts across the top Bracket down to the top of this "C" enclosure and ties the two together to form a very rigid and strong unit.
Virtually the only connections into the Vehicle wiring is the Audio HVAC head unit Plug, I removed a socket from an old radio board so that I could just plug it in. There are only 4 cables coming from the trunk - 5volt USB power, Audio cable, USB to the rear HUB and the Control interface cable. The Control cable goes straight to the iDrive panel between the front seats.
The white USB drive plugged into the HUB is for Password security - It auto logs into the OS from a cold boot, later I'll incorporate a key fob transponder.
Half way down you can see the cut down Climate-Control / Audio head unit PCB (in the grey enclosure) None of this would have been possible without successfully cutting that in half.
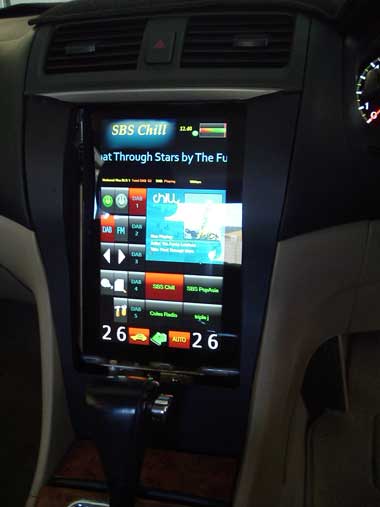
Finally I'd like to repeat the fact that DAB and FM reception has improved out of sight with the Tablet install. Those of you who have looked at my old system will know that I built an RF shielded case for the M4 switch mode supply, and mounted the mini-ATX PC in the trunk with the PSU, and both inside another large aluminium case - I virtually eliminated interference from the PSU but could not get rid of all the noise from the MB and numerous cables.
Last edited by MikeCl; 17-12-2014 at 03:47 PM.
-
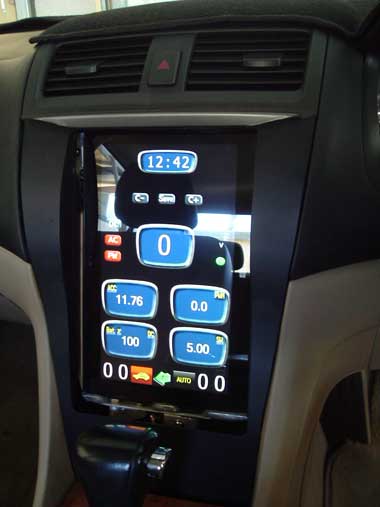
Dismantled the install in the dash - cleaned up all metalwork and painted - reinstalled and grabbed this shot. Still without the trim insert but certainly clean (or is that vacant) when the Tablet is not running.
BTW Flash darkens everything a bit - IE the mats and seats are CLEAN light cream.

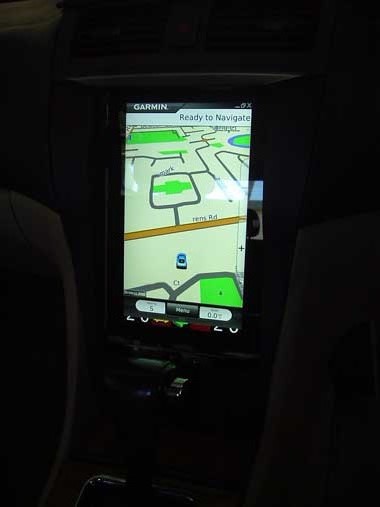
So, I think I've run out of time with Xmas almost here and a few jobs around the house neglected over the past month. But the 10.6" Surface Pro 2 is in and working perfectly - I've prettied up a few off the Front End software screens, updated Garmin PC StaNav software to 2015 maps and cleaned my grubby paw marks from the trim. It's time to take a break - Wishing everyone an early "safe Holliday" and festive season 
Last edited by MikeCl; 19-12-2014 at 04:51 PM.
-
Reviving thread and hope Mike is still around.
I found this currently being sold in China for the accords.
A fully integrated android 4.4 head unit.
Aircon control in the software
car dvd player gps navigation for honda accord 7 2003-2007 Android 10.1" car Stereo Radio dual / Single Zone Climate Control
http://s.aliexpress.com/ZB3UnUbI
(from AliExpress Android)
2003 CL9 5AT *ECU REFLASHED*
CT-E Icebox|Ralco RZ pulleys|K&N filter|DC Header|250cell Cat|Cusco Tower & H Brace| H.Drive Coilovers | Rays RE30 18x8.5 | S/S Brakelines | Rigid Collars
-
Hi Fred, still around now and then. As you know the earlier units from China were poorly made and HVAC was not implemented correctly, hopefully this unit is a lot better, certainly seems to have a more substantial HVAC controller, shame about our exchange rate. It would be interesting to hear of anyone who has tried one, I'll take a look at a few of the USA Honda forums and see if I can find a mention of it.
BTW 8 month ago I removed the SP2 and built a Head unit using a Honda fascia, it uses the same OEM mounting and vehicle plugs. I also retained the Hardware HVAC controls along the bottom of the fascia AND the lower cubby is back in. The complete system runs from a tiny $90 Aniol mini PC that mounts to the inside rear wall of the glove box, it's so small that it leaves the complete glove box free, and only draws 4 watts, runs virtually cold.
It takes 4 seconds to remove the Mini PC - no tools needed (Velcro). I revamped and simplified the entire system. It has worked faultlessly and is so good that I would not change it. For anyone interested here is a link. http://www.mp3car.com/forum/general/show-off-your-project/-surface-pro-out-ainol-minipc-in
Cheers.
-
it actually only retains around 300 odd dollars in China, so i might actually get one.
2003 CL9 5AT *ECU REFLASHED*
CT-E Icebox|Ralco RZ pulleys|K&N filter|DC Header|250cell Cat|Cusco Tower & H Brace| H.Drive Coilovers | Rays RE30 18x8.5 | S/S Brakelines | Rigid Collars
-
 Posting Permissions
- You may not post new threads
- You may not post replies
- You may not post attachments
- You may not edit your posts
-
Forum Rules
|


Bookmarks