|
-
HOW TO: Install speakers in your Jazz (graphic intensive)
Well, I've installed some speakers in the Jazz, and I tell you, working it all out (on the passenger side door first) wasn't easy. But once I knew how to do it, the drivers side door was a cinch...
I decided to take photos and write up a HOW TO, so you guys won't have to endure the pain that I went through 
DISCLAIMER: While, this is the way I did the install, I don't claim that it is the best method, so please take the time to understand and plan the installation before you actually go and do it.
Last edited by Kit; 17-09-2004 at 01:07 AM.
-
PREPARATION
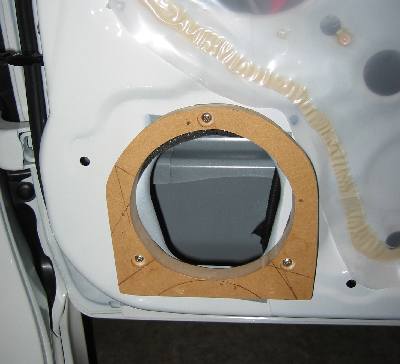
If you have ever had a look at the Jazz speakers, they are moulded (fixed) into a plastic bracket that clips into the door. The speakers are not removable from the bracket; so in order to fit aftermarket speakers you need to have a bracket that you fix to the door, and then you mount your speakers onto the bracket.
NOTE: you can actually buy pre fabricated brackets for your jazz! they include a bracket and all the fittings to bolt straight into the Jazz door. I have seen these in Japan, but because of the difficulty of locating them locally, I opted to create brackets myself out of MDF.
This is what the door looks like with the speaker removed:
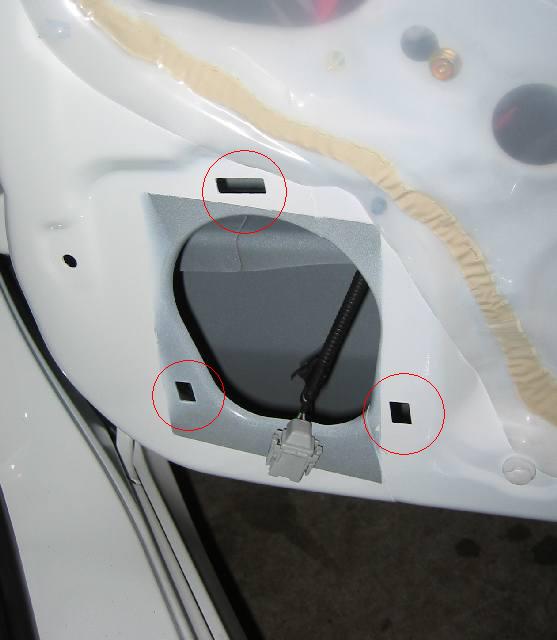
Notice the holes (circled). That is the main challenge, making a bracket to fit into these 3 holes (without drilling into the door)
Last edited by Kit; 23-09-2004 at 01:00 PM.
-
-
REMOVING THE DOOR TRIM
This step took me a considerable amount of time to work out. But once you know how to do it, its really easy.
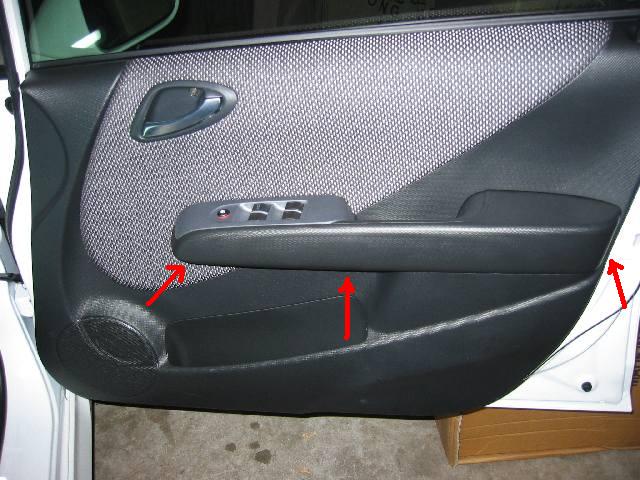
The first step is to remove the lower half of the door handle. You will need to slide a flathead screwdriver into the locations shown below and gently pry it off. Wrap a thin cloth around the screwdriver to prevent scratching.
This is how it looks with the lower half removed:
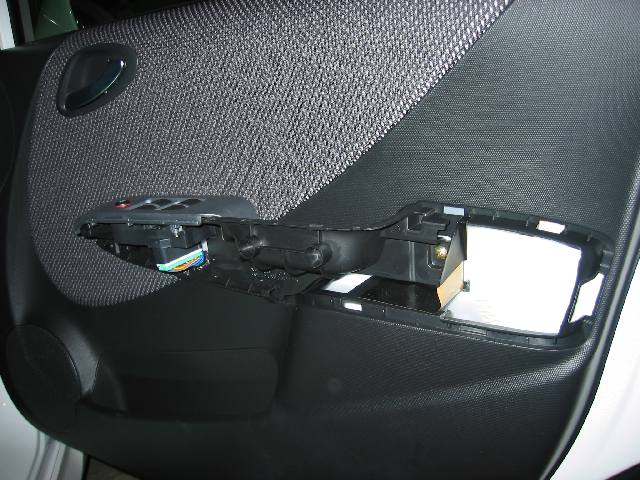
Next remove the 3 circled screws:

Now remove the screw in the door release handle. After removing the screw, the whole unit can be loosened by sliding it. Its important that the unit be loosened before you continue.

After the above steps have been completed, you may now remove the door trim. This bit requires a fair bit of effort, and can scare you at first as it will make you think you have broken the door trim.
By grabbing the hole that the removed door handle has left behind (near the door edge) use a fair amount of force to pull the door trim away from the door itself. It will take a few goes, and when it does come free, it will come loose with a loud bang.
As shown below, the door trim is held on by plastic studs (circled), and they are very tight.

Also remember to disconnect the wire plug that connects the power window switch. When the lower half of the door trim has been loosened, slide the door release handle through the hole in the trim, and then slide the whole door trim upwards. The door will look like this with the trim removed:
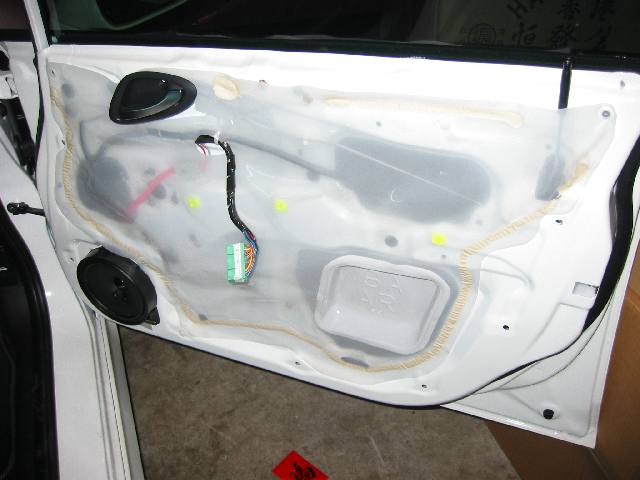
Now remove the stock speaker by inserting a screw driver into the top. Push downwards to release the metal latch, and the top of the speaker can be pushed outwards. Once out, slide the whole unit UP to remove it.
Then disconnect the stock wire harness.

This is the passenger side door with the speaker removed:

Last edited by Kit; 23-09-2004 at 01:42 PM.
-
-
Just a few comments after the install..
The speakers were a significant upgrade from the stockers, and clarity was greatly increased. However I feel they were being let down by the Stock Head Unit..
Next upgrade: Head unit!
-
Nice write up. 
I like it when a How To includes pics with arrows or the sort.
Maybe this can be in Articles forums.
-
mate, do u mind help us to make the brackets and we pay u labour plus material coz i live in an apartment
=(
-
Nice one Kit.
Can't be stuffed upgrading my stock speakers just yet
-
 Originally Posted by TypeG
mate, do u mind help us to make the brackets and we pay u labour plus material coz i live in an apartment
=(
hmmmmm.... well.. to be honest, i'm not exactly a tradesman, so my brackets aren't exactly the most round and the most neat ones you will find.
The hole in the bracket for the speaker will vary depending on the dome size.
And I won't be able to drill the holes for your speaker, cos holes can be in different locations for different speakers.
I'm in Sydney, so won't be able to measure all these for you.
would it be easier and cheaper to just get a local car audio shop to install them?
i mean, if people really wanted them, I guess I could make up a few sets......
-
Originally Posted by FB008
Nice one Kit.
Can't be stuffed upgrading my stock speakers just yet
the stock speakers are actually very ordinary, but as I said earlier, the stock headunit really lets the speakers down...
-
u know, a simpler solution than cutting an xtra 6 small mdf blocks and putting em behind the rect. holes would be just to use nuts+bolts+washers(+foam)...
 Posting Permissions
- You may not post new threads
- You may not post replies
- You may not post attachments
- You may not edit your posts
-
Forum Rules
|


 Reply With Quote


Bookmarks