|
-
[DIY] LED High-mount brake light
Disclaimer: The following is provided as a GUIDE ONLY, and neither myself nor Ozhonda take any responsibility for the outcomes of someone else doing the following. You follow these steps at your own risk!
Aim:
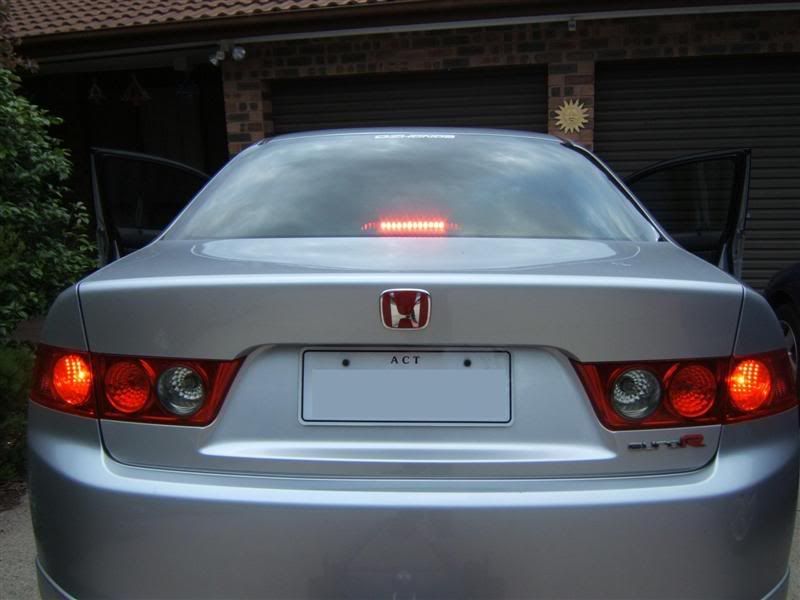
To change boring/ugly stock incandescant high/centre-mount stop/brake light into sexy/safer LED light 
Required:
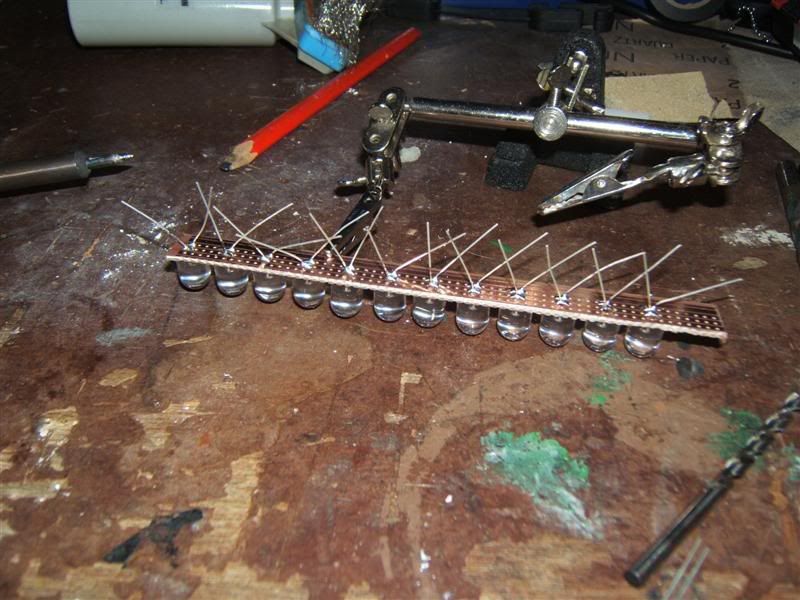
1- LEDs - Depending on the size/length of your light will determine how many you'll need. I used 13x 10mm high brightness 10,000mcd LEDs
2- Soldering iron and solder
3- PCB (typically called vero board)
4- Resistor, once again depending on your LEDs will depend on what value you'll need, I used a single ceramic 10W 18R resistor
5- Two part expoxy (Glue)
6- Short offcuts of 18AWG cable (anything that will carry 1-2A)
Optional:
PCB holder - gives you an extra two hands for soldering!
Cable clips (plg and skt set)
Steps:
1- Take out you old high/centre mount brake light fitting... different cars will vary, on the euro its a real b*tch, just try not to snap anything (like i did  ) )
2- Once out remove the red lens from the reflector (if possible - on the euro it is easy, just undo four clips)
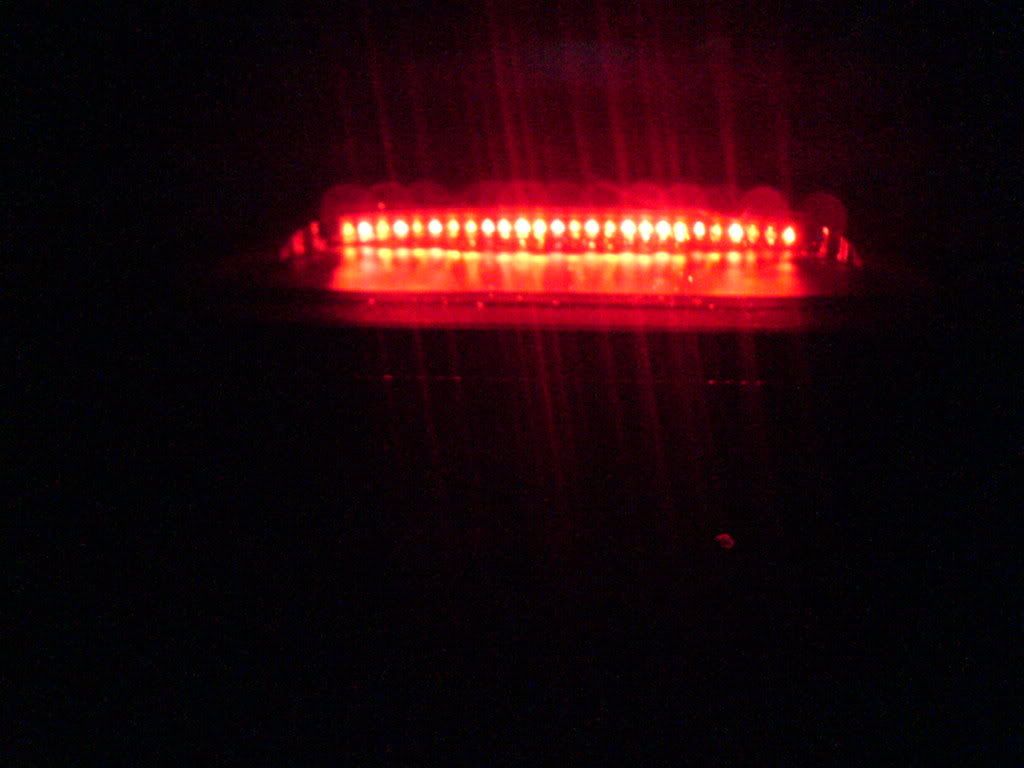
3- Measure the inside of the reflector to determine how many / what configuration on LEDs you can use. I decided to use a bar of 13x 10mm LEDs... fits perfectly into the euros holder
4- Cut up a piece of vero board to the required size, in my case a strip approx 12mm wide, 200mm long, i left three full tracks on the board, these will later be used for powering the LEDs
5- Insert the LEDs into the vero board, be cautious of polarity, i wired all my LEDs in parrallel, so all the +ves went on one track
6- After soldering in all the LEDs, solder in your resistor(s) in series with the LEDs. To calculate what resistance is needed, see notes and erata at the bottom of this DIY
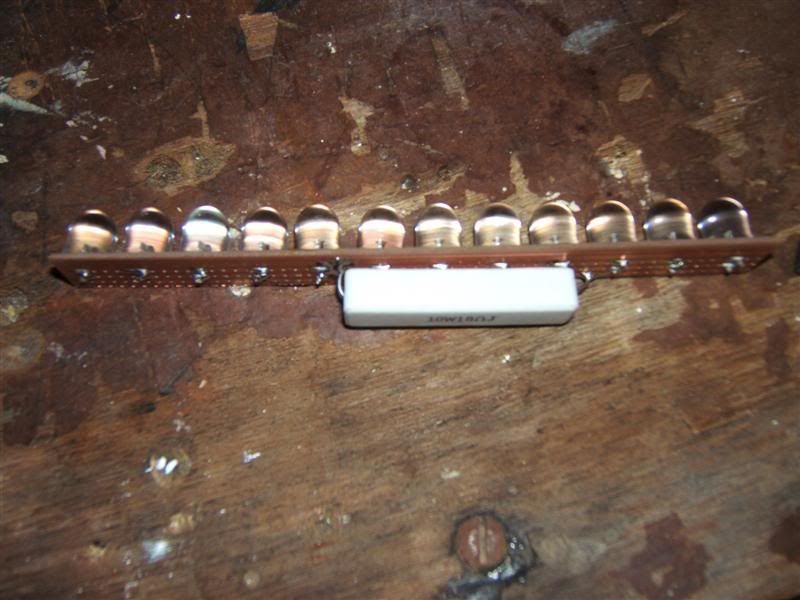
7- I then soldered on the two power leads and a connector (this is not necessary, however, it will make it easier if you ever need to remove the fitting)

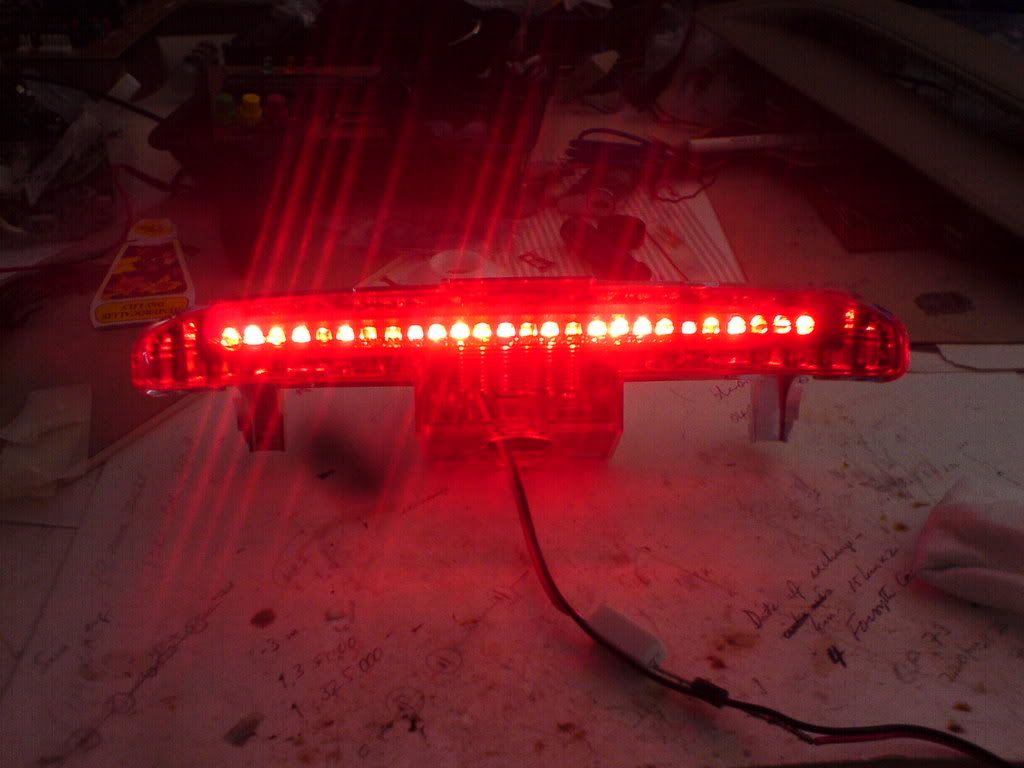
8- At this point it may be a good idea to test if the LEDs all work
9- Place the LEDs and board inside the original reflector housing, being careful to line them facing what will be directly rear once installed back in the car
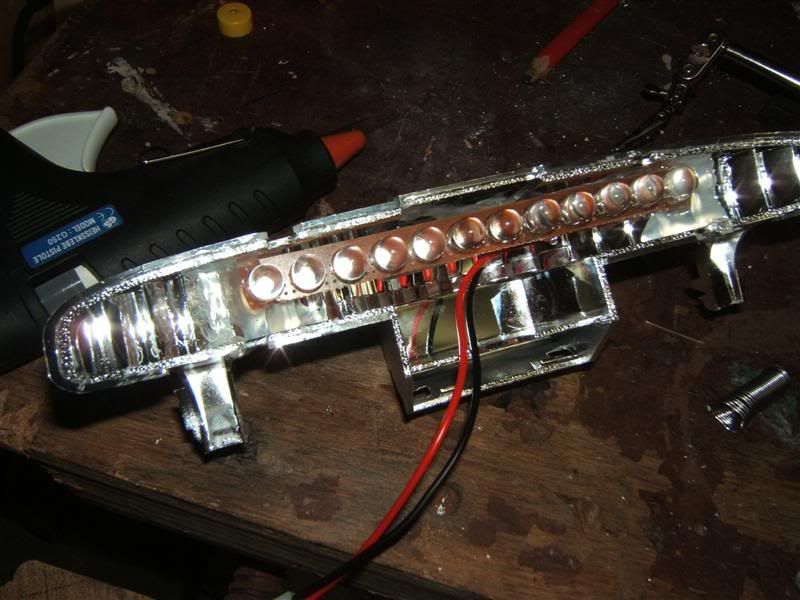
then i used a hot glue gun to fix them in place (notice the glue i used to fix the housing i broke  lol) lol)
EDIT: During summer the interior of the car actually got so hot that the hot glue melted lol appon checking my housing the other day i found the lights had droopped out of place, i now reccomend using a two part epoxy glue, this will stop that from happening
10- Clip the lens back on, or if you broke the clips, glue it back on

11- Place the entire fitting back into the car, making sure its correctly secured, connect the wires, and there you have it, your brand new LED stop/brake light!
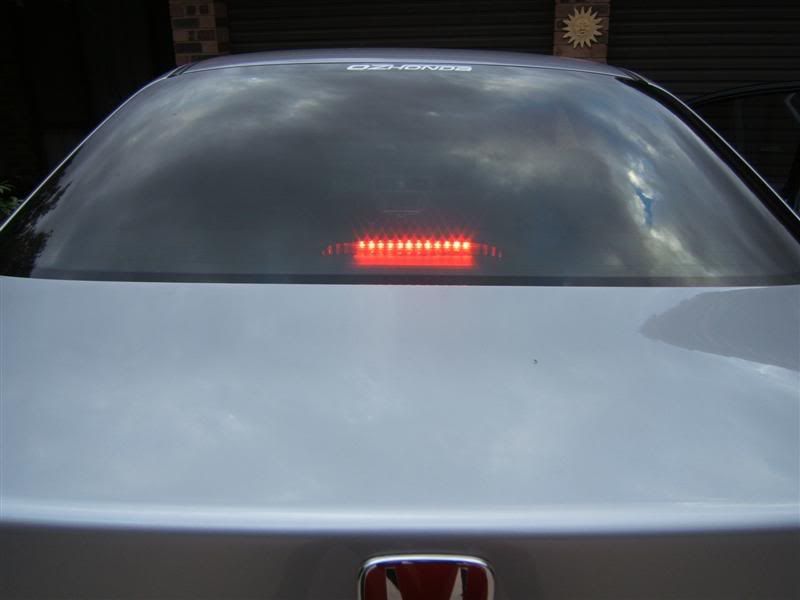
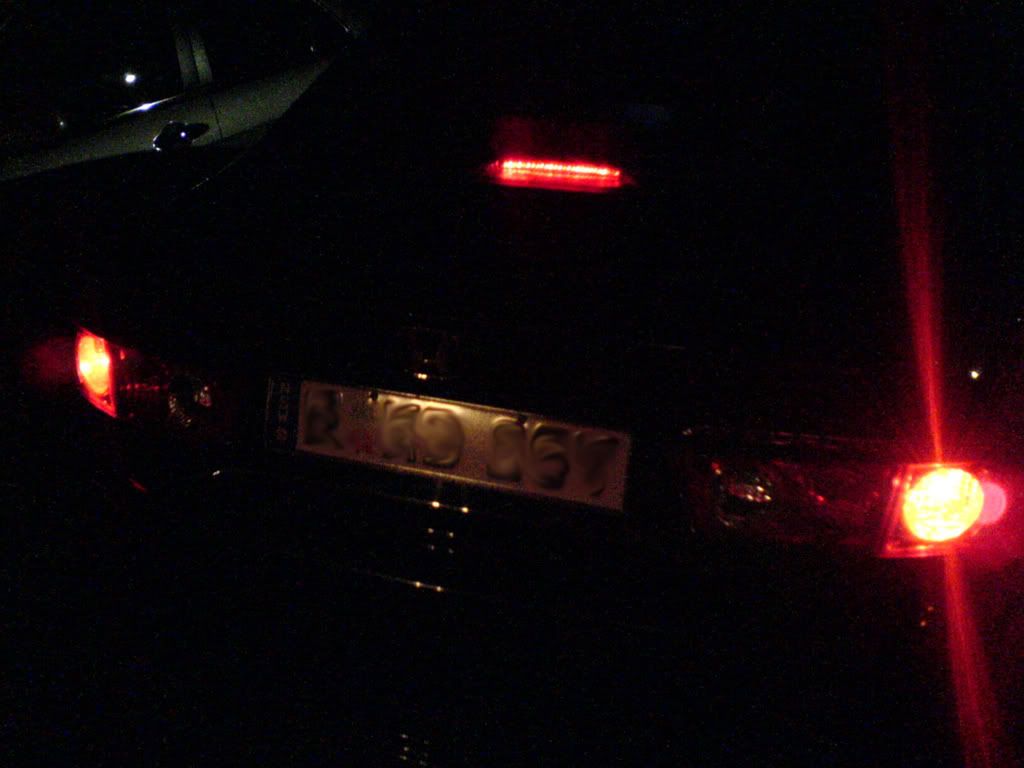
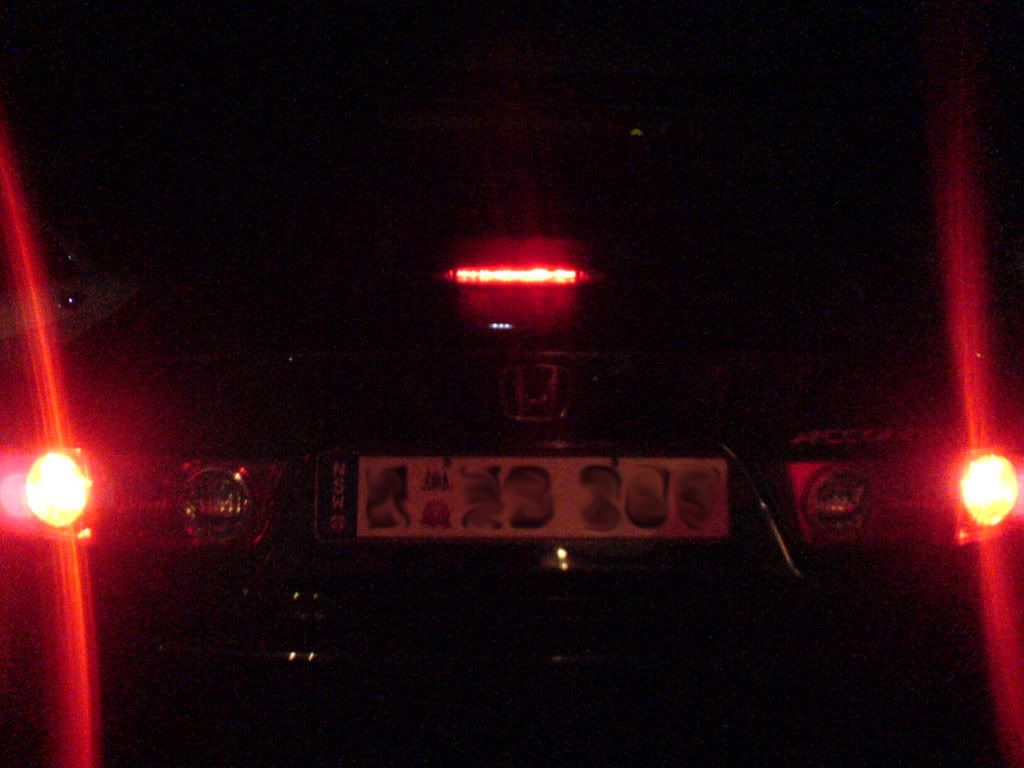
12- As you can see in the pic below, the LEDs are alot brighter than the stock incandescant globes, they also light up ALOT quicker than filament globes, meaning fellow motorists now have more time to react to your braking safety safety safety
Night time shot, sorry its over developed, was using crappy digital camera on auto:

Notes and Erata:
Calculating resistor values required
Use this simple formula: R=(V-Ve) x (1000/vf)
Where R is the resistor required, V is the base voltage (calculate for 13-15v typical), Ve is the voltage drop of the LED (usually 2-3v) and vf is the current draw of the LED in milliamps (varies between 20-80ma).
Example:
240 = (14-2) x (1000/50)
When using LEDs in parrallel, just add there current draw together to give you the total value needed. when wiring in series, add the voltages together.
Last edited by EUR003act; 31-12-2007 at 08:57 AM.
-
Nice
If you want even brighter LED's, you can buy pre-built LED strips with High-Flux LED's (more than twice as bright), and ones with normal LED's from here:
http://www.superbrightleds.com/light_bars.htm
Last edited by EuroDude; 31-12-2007 at 03:00 PM.
-
 Originally Posted by EUR003act

Steps:
1- Take out you old high/centre mount brake light fitting... different cars will vary, on the euro its a real b*tch, just try not to snap anything (like i did )
Any tips on avoiding the problems you had?
Where should you push/pull/un-screw etc?
-
Originally Posted by one4spl
Any tips on avoiding the problems you had?
Where should you push/pull/un-screw etc?
on the euro:
1- Push the entire centre brake light housing backwards towards the rear of the car
2- you should then be able to lift up the front facing of the housing slightly, just enough to get your fingers underneath (be care the plastic is sharp, i cut myself on it!)
3- you'll see the back of the silver reflector, push that bit towards the rear and pull the black housing back - that should unclip the two prongs that hold the reflector to the housing
4- now slide the whole black housing forward towards the front of the car, the two rear most clips should release, allowing you to lift off the cover
5- you can now take out the reflector housing
NOTE: it will take abit of fiddling/jiggling around to undo the clips, just be firm but careful
hope that helps
-
i just brought a led red light bar and put it in. I'm lazy to soldier
Evo IX - THE FINAL EVOLUTION
-
Originally Posted by EUR003act
3- you'll see the back of the silver reflector, push that bit towards the rear and pull the black housing back - that should unclip the two prongs that hold the reflector to the housing
I took mine out last night... You can see the prongs from the silver part poking through the roof of the boot. You can push them backwards with a screwdriver there and pop it out. I can't recommend pulling up the beige (in my beige interior car) plastic of the lamp cover itself as I broke a couple of prongs on the reflector doing this.
I've decided that I'll buy one of the SMT Tower II lights from here rather than DIY, will cost $40 shipped tho...
I'm looking for a faster response than the incandescent, I'll leave the other lights stock as all the attempts I've seen to use cheap LED replacement lamps have sucked, and certainly aren't legal.
-
Originally Posted by one4spl
I took mine out last night... You can see the prongs from the silver part poking through the roof of the boot. You can push them backwards with a screwdriver there and pop it out. I can't recommend pulling up the beige (in my beige interior car) plastic of the lamp cover itself as I broke a couple of prongs on the reflector doing this.
I've decided that I'll buy one of the SMT Tower II lights from here rather than DIY, will cost $40 shipped tho...
I'm looking for a faster response than the incandescent, I'll leave the other lights stock as all the attempts I've seen to use cheap LED replacement lamps have sucked, and certainly aren't legal.
i broke my clips cause i didnt realise the silver bit was attached to the housing  lol thanks for your suggestions tho! lol thanks for your suggestions tho! 
yeah, you'lll love the response time on the LEDs, they light up alot quicker than incandescant, and theyre right smack bang in the middle of the driver behind yous vision... might save u a rear ender one day!
-
 Posting Permissions
- You may not post new threads
- You may not post replies
- You may not post attachments
- You may not edit your posts
-
Forum Rules
|


 Reply With Quote
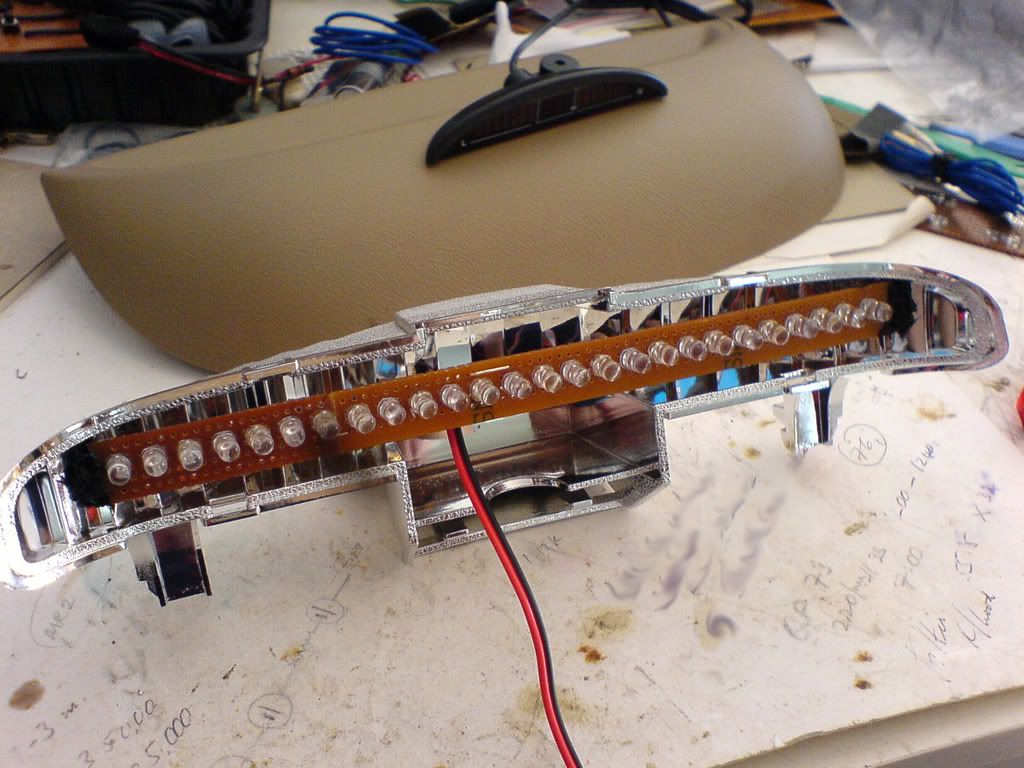
Bookmarks