|
-
[DIY] Fuel Filter - Renewal
Disclaimer: The following is provided as a GUIDE ONLY, and neither myself nor Ozhonda take any responsibility for the outcomes of someone else doing the following. You follow these steps at your own risk!
Aim: To replace existing fuel filter with a new one
Required: 17mm spanner, 12mm ring spanner, 10mm thing attached to a ratchet. Maybe a screw driver as well to remove the intake pipe or what ever you have to use to remove yours.
Steps: Not many and it doesn't take much time to do.
Other comments: Please do not smoke while doing this. Keep flammable/open flame objects away, don't be stupid as you're going to be working on the fuel system.
--------------------------------------------
EDIT:
- Bought the Fuel Filter from my local performace shop called Speed Parts, in Narre Warren/Fountain Gate (VIC). Repco, Autobarn & many other franchise stores should be able to order this in. They most likely won't have it in stock as not many Honda's use this particular filter. So if you're looking to drop by and pick one up, call the place first and check for stock availability, unless you're going straight to a Honda dealership for parts.
- Part Number is "MF5" - Brand is RYCO
- Cost me like $25. Normally around the $30 mark.
- For older car makes, would recommend to renew the filter annually as any crap that manages to pass through the fuel system could possibly damage the insides causing $$$ loss, in rare cases.
- For newer makes, less often. The filter has a life span of 4 years, so my guess is that you could probably stretch it to every 2 years before renewal.
--------------------------------------------
This is being performed on my ED9 '89 CRX
1. Disconnect the negative battery terminal
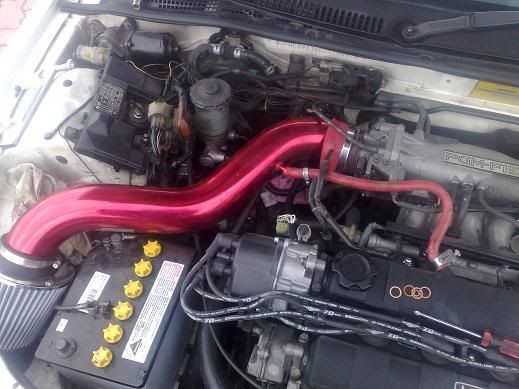
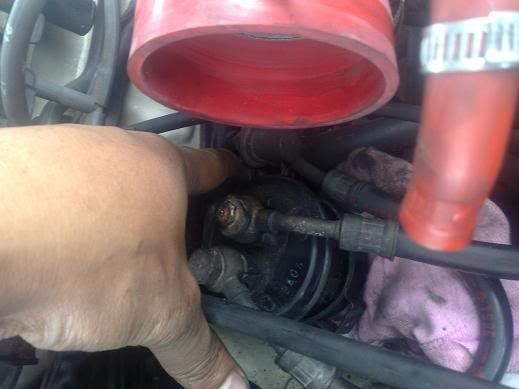
2. Locate your fuel filter. In this pic, mine is behind the intake pipe
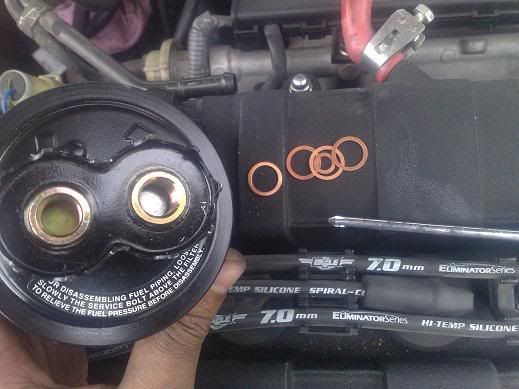
3. I opened the fuel filter and looked at the parts i got with it. (5 washers & the fuel filter)
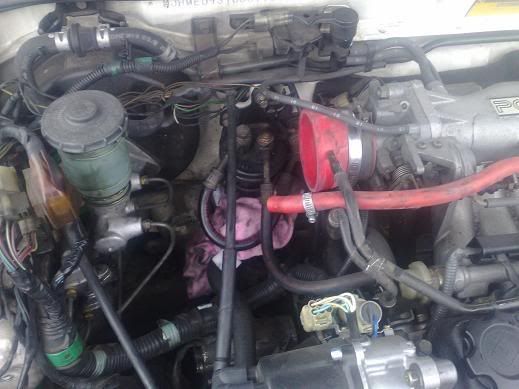
4. Remove the intake pipe and place suitable quantities of rags or something under the fuel filter, just incase for any spillage that may occur.
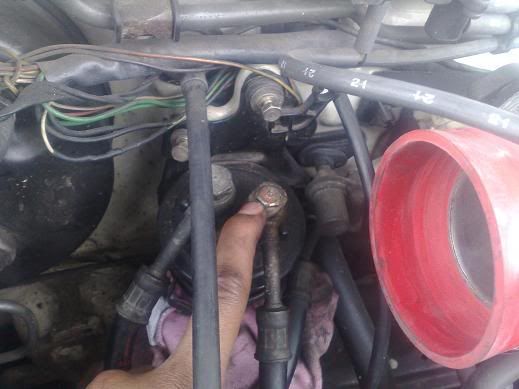
5. Now we have to depressurise the fuel system. Where my finger is pointing to, that's the service bolt.
DEPRESSURISING MUST TAKE PLACE BEFORE ANY OF THE PIPES OR HOSES BETWEEN THE FUEL PUMP AND THE PRESSURE REGULATOR ARE DISCONNECTED.
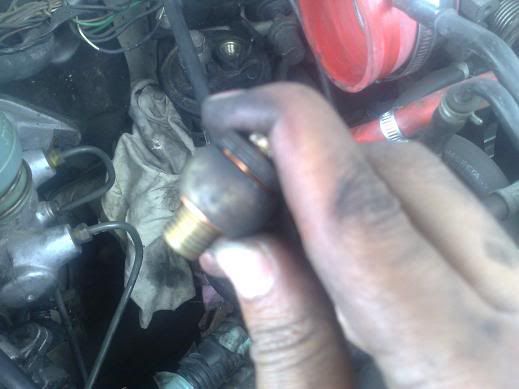
Hold on to the service bolt with the 12mm ring spanner & use the 17mm spanner to hold on to the banjo bolt. Loosen up the service bolt a bit then start turning the banjo bolt slowly. By doing this, it would depressurise the fuel system. This must be done slowly and the rags that you placed underneath the fuel filter would collect any spilt fuel that would have ejected.

6. Depressurising

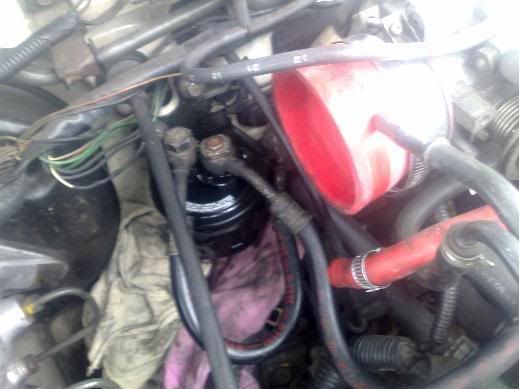
7. After depressurising, I've loosen up some bolts that are used to hold up the fuel filter.
8. In this pic, I'm trying to point to where the bolt is that holds the fuel filter on to the plastic thing that keets it upright.

9. If you take a look at the new fuel filter it would have arrows on them. The on that is pointing outwards, you connect that to the hose that goes in to the fuel rail. The one pointing inwards, you connect that one to the hose that is coming from the firewall.
10. New washers in place.
11. Refitting is the reverse sequence to removal, and use the new sealing washers at the banjo unions.
12. Remove the rags and flick the car to the 'ON' position a couple time to have the fuel fill up the new fuel filter and inspect for any leakages.
Before doing this, I had changed oils, oil filter and flushed / renewed the radiator coolant but didn't think of writing up a DIY until I started to put this in lol
Last edited by sid; 30-03-2008 at 07:06 PM.
Reason: CRXer's suggestion to add additional information :)
 Posting Permissions
- You may not post new threads
- You may not post replies
- You may not post attachments
- You may not edit your posts
-
Forum Rules
|


 Reply With Quote
Bookmarks